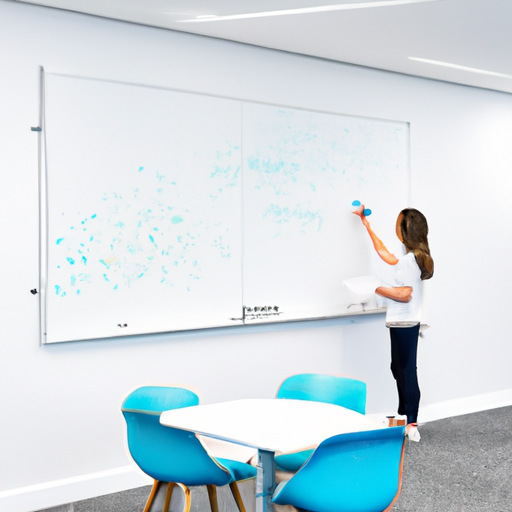
Melamine dry erase boards are a popular choice for offices, classrooms, and homes due to their affordability and lightweight design. These boards are made from a plastic material called melamine, which is laminated onto a backing material such as MDF or particle board. They are suitable for light to moderate use, but may be susceptible to ghosting, staining, and warping over time. In this article, we will discuss the features, benefits, and drawbacks of melamine dry erase boards, as well as how to choose the right one for your needs.
II. Types of Whiteboards
There are several types of whiteboards available in the market, each with its own set of advantages and disadvantages:
Melamine whiteboards: These non-magnetic dry erase boards are lightweight and affordable, making them a popular choice for personal or occasional use. However, they may be prone to ghosting, staining, and warping over time.
Porcelain steel whiteboards: These magnetic whiteboards offer a more durable and stain-resistant surface compared to melamine boards. They are suitable for heavy use in offices and classrooms but are more expensive.
Glass whiteboards: These nonporous whiteboards are resistant to staining, ghosting, and scratches, making them a long-lasting and stylish option. They are more expensive than melamine and porcelain boards but offer a sleek and modern appearance.
Painted steel boards: These magnetic dry erase boards provide a smooth writing surface and are suitable for moderate use. They are less durable than glass and porcelain boards but can be more affordable.
III. Features of Melamine Dry Erase Boards
Melamine dry erase boards offer several features that make them a popular choice for various settings:
Non-magnetic surface: Unlike porcelain and painted steel boards, melamine whiteboards do not have a magnetic surface.
Lightweight and portable: Melamine boards are lightweight, making them easy to install and move around as needed.
Affordability: Melamine dry erase boards are generally less expensive than porcelain and glass whiteboards, making them a budget-friendly option.
Susceptibility to ghosting, staining, and warping: Due to the nature of the melamine material, these boards may be prone to ghosting, staining, and warping over time, especially with heavy use.
IV. Choosing the Right Melamine Dry Erase Board
When selecting a melamine dry erase board, consider the following factors:
Size and dimensions: Choose a board that fits your available space and meets your writing needs.
Frame materials: Melamine boards typically come with aluminum or plastic frames. Consider the durability and appearance of the frame when making your decision.
Mounting options: Decide whether you need a wall-mounted board or one that can be placed on an easel for portability.
V. Accessories and Maintenance
To get the most out of your melamine dry erase board, consider investing in the following accessories and maintenance items:
Dry erase markers: Choose high-quality markers that write smoothly and erase easily.
Erasers and cleaning solutions: Regularly clean your board with a suitable eraser and cleaning solution to prevent staining and ghosting.
Marker trays and hooks: Keep your markers and erasers organized and easily accessible with a marker tray or hooks.
Tips for preventing staining and ghosting: Clean your board regularly and avoid using permanent markers to minimize the risk of staining and ghosting.
VI. Alternatives to Melamine Dry Erase Boards
If you’re looking for a whiteboard with different features or a more durable surface, consider these alternatives to melamine dry erase boards:
DIY whiteboard options: You can create your own whiteboard using melamine sheets or other materials like shower board. These options can be more affordable and customizable but may not offer the same level of durability and erasability as commercial whiteboards.
Porcelain whiteboards: These magnetic whiteboards are made from a porcelain enamel surface fused to a steel backing. They are highly durable, resistant to staining and ghosting, and suitable for heavy use in offices and classrooms. However, they are more expensive than melamine boards.
Glass whiteboards: Glass whiteboards are made from nonporous tempered glass, which makes them resistant to staining, ghosting, and scratches. They offer a sleek, modern appearance and are suitable for both home and office use. While more expensive than melamine and porcelain boards, they provide a long-lasting and stylish option.
Painted steel boards: Painted steel boards are magnetic dry erase boards with a smooth writing surface. They are suitable for moderate use and are less durable than glass and porcelain boards but can be more affordable.
VII. Conclusion
Melamine dry erase boards are a popular and budget-friendly option for light to moderate use in various settings. However, they may be prone to ghosting, staining, and warping over time. By considering the features, benefits, and drawbacks of melamine boards and their alternatives, you can make an informed decision about the best whiteboard for your specific needs. Don’t forget to invest in high-quality accessories and maintain your board regularly to ensure its longevity and optimal performance.
At “affordable whiteboard solutions,” we understand the importance of having high-quality whiteboards without breaking the bank. That’s why we offer a range of budget-friendly whiteboard options that meet your needs without compromising on performance. Whether you’re a small business looking to enhance collaboration or an educator seeking interactive teaching tools, our whiteboards provide the perfect solution. With a focus on affordability, durability, and functionality, our whiteboards offer a seamless and efficient way to bring your ideas to life. Discover the possibilities with our affordable whiteboard solutions.
Affordable Whiteboard Solutions
Whiteboards have become an essential tool for communication and organization in various settings, including classrooms, offices, and conference rooms. They provide a versatile and practical way to brainstorm ideas, share information, and collaborate with others. However, finding an affordable whiteboard solution that meets your needs and budget can be challenging. In this article, we will explore the different options for budget-friendly whiteboards and discuss their benefits and factors to consider when making a purchase.
Budget-Friendly Whiteboard Options
When it comes to affordable whiteboard solutions, there are several options to choose from. These options include dry erase whiteboards, magnetic whiteboards, interactive whiteboards, mobile whiteboards, virtual whiteboards, DIY whiteboard solutions, and alternative whiteboard surfaces. Each option has its own unique features and benefits, allowing you to select the one that best suits your requirements and budget.
Benefits of Whiteboards
Whiteboards offer numerous benefits that make them a popular choice for individuals and organizations alike. Firstly, they provide a smooth and erasable surface, allowing you to easily write, draw, and erase information. This feature promotes efficiency and flexibility in presenting ideas and concepts. Additionally, the use of whiteboards encourages active participation, as individuals can actively engage in discussions and contribute their thoughts and ideas. Moreover, whiteboards foster collaboration and teamwork by enabling multiple users to work together simultaneously. Lastly, whiteboards are environmentally friendly, as they eliminate the need for paper and reduce waste.
Factors to Consider
Before purchasing a whiteboard, it is important to consider several factors that will impact your decision-making process. The first factor to consider is the size of the whiteboard. The size should be determined by the available space and the amount of content that needs to be displayed. Additionally, it is essential to consider the intended purpose of the whiteboard. Will it primarily be used for individual note-taking or for collaborative group work? This will help determine whether a smaller personal whiteboard or a larger interactive whiteboard is the most suitable option. Other factors to consider include the type of whiteboard surface, durability, ease of installation, and budgetary constraints.
Dry Erase Whiteboards
Dry erase whiteboards are the most common type of whiteboard and are widely favored for their versatility and ease of use. They feature a smooth surface that can be written on using dry erase markers and easily erased with an eraser or a dry cloth. Dry erase whiteboards are available in various sizes, ranging from small handheld boards to large wall-mounted boards. These whiteboards are an affordable option, making them suitable for a wide range of environments, including classrooms, offices, and homes.
Magnetic Whiteboards
Magnetic whiteboards offer an extra level of functionality by incorporating a magnetic surface. This feature allows users to attach magnetic accessories, such as markers, erasers, and document holders, to the whiteboard. Magnetic whiteboards are particularly useful in educational and office settings where visual aids, such as charts, graphs, and diagrams, play a crucial role in presentations and discussions. The magnetic aspect adds versatility and convenience to the overall whiteboard experience.
Interactive Whiteboards
Interactive whiteboards take whiteboard technology to the next level by incorporating touch screen capabilities and digital features. These whiteboards allow users to interact with the board using gestures, such as swiping and tapping, and provide access to various digital tools, including internet browsers, multimedia content, and software applications. Interactive whiteboards are commonly used in educational institutions and business settings, as they offer enhanced engagement, interactivity, and multimedia integration.
Mobile Whiteboards
Mobile whiteboards, also known as portable whiteboards, are a practical solution for those who require a flexible and mobile whiteboard option. These whiteboards are mounted on wheels or casters, allowing them to be easily moved and repositioned as needed. Mobile whiteboards are ideal for collaborative spaces, such as conference rooms and training facilities, where the layout and arrangement of furniture may change frequently. Their portability ensures convenience and adaptability in various environments.
Virtual Whiteboards
In today’s digital age, virtual whiteboards have gained popularity as a cost-effective and versatile alternative to traditional physical whiteboards. Virtual whiteboards are software-based platforms that simulate the experience of using a whiteboard on a computer or other electronic devices. They offer features such as digital writing, drawing tools, and the ability to collaborate remotely with others in real-time. Virtual whiteboards allow for seamless integration of multimedia content, making them an excellent solution for remote learning, online meetings, and virtual presentations.
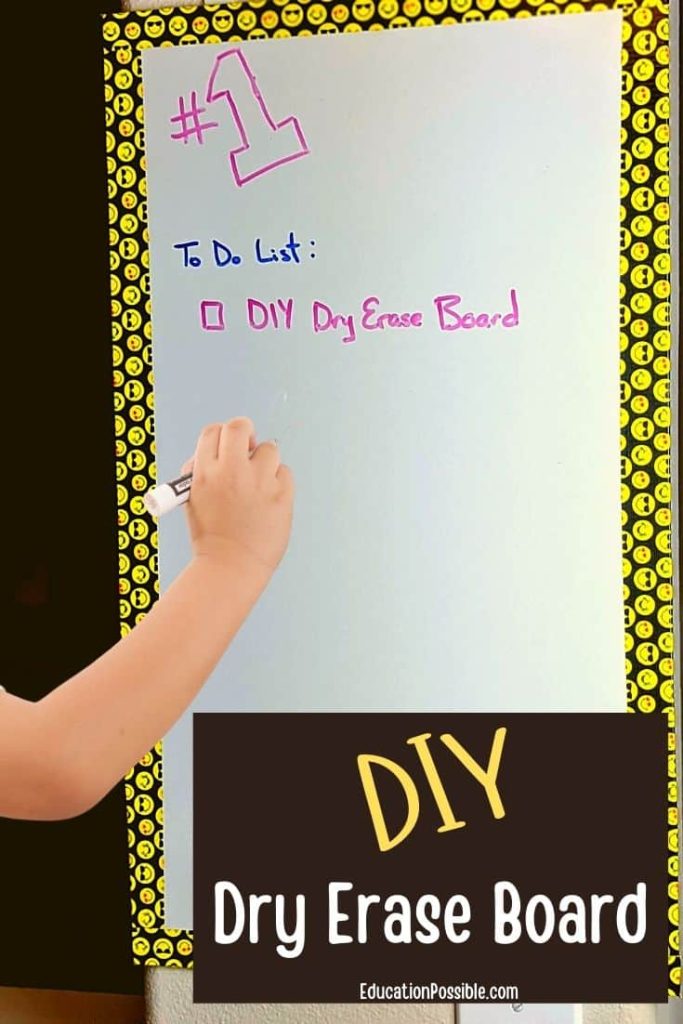
DIY Whiteboard Solutions
For those who enjoy hands-on projects and customization, creating a DIY whiteboard can be a fun and cost-effective option. There are several DIY whiteboard solutions that you can explore, depending on your preferences and available resources. Some popular options include using whiteboard paint or adhesive whiteboard sheets to transform a wall or other surface into a whiteboard. Another option is repurposing materials, such as glass or plexiglass, as a whiteboard surface. DIY whiteboard solutions offer the flexibility to design and create a whiteboard that perfectly suits your needs and style.
Alternative Whiteboard Surfaces
In addition to traditional whiteboards, there are alternative surfaces that can be used as whiteboards. These surfaces provide similar functionality but may offer additional benefits depending on the specific material used. For example, glass whiteboards offer a sleek and modern aesthetic while being easy to clean. Chalkboard paint can transform a surface into a writable and erasable board using chalk. Other options include laminate boards, melamine boards, and even repurposed materials such as old furniture or doors. alternative whiteboard surfaces offer a unique and creative approach to incorporating whiteboard functionality into your space.
In conclusion, affordable whiteboard solutions are readily available for those seeking practical and budget-friendly options. Whether you opt for a traditional dry erase whiteboard, a magnetic whiteboard, an interactive whiteboard, a mobile whiteboard, a virtual whiteboard, a DIY solution, or an alternative surface, each option offers its own set of benefits and considerations. By assessing your needs, available space, and budget, you can select the whiteboard solution that best fits your requirements and enhances collaboration, communication, and organization in your environment.
Mounting melamine dry erase boards can be a daunting task, especially if you’re not sure where to start. But fear not, because we’ve got you covered with these essential tips that will make the process a breeze. From choosing the right hardware to ensuring a level installation, we’ll walk you through all the necessary steps to get that board up on the wall and ready for all your brainstorming sessions and important notes. So grab your tools and let’s get started!
Choosing the Right Mounting Hardware
When it comes to mounting a melamine dry erase board, the first step is to choose the right mounting hardware. This is crucial because it ensures that the board is securely attached to the wall and can withstand the weight of the board and any additional pressure that may be applied to it.
Consider the weight of the board
Before selecting the mounting hardware, it’s important to consider the weight of the melamine board. Different boards can vary significantly in weight, so it’s essential to choose hardware that can properly support the specific board you have. Be sure to check the manufacturer’s specifications or consult the packaging to determine the weight of your board.
Evaluate the type of wall
The type of wall you have will also play a role in determining the appropriate mounting hardware. For example, if you have a drywall, you’ll need to use wall anchors in order to secure the board to the wall. On the other hand, if you have a concrete or brick wall, you may require different hardware such as masonry screws or anchors.
Select appropriate hardware
Once you have considered the weight of the board and evaluated the type of wall, it’s time to select the appropriate mounting hardware. There are various options to choose from, including brackets, clips, or wall anchors, depending on your specific requirements. It’s always a good idea to consult with a hardware store professional to ensure you select the right hardware for your needs.
Ensure the hardware is compatible with melamine boards
Lastly, it’s important to ensure that the mounting hardware you choose is compatible with melamine boards. Melamine is a smooth and slick surface, so it may require specific hardware that can securely hold onto the board without damaging it. Look for hardware that is designed specifically for use with melamine or dry erase boards to ensure a proper fit.
Preparing the Wall Surface
Before mounting your melamine board, it’s crucial to properly prepare the wall surface. By doing so, you’ll ensure a secure and long-lasting installation.
Inspect the wall for damage
Start by inspecting the wall for any signs of damage, such as cracks, holes, or uneven surfaces. It’s important to address any existing damage before proceeding with the installation. You can use a putty knife to scrape off loose paint or plaster and make any necessary repairs.
Clean the wall surface
After checking for damage, thoroughly clean the wall surface. Remove any dust, dirt, or grease using a mild detergent and water. This will ensure proper adhesion between the wall and the mounting hardware.
Patch any holes or cracks
If you found any holes or cracks during the inspection, it’s essential to patch them up before proceeding. Use a high-quality wall patching compound and a putty knife to fill in any imperfections. Once the compound is dry, sand it down until the surface is smooth and flush with the rest of the wall.
Ensure the wall is smooth and dry
Before mounting your melamine board, make sure the wall surface is smooth and completely dry. Any bumps or damp spots can affect the stability of the installation. Use sandpaper to smooth out any rough areas and allow the wall to dry thoroughly before proceeding.
Locating the Mounting Position
The next step in mounting your melamine board is to determine the ideal position on the wall. This involves finding the right height, locating the studs or using wall anchors, and considering the viewing angle and accessibility.
Determine the ideal height for the board
The height at which you mount your melamine board is a personal preference, but there are a few factors to consider. Take into account the average eye level of the intended users and ensure that the board is easily accessible for everyone. Avoid installing it too high or too low, as this can strain the neck and make it difficult to use.
Find the studs or use wall anchors
Once you have determined the ideal height, it’s important to locate the studs in the wall. Studs provide the strongest support for heavy objects like melamine boards. Use a stud finder to locate the studs and mark their positions on the wall.
If studs are not conveniently located where you want to mount the board, you may need to use wall anchors. Wall anchors provide additional support for the board and allow you to securely mount it to the wall. Make sure to choose the appropriate wall anchors for your specific wall type and follow the manufacturer’s instructions for installation.
Consider the viewing angle and accessibility
In addition to the height and stud positioning, it’s also crucial to consider the viewing angle and accessibility of the melamine board. Ensure that the board is mounted at a comfortable angle for users to view and write on without straining their necks or wrists. Additionally, consider the surrounding environment and any obstructions that may affect visibility.
Measuring and Marking
Accurate measurement and marking are crucial for a successful installation of your melamine board. By taking the time to do this step properly, you’ll ensure that the board is level and securely attached to the wall.
Measure and mark the mounting holes on the back of the board
Start by measuring and marking the mounting holes on the back of the melamine board. Use a tape measure to measure the distance between the holes and mark them with a pencil or marker. Take care to ensure the measurements are accurate and symmetrical.
Transfer the measurements onto the wall
Next, transfer the measurements from the back of the board onto the wall. Use a level and a pencil to mark the exact positions where the mounting holes will be drilled. Double-check the alignment and ensure that the marks for each hole are accurately placed.
Double-check the alignment and levelness
Before moving on to drilling the mounting holes, double-check the alignment and levelness of the marked positions. Use the level to ensure the marks are perfectly horizontal or vertical, depending on the orientation of your melamine board. This step is crucial for a professional-looking installation.
Drilling Mounting Holes
Once you have measured, marked, and double-checked the positions of the mounting holes, it’s time to drill the holes in the wall. This step requires some precision to ensure that the holes are the correct size and depth.
Use an appropriate drill bit size
Select the appropriate drill bit size for your mounting hardware. It should match the diameter of the screws or wall anchors you are using. Using a drill bit that is too small or too large can result in loose or wobbly mounting.
Drill pilot holes into the wall
Start by drilling pilot holes into the marked positions on the wall. Pilot holes ensure that the screws or wall anchors go in smoothly and help prevent the wall from splitting or cracking. Make sure to drill straight and apply steady pressure to avoid any damage to the wall.
Ensure the depth of the holes matches the length of the screws
When drilling the pilot holes, it’s important to ensure that the depth matches the length of the screws or wall anchors. This will ensure a secure fit and prevent the hardware from protruding too far out from the wall. Use a depth gauge or measure the length of the screws to guide you while drilling.
Attaching the Mounting Hardware
With the mounting holes drilled, it’s time to attach the mounting hardware to the wall. This is a critical step as it determines the stability and security of the melamine board on the wall.
Insert wall anchors, if required
If you are using wall anchors, insert them into the pilot holes following the manufacturer’s instructions. Wall anchors provide extra support and strength for the mounting. Make sure they are snugly fitted into the holes for optimal stability.
Attach brackets or clips to the wall
Depending on the type of mounting hardware you have selected, attach the brackets or clips to the wall. Ensure that they are securely fastened to the wall and aligned with the marked positions for the mounting holes. Use screws or other appropriate fasteners to attach the hardware. Make sure to follow the manufacturer’s instructions for proper installation.
Secure the hardware tightly
Once the brackets or clips are attached to the wall, make sure to secure them tightly. Use a screwdriver or appropriate tools to ensure that the mounting hardware is firmly in place and there is minimal play or movement. A secure attachment is crucial for the stability of the melamine board.
Mounting the Melamine Board
Now that the mounting hardware is securely attached to the wall, it’s time to mount the melamine board itself. This step requires some care to ensure that the board is properly aligned and securely fastened to the hardware.
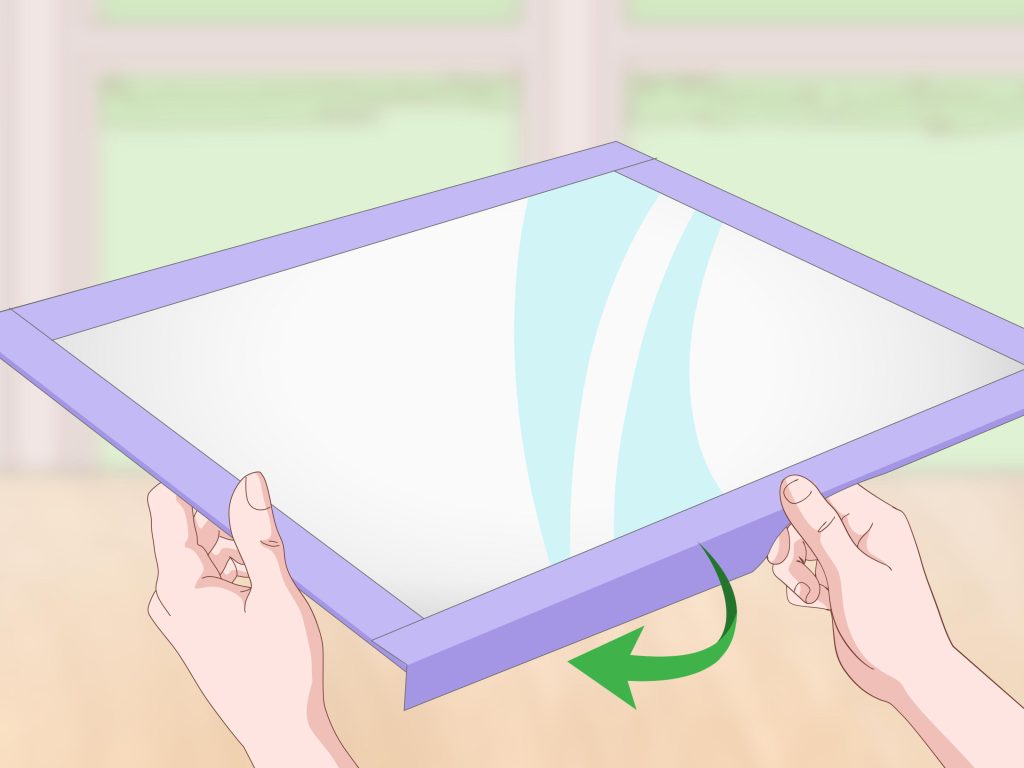
Lift the board onto the wall
With the help of another person, carefully lift the melamine board and align it with the mounted brackets or clips on the wall. Take your time to ensure that the board is level and properly positioned.
Align the mounting holes with the hardware
Once the board is in position, align the mounting holes on the back of the board with the hardware on the wall. Ensure that the holes line up perfectly with the brackets or clips. This step is crucial for a secure and stable installation.
Attach the screws and tighten
Finally, attach the screws provided with the mounting hardware through the holes on the back of the board and into the brackets or clips on the wall. Use a screwdriver or appropriate tool to tighten the screws, ensuring that they are securely fastened without overtightening and damaging the melamine board. Repeat the process for all the mounting holes.
Checking Alignment and Stability
After mounting your melamine board, it’s important to check its alignment and stability to ensure a professional and functional installation.
Ensure the board is level and straight
Use a level to check if the melamine board is perfectly level and straight. Make any necessary adjustments by slightly loosening the screws and repositioning the board. Once it is level and straight, retighten the screws securely.
Check if all corners are securely mounted
Inspect all corners of the melamine board to ensure that they are securely mounted and there is no movement or wobbling. Gently try to move the board and ensure that it is stable and firmly attached to the wall. If any corner feels loose, retighten the screws to secure it properly.
Test the stability by shaking the board gently
To further test the stability of the melamine board, gently shake it to see if it wobbles or moves excessively. A properly mounted board should remain stable and not shake or sway. If you notice any instability, check the screws and mounting hardware to ensure they are tightly secured.
Allowing Sufficient Drying Time
Once the melamine board is mounted, it’s important to allow sufficient drying time, especially if you have used adhesive or other bonding agents during the installation.
Wait for the adhesive to dry, if applicable
If you have used adhesive or any other bonding agent to mount the melamine board, follow the manufacturer’s instructions for the required drying time. Avoid using the board until the adhesive is fully dry to ensure a strong and secure attachment.
Avoid using the board until it is fully installed and stable
Even if you haven’t used adhesive, it’s still a good idea to avoid using the melamine board until it is fully installed and stable. This allows the mounting hardware to settle and ensures that the board is securely attached to the wall. Patience is key to achieving a long-lasting and reliable mounting.
Additional Considerations
In addition to the main steps outlined above, there are a few additional considerations to keep in mind when mounting a melamine board.
Consider the location and environment
Before mounting your melamine board, consider the location and environment where it will be installed. Ensure that the area is well-lit and easily accessible for users. If the board will be exposed to direct sunlight or high humidity, choose a melamine board specifically designed for such conditions to prevent warping or fading.
Use additional support if needed
In certain situations, you may need to provide additional support for your melamine board. This can include installing additional brackets or supports if the board is exceptionally large or heavy. Consult with a hardware store professional or refer to the manufacturer’s guidelines for extra support options.
Follow the manufacturer’s instructions
Lastly, it’s essential to always follow the manufacturer’s instructions when mounting a melamine board. Different boards and mounting hardware may have specific guidelines and recommendations that should be followed for optimal results. Ignoring these instructions can lead to an insecure or damaged installation.
By following these tips and steps, you will be well-equipped to mount your melamine dry erase board successfully. Remember to take your time, double-check your measurements, and ensure that the mounting hardware is securely attached to the wall. With a properly installed melamine board, you’ll have a functional and aesthetically pleasing addition to your space. Happy mounting!
If you’re in the market for a new dry erase board, then you’ll want to read this article on the cost comparison of melamine dry erase boards. We’ll be taking a closer look at the prices of these whiteboards and analyzing their features and value for money. Whether you’re a student, teacher, or business professional, finding the right dry erase board at a reasonable price is essential. So, let’s dive into this comparative analysis and discover the best options available!
A Comparative Analysis of the Cost of Melamine Dry Erase Boards
Melamine dry erase boards are widely used in various settings, such as classrooms, offices, and even at home. They offer a convenient and versatile way to communicate ideas, make notes, and plan activities. When considering purchasing a melamine dry erase board, it is important to understand the factors that can affect their cost. In this article, we will explore the various factors that can influence the price of melamine dry erase boards, and compare them based on different quality levels, sizes, frame materials, mounting options, accessories included, brand reputation, and quantity or bulk orders.
2. Factors Affecting the Cost of Melamine Dry Erase Boards
2.1. Quality of Melamine Coating
the quality of the melamine coating applied to the surface of the dry erase board is a significant factor that can impact its cost. Lower-priced melamine boards often have a thinner and less durable coating, which may be prone to staining and ghosting. On the other hand, higher-quality melamine boards feature a thicker, smoother, and more resistant coating, ensuring a longer lifespan and better erasability. The cost of the board will likely increase as the quality of the melamine coating improves.
2.2. Size and Thickness
Another important consideration in determining the cost of a melamine dry erase board is its size and thickness. Standard sizes, such as small, medium, and large, are generally more affordable due to their mass production. However, custom sizes can be more expensive as they require additional manufacturing processes and materials. Additionally, thicker boards may come at a higher price point due to the increased durability and sturdiness they offer.
2.3. Frame Material
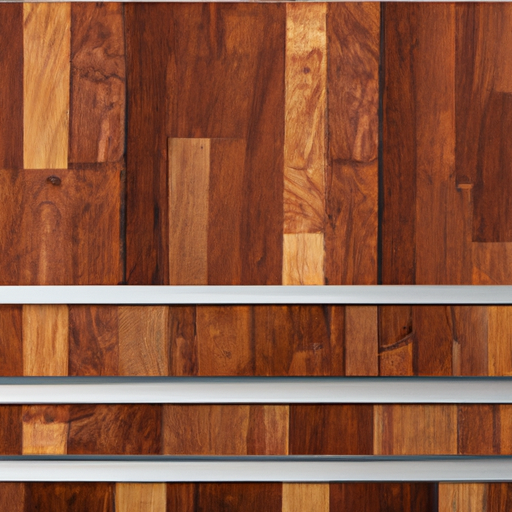
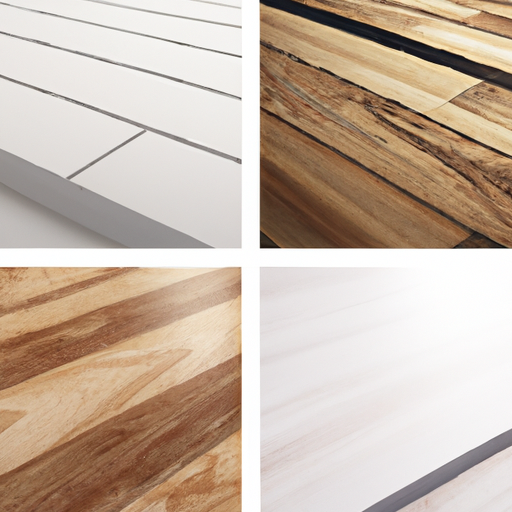
The frame material of a melamine dry erase board can also impact its cost. Common frame materials include aluminum, wood, and plastic. Aluminum frames are often the most affordable due to their lightweight and cost-effective manufacturing process. Wooden frames, on the other hand, tend to be more expensive due to the higher cost of materials and craftsmanship involved. Plastic frames typically fall somewhere in between in terms of cost. Frameless options are also available, offering a minimalist and modern aesthetic, but these may also come at a higher price compared to framed boards.
2.4. Mounting Options
The mounting option of a melamine dry erase board can affect its cost as well. Wall-mounted boards, which are the most common option, generally come at a more affordable price point. Freestanding boards, which often come with additional features like adjustable height and tilt angles, can be more expensive due to their added functionality. Mobile or rolling boards, which feature wheels for easy mobility, tend to be the most expensive due to the inclusion of specialized mechanisms and materials.
2.5. Accessories Included
The accessories included with a melamine dry erase board can also contribute to its overall cost. Marker trays, markers, erasers, magnets, and push pins are common accessories that may or may not be included with the board at the time of purchase. Lower-priced boards may not come with any accessories or may only include a basic set, while higher-priced boards often come with a complete set of accessories. Considering the cost of these accessories separately can provide a better understanding of the value provided by each board option.
2.6. Brand Reputation
Brand reputation can play a significant role in the cost of melamine dry erase boards. Established and well-known brands often have higher prices due to their reputation for quality and customer satisfaction. These brands have invested in research and development, ensuring that their products meet the highest standards. On the other hand, lesser-known brands may offer more affordable options without compromising on quality. It is essential to consider the reputation of the brand when evaluating the cost of a melamine dry erase board.
2.7. Quantity and Bulk Orders
The quantity and bulk orders of melamine dry erase boards can also affect their cost. Retail pricing is typically higher due to factors like packaging, marketing, and distribution costs. However, wholesale and bulk pricing can provide significant discounts, especially for larger quantities. Manufacturers and suppliers often offer special rates to attract customers who are looking to purchase multiple boards. It is important to consider the number of boards required and explore opportunities for discounts when evaluating the cost of melamine dry erase boards.
3. Comparison of Melamine Dry Erase Boards by Quality
3.1. Low-quality Melamine Boards
Low-quality melamine boards are often the most affordable option on the market. These boards typically have a thin melamine coating that may wear out quickly with regular use. They are more prone to staining, ghosting, and surface damage. While they can still serve their purpose, they may not offer the same level of durability and longevity as higher-quality alternatives.
3.2. Medium-quality Melamine Boards
Medium-quality melamine boards strike a balance between affordability and durability. They feature a thicker melamine coating that provides improved erasability, resistance to staining, and a longer lifespan. These boards are suitable for most regular usage scenarios and offer good value for their price. They are a popular choice among individuals and organizations looking for a balance between price and quality.
3.3. High-quality Melamine Boards
High-quality melamine boards are the top-tier options available in terms of both cost and performance. These boards feature a superior melamine coating that ensures exceptional erasability, stain resistance, and longevity. They are often backed by extensive warranties and are preferred by those who require the highest level of quality and durability. While they may come at a higher price, investments in high-quality melamine boards can prove to be worthwhile in the long run.
4. Comparison of Melamine Dry Erase Boards by Size and Thickness
4.1. Standard Sizes (Small, Medium, Large)
Melamine dry erase boards are commonly available in standard sizes, such as small, medium, and large. These sizes are mass-produced, making them more affordable compared to custom sizes. Small-sized boards are typically the most economical option and are suitable for individual use or small spaces. Medium-sized boards offer a good balance between price and functionality, catering to a wider range of needs. Large-sized boards are more expensive due to their larger surface area and are often used in classrooms, conference rooms, or other settings where a larger writing surface is required.
4.2. Custom Sizes
Custom-sized melamine dry erase boards are made to specific dimensions, allowing for precise fitting in unique spaces or meeting specific requirements. These boards require additional manufacturing processes and materials, making them more expensive than standard-sized options. However, the cost of a custom-sized board can vary greatly depending on the specific dimensions and complexity involved.
4.3. Thin vs Thick Boards
The thickness of a melamine dry erase board can affect its cost. Thin boards, often around 1/8 inch thick, are generally less expensive due to their simpler manufacturing process. They are suitable for light to moderate use and can be easily mounted on walls. Thicker boards, typically around 3/16 inch to 1/4 inch thick, offer increased durability and sturdiness, making them more expensive. These boards are ideal for heavy use environments or for those seeking a more substantial and premium feel.
5. Comparison of Melamine Dry Erase Boards by Frame Material
5.1. Aluminum Frame
Dry erase boards with aluminum frames are commonly found and tend to be the most affordable option. Aluminum frames are lightweight, sturdy, and resistant to corrosion, making them a practical choice for many users. They are suitable for various environments, including classrooms, offices, and homes, offering a reliable and cost-effective solution.
5.2. Wooden Frame
Melamine dry erase boards with wooden frames provide a more sophisticated and elegant look. Wooden frames are often crafted from high-quality materials and offer a touch of warmth and charm to any space. However, they generally come at a higher price compared to aluminum frames due to the cost of materials and craftsmanship involved. Wooden frames are chosen by those who prioritize aesthetics and are willing to invest in a visually appealing dry erase board.
5.3. Plastic Frame
Plastic frames are a more budget-friendly alternative to both aluminum and wooden frames. They are lightweight and durable, making them suitable for environments with high traffic or areas where accidental damage may occur. Plastic frames come in a variety of colors and styles, providing ample options for customization. While they may lack the visual appeal of aluminum or wooden frames, they offer an affordable option for those on a tighter budget.
5.4. Frameless Options
Frameless melamine dry erase boards offer a sleek and modern aesthetic. They do not feature traditional frames, providing a minimalist look that can blend well with any decor. However, frameless options typically come at a higher price compared to framed boards. The manufacturing process required to achieve a frameless design involves additional steps, resulting in increased production costs. Despite the higher price, frameless boards are sought after by those who desire a contemporary and seamless appearance.
6. Comparison of Melamine Dry Erase Boards by Mounting Options
6.1. Wall-Mounted
Wall-mounted melamine dry erase boards are the most common option and are typically the most affordable. They are designed to be securely mounted on walls, offering a permanent and stable writing surface. Wall-mounted boards are simple and straightforward in terms of installation and are suitable for a wide range of environments. They are a cost-effective solution for those who require a fixed location for their dry erase board.
6.2. Freestanding
Freestanding melamine dry erase boards offer increased versatility and convenience. These boards come with built-in stands or legs, allowing them to be placed anywhere without the need for wall mounting. Freestanding boards often offer additional features like adjustable height or tilt angles to accommodate different users’ requirements. The added functionality and flexibility come at a higher price compared to wall-mounted boards.
6.3. Mobile or Rolling
Mobile or rolling melamine dry erase boards provide the ultimate level of portability and flexibility. These boards come with wheels or casters, allowing them to be easily moved around in different rooms or areas. Mobile boards are often used in educational or professional settings where the board needs to be relocated frequently, such as classrooms, conference rooms, or training facilities. The inclusion of specialized mechanisms and materials makes mobile boards the most expensive option among mounting options.
7. Comparison of Melamine Dry Erase Boards by Accessories Included
7.1. Marker Trays
Marker trays are a common accessory included with melamine dry erase boards. They provide a convenient place to store markers, keeping them within reach during use. Lower-priced boards may not include a marker tray or may only offer a basic design. Higher-priced boards often come with a more robust and integrated marker tray, providing additional space for other accessories like erasers and magnets.
7.2. Markers and Erasers
The inclusion of markers and erasers can vary among melamine dry erase boards. Lower-priced boards may not include any markers or erasers or may offer a limited number of low-quality options. Higher-priced boards often come with a set of high-quality markers and erasers, ensuring smooth and consistent writing, as well as easy erasability. The quality and quantity of the markers and erasers included can influence the overall cost of the board.
7.3. Magnets and Push Pins
Some melamine dry erase boards include additional accessories such as magnets and push pins. Magnets are commonly used to attach papers, memos, or other lightweight items to the board’s surface. Push pins, on the other hand, allow users to affix paper or other materials directly onto the board. The inclusion of magnets and push pins can increase the cost of melamine dry erase boards, especially if they are of higher quality or come in larger quantities.
8. Comparison of Melamine Dry Erase Boards by Brand Reputation
8.1. Popular Brands
Well-established and popular brands often offer melamine dry erase boards at a higher price point. These brands have invested in research and development, ensuring the highest level of quality control and customer satisfaction. They have built a reputation for producing reliable and durable products. While the cost may be higher, purchasing from popular brands can provide peace of mind and assurance of the board’s performance.
8.2. Lesser-Known Brands
Lesser-known brands may offer more affordable options without compromising on quality. These brands may not have the same level of brand recognition or market presence as popular brands, but they can still provide reliable and functional melamine dry erase boards. It is important to research and read reviews to ensure that lesser-known brands meet the required standards of quality and performance.
9. Comparison of Melamine Dry Erase Boards by Quantity and Bulk Orders
9.1. Retail Pricing
Retail pricing of melamine dry erase boards is generally higher than wholesale or bulk pricing. Retail prices account for factors such as packaging, marketing, and distribution costs. Retail prices are straightforward and do not require a minimum order quantity or volume commitment. Consumers who only need a single board or a small quantity typically purchase from retailers and pay the listed retail price.
9.2. Wholesale and Bulk Pricing
Wholesale and bulk pricing offer significant discounts for larger quantities of melamine dry erase boards. Manufacturers and suppliers are often willing to negotiate special rates to attract customers looking to purchase multiple boards. Wholesale and bulk pricing can provide substantial cost savings per board, making it an ideal option for educational institutions, businesses, or organizations planning to equip multiple rooms or departments.
9.3. Discounts and Promotions
In addition to wholesale and bulk pricing, discounts and promotions are sometimes available for melamine dry erase boards. Manufacturers or retailers may offer special deals during certain periods or on specific occasions such as back-to-school seasons or holidays. These discounts and promotions can further reduce the cost of the boards, making it an opportune time to make a purchase.
10. Conclusion
When considering purchasing a melamine dry erase board, it is essential to understand the various factors that can affect its cost. Factors such as the quality of the melamine coating, size and thickness, frame material, mounting options, accessories included, brand reputation, and quantity or bulk orders all contribute to the overall cost. By evaluating and comparing these factors, you can find a melamine dry erase board that meets your specific needs, preferences, and budget. Whether you opt for a low-cost option or invest in a high-quality board, a melamine dry erase board can prove to be a valuable tool for communication, organization, and creativity.
So you’re curious about melamine boards, huh? Well, look no further because this article is here to give you a quick rundown of the pros and cons of these versatile building materials. From their durability and cost-effectiveness to their limited color options and potential for chipping, we’ll cover it all. Whether you’re a DIY enthusiast or a professional contractor, understanding the advantages and disadvantages of melamine boards will help you make an informed decision for your next project. Let’s get started!
Advantages of Melamine Boards
Durable and long-lasting
Melamine boards are known for their durability, making them a popular choice for various applications. Whether used for furniture, shelves, cabinets, or countertops, melamine boards can withstand daily wear and tear, ensuring a long-lasting product. The boards are resistant to scratches, dents, and stains, making them highly reliable and perfect for high-traffic areas in your home or office.
Easy to clean
One of the major advantages of melamine boards is their ease of maintenance. Unlike some other materials, melamine boards are incredibly easy to clean. A simple wipe with a damp cloth is usually enough to remove any dirt or spills. This convenience not only saves you time and effort but also ensures that your surfaces always look clean and presentable.
Variety of designs and finishes
melamine boards come in a wide range of designs and finishes, allowing you to choose the perfect style to complement your interior decor. Whether you prefer a modern, minimalist look or a more traditional aesthetic, there is a melamine board design to suit your taste. From wood grains to solid colors, you can easily find the right option to bring your vision to life.
Affordable
Compared to other materials like solid wood or natural stone, melamine boards are generally more affordable. This makes them a budget-friendly choice for those who want to achieve a stylish and durable look without breaking the bank. With melamine boards, you can have the appearance of expensive materials without the hefty price tag.
Resistance to moisture and chemicals
Melamine boards are engineered to be highly resistant to moisture and chemicals. This makes them suitable for areas prone to moisture and humidity, such as kitchens and bathrooms. Unlike natural wood, melamine boards won’t warp or rot when exposed to moisture, ensuring their longevity and maintaining their structural integrity.
Impact resistance
Thanks to their construction, melamine boards are highly resistant to impact. This makes them ideal for environments where there is a higher risk of accidental damage, such as homes with young children or busy commercial spaces. With melamine boards, you can have peace of mind knowing that your surfaces can withstand daily bumps and knocks without showing signs of wear and tear.
Prevents growth of bacteria and mold
Another advantage of melamine boards is their ability to inhibit the growth of bacteria and mold. This is due to the material’s non-porous nature, making it difficult for microorganisms to thrive. By choosing melamine boards, you can create a hygienic and healthy environment, reducing the risk of illness and ensuring the longevity of your surfaces.
Low maintenance
As mentioned earlier, melamine boards are incredibly low maintenance. Unlike natural wood, which requires regular polishing and refinishing, melamine boards only require simple cleaning to keep them looking their best. This convenience saves you valuable time and effort, allowing you to enjoy your surfaces without the hassle of extensive upkeep.
Saves time during installation
Installing melamine boards can be significantly quicker and easier compared to some other materials. The boards come pre-finished, eliminating the need for additional painting or varnishing. Additionally, melamine boards are lightweight, making them easier to handle and transport. With their ease of installation, melamine boards are a convenient choice for both professionals and DIY enthusiasts.
Environmentally friendly
Melamine boards are considered environmentally friendly due to their sustainable production process. The boards are made from a combination of wood fibers, resin, and other materials, reducing the need for harvesting large amounts of natural wood. Additionally, the manufacturing process of melamine boards produces less waste compared to traditional wood processing methods. By choosing melamine boards, you can contribute to a greener and more sustainable future.
Disadvantages of Melamine Boards
Limited heat resistance
While melamine boards offer many advantages, they have a limited resistance to heat. Direct exposure to high temperatures, such as placing hot pots or pans directly on the surface, can cause the melamine to blister or discolor. It is important to use heat-resistant mats or trivets to protect the surface from heat damage and prolong the lifespan of your melamine boards.
Prone to chipping and scratching
Despite their durability, melamine boards can still be prone to chipping and scratching. Rough handling or impact from heavy objects can cause the melamine surface to chip or form scratches. It is important to handle melamine boards with care and avoid dragging sharp objects across its surface to maintain its pristine appearance.
Difficult to repair
Unlike some other materials, repairing melamine boards can be more challenging. Major damages, such as deep scratches or chipped edges, might require professional repair or even replacement of the affected area. It is important to take preventive measures and use protective measures, such as proper cutting boards and coasters, to minimize the risk of damage.
Not suitable for outdoor use
One of the limitations of melamine boards is that they are not suitable for outdoor use. Exposure to direct sunlight, rain, and harsh weather conditions can cause the melamine surface to fade, warp, or deteriorate over time. If you are considering using melamine boards for an outdoor project, it is recommended to choose materials specifically designed for outdoor use.
Weight limitations
Melamine boards have weight limitations, especially when used for vertical applications such as cabinets or shelves. Exceeding the weight limit can cause the boards to sag or become structurally unstable. It is important to consider the weight of the items you plan to store on melamine board surfaces and ensure they are within the recommended weight limits.
Formaldehyde emissions
One of the concerns associated with melamine boards is their potential formaldehyde emissions. While melamine boards are considered safe for everyday use, some lower-quality or improperly manufactured boards may release small amounts of formaldehyde gas over time. It is advisable to choose melamine boards from reputable manufacturers that meet strict quality standards and adhere to regulatory guidelines.
Susceptible to swelling in high humidity
Although melamine boards are resistant to moisture, prolonged exposure to high humidity can cause them to swell. This can result in a change in the board’s dimensions, leading to fits or gaps in joints or connections. To prevent this, it is important to ensure proper ventilation and avoid excessive humidity levels in areas where melamine boards are used.
Lack of natural wood feel
While melamine boards offer a wide range of designs and finishes, they may lack the natural wood feel that some people prefer. The smooth and consistent surface of melamine boards may not provide the same tactile experience as real wood. If you value the unique textures and grain patterns of natural wood, melamine boards may not fully satisfy your aesthetic preferences.
Limited customizability
Although melamine boards come in various designs, they have certain limitations when it comes to customization. Unlike natural wood, which can be easily modified or shaped, melamine boards are pre-finished and fixed in their dimensions and appearances. If you have specific design requirements or prefer more intricate customization options, melamine boards might not be the best choice for you.
Potential for warping
While melamine boards are resistant to moisture, improper installation or exposure to extreme humidity levels can lead to warping. Warped boards can compromise the structural integrity of furniture or surfaces, resulting in an uneven or unstable surface. It is crucial to follow proper installation guidelines and maintain optimal humidity levels to minimize the risk of warping.
In conclusion, melamine boards offer numerous advantages such as durability, ease of maintenance, versatility in design, affordability, resistance to moisture and impact, hygienic properties, low maintenance requirements, time-saving installation, and environmental friendliness. However, they also have limitations, including limited heat resistance, susceptibility to chipping and scratching, difficulties in repairing, unsuitability for outdoor use, weight limitations, potential formaldehyde emissions, vulnerability to swelling in high humidity, lack of natural wood feel, limited customizability, and the potential for warping. Considering both the pros and cons of melamine boards is essential when deciding whether they are the right choice for your specific needs and preferences.
So you’ve decided to install melamine boards in your home and you’re not quite sure where to start. Look no further! This article serves as your ultimate guide to step-by-step melamine board installation. From measuring and cutting the boards, to attaching them securely and finishing off with a professional touch, we’ve got you covered. Whether you’re a seasoned DIY enthusiast or a beginner taking on your first home project, this comprehensive guide will walk you through every stage of the installation process, ensuring a successful and flawless end result. Get ready to transform your space with the sleek and durable beauty of melamine boards.
Preparation
Before you dive into the process of installing a melamine board, it’s important to make sure you have everything you need and create a plan for the project. Here are a few steps to help you prepare:
Measuring and Planning
The first step in any installation project is accurate measurements and careful planning. Measure the area where you will be installing the melamine board, taking into account any obstacles or existing features like electrical outlets. Use a tape measure and a level to ensure your measurements are precise. Once you have your measurements, sketch out a simple diagram of the space and make note of any specific dimensions or requirements.
Gathering Materials
Once you have your measurements and plan in place, it’s time to gather all the materials you’ll need for the installation. Start with the melamine board itself, making sure you have enough to cover the entire area. You’ll also need screws or adhesive, depending on your preferred method of securing the board, as well as the appropriate tools for cutting and assembling the board. Additionally, consider purchasing edge banding to give your project a polished, finished look.
Preparing the Work Area
Before you begin cutting or installing the melamine board, take the time to prepare your work area. Clear out any existing furniture or objects that may be in the way, and lay down protective coverings on the floor to prevent any damage. Ensure that you have enough space to move around comfortably and safely. Additionally, gather any necessary tools and make sure they are in good working condition.
Before you start cutting, mark the melamine board with the appropriate measurements. Use a tape measure and a pencil to ensure accurate markings. Take your time to double-check your measurements before proceeding to avoid any costly mistakes. It’s also a good idea to label each section of the board to keep things organized during the installation process.
Using a Circular Saw
A circular saw is an excellent tool for cutting melamine board. Set the saw to the appropriate depth, typically around 1/4 inch deeper than the thickness of the board. Start cutting slowly and steadily, following your marked lines. Be sure to use a straight edge or guide to ensure a clean, straight cut. Take care to keep your fingers and hands away from the blade for safety.
Using a Jigsaw
If you need to make curved or intricate cuts, a jigsaw is the ideal tool for the job. Attach a fine-toothed blade to the jigsaw and secure the melamine board firmly in place. Start cutting along the marked lines, moving the jigsaw smoothly and steadily. Take your time and use light, controlled pressure to avoid any chipping or splintering of the board. Again, prioritize safety by keeping your hands away from the blade at all times.
Assembling the Melamine Board
With your melamine board cut to the appropriate size, it’s time to assemble it. Here are a few key steps to consider:
Securing the Melamine Board
Decide on the method of securing the board that works best for your project. You can either use screws or adhesive. If you choose screws, make sure to drill pilot holes to prevent the board from splitting. Place the board in position and secure it carefully, making sure it is level and flush with the surrounding surfaces. If you opt for adhesive, follow the manufacturer’s instructions for the best results.
Using Screws vs. Adhesive
The choice between screws and adhesive for securing the melamine board largely depends on personal preference and the nature of the project. Screws offer a more permanent and adjustable option, allowing for easier removal and replacement if necessary. On the other hand, adhesive provides a seamless, clean appearance without any visible fasteners. Consider the specific needs and constraints of your installation and choose the method that suits you best.
Joining Boards Together
In some cases, you may need to join multiple melamine boards together to cover a larger area. To join boards together, use a biscuit joiner or dowels to create strong, invisible joints. Apply adhesive or insert dowels into the corresponding holes, making sure the boards align perfectly. Press the boards together firmly and clamp them until the adhesive dries. If using screws, drill pilot holes and use screws to secure the boards together.
Finishing Touches
To give your melamine board installation a professional finish, consider the following steps:
Filling Holes and Gaps
Once the melamine board is securely in place, inspect it for any visible holes or gaps. Use wood filler or putty to fill these imperfections, then allow the filler to dry completely. Sand the filled areas until they are smooth and blend seamlessly with the rest of the board’s surface.
Sanding the Board
To ensure a smooth, polished look, sand the entire surface of the melamine board. Start with a coarse sandpaper to remove any rough spots or imperfections, then gradually switch to finer grits for a smoother finish. Be careful not to oversand and damage the melamine coating. Wipe away any dust after sanding to prepare the board for the next step.
Applying Edge Banding
To add a finished look to the edges of your melamine board, consider applying edge banding. Edge banding is a strip of veneer or PVC that matches the color and texture of the melamine board. It covers the exposed edges, giving them a smooth, professional appearance. Use a hot iron or special edge banding tool to adhere the banding to the edges, then trim off any excess for a clean finish.
Installing the Melamine Board
You’re almost there! It’s time to install the melamine board in its designated space. Follow these steps for a successful installation:
Aligning the Board
Carefully align the melamine board with your previous measurements and ensure that it is level. Use a level and shims, if necessary, to make any necessary adjustments. Take your time during this step, as proper alignment is crucial for a visually appealing installation.
Attaching the Board to the Wall Studs
If you are installing the melamine board on a wall, it’s essential to attach it securely to the wall studs for stability. Locate the wall studs using a stud finder or by tapping the wall, then mark their positions. Use screws or nails to fasten the board directly to the studs, ensuring they penetrate the board and go securely into the studs for maximum support.
Installing Corner Braces
To further reinforce the stability of the installed melamine board, consider adding corner braces. Corner braces are metal brackets that provide additional support to corners and joints. Attach them by using screws or nails to secure them to both the melamine board and the adjacent wall. Make sure the braces are properly aligned and firmly attached for optimal strength.
Measure and mark the desired locations for your shelves or drawers on the melamine board. Use a tape measure, level, and pencil to ensure accurate placement. Take into account the size and weight capacity of the shelves or drawers to determine the appropriate spacing and dimensions.
Installing Shelf Supports
To support the weight of shelves, install shelf supports within the melamine board. Measure and mark the positions of the supports, then use appropriate hardware (such as shelf brackets or shelf pins) to attach them securely to the board. Make sure the supports are level and properly aligned to guarantee the stability of your shelves.
Building and Installing Drawers
If you’re adding drawers to your melamine board installation, follow these steps to ensure a successful integration:
Measure and cut the drawer components (front, back, sides) to the desired sizes, ensuring they fit within the designated space on the board.
Use a suitable method to join the drawer components together. This could include using dovetail joints, dado joints, or drawer slides.
Install drawer slides on the supporting shelf or within the cabinet opening, following the manufacturer’s instructions.
Attach the drawer front to the drawer box, aligning it properly and securing it firmly in place.
Test the drawers for smooth operation and adjust as necessary.
Maintaining Melamine Board
To keep your melamine board looking its best and extend its lifespan, follow these maintenance tips:
Cleaning and Care Tips
Regularly clean the surface of the melamine board with a mild detergent and warm water. Avoid using abrasive or harsh cleaners that can damage the finish. Wipe up spills promptly to prevent staining, and use coasters or placemats to protect the surface from heat and moisture. Avoid dragging heavy or sharp objects across the board, as this can cause scratches or dents.
Repairing Scratches or Damage
In the event that your melamine board sustains scratches or damage, there are a few options for repair. Minor scratches can often be concealed with a melamine touch-up pen or marker that matches the board’s color. For deeper scratches or dents, consider using a melamine repair compound or filler. Follow the manufacturer’s instructions for the specific product you choose, and sand and blend the repaired area to match the surrounding surface.
Safety Precautions
Throughout the installation process, it’s important to prioritize safety. Here are a few precautions to keep in mind:
Wearing Protective Gear
When working with melamine boards, wear appropriate protective gear such as safety glasses, earplugs, and gloves. This will help protect your eyes, ears, and hands from potential injuries. Additionally, make sure to wear clothing that covers your arms and legs to prevent cuts or scratches.
Using Tools Safely
Use tools as instructed by the manufacturer and follow all safety guidelines. Be familiar with the proper operation of each tool before using it, and never force a tool if it’s not working correctly. Keep your fingers and hands away from moving blades or sharp edges, and always unplug power tools when not in use. Take your time and work in a well-lit and well-ventilated area to minimize the risk of accidents.
Common Mistakes to Avoid
To ensure a successful melamine board installation, steer clear of these common pitfalls:
Not Measuring Accurately
Accurate measurements are crucial for a seamless installation. Take the time to measure twice and cut once to avoid costly mistakes. Double-check your measurements and markings throughout the process to maintain precision and consistency.
Not Using Proper Tools
Using the right tools for the job is essential to achieve professional results. Make sure you have the necessary tools and equipment, and familiarize yourself with their proper usage. Using improper tools can lead to inaccurate cuts, damaged boards, and compromised safety.
Forgetting to Secure the Board Properly
Properly securing the melamine board is vital to ensure its stability and longevity. Whether you choose screws or adhesive, make sure to follow the recommended guidelines and secure the board securely. Failure to do so can result in sagging, warping, or even detachment of the board over time.
Conclusion
Installing a melamine board can transform your space and provide a functional, durable surface. By following the step-by-step guide outlined above, you can confidently tackle this project and achieve professional results. Remember to measure accurately, gather the necessary materials, and take necessary safety precautions throughout the installation process. With proper planning and attention to detail, your melamine board installation will be a success.
Summary
Installing a melamine board involves several key steps, starting with measuring and planning and ending with adding finishing touches. Cutting the melamine board requires precise marking and the use of either a circular saw or jigsaw, depending on the desired cuts. Assembling the board involves securing it with screws or adhesive and joining multiple boards together if necessary. Finishing touches include filling holes, sanding, and applying edge banding for a polished appearance. Installing the melamine board involves aligning it properly, attaching it securely to wall studs, and reinforcing with corner braces. Adding shelves or drawers involves careful measurement and installation of the necessary components. Maintenance of melamine board includes cleaning and care tips, as well as repairing any damage. Safety precautions should be observed throughout the installation process, and common mistakes such as inaccurate measuring or improper tool usage should be avoided. By following these steps and recommendations, you can successfully install a melamine board in your space.
So you’ve been tasked with choosing a new dry erase board for your office, but you’re not sure which one is the best fit. Well, you’re in luck! This article will provide a comparison between melamine and glass dry erase boards, giving you the information you need to make an informed decision. Whether you’re looking for durability, ease of cleaning, or overall aesthetics, we’ve got you covered. So let’s dive in and find the perfect dry erase board for your office needs!
Durability
Scratch resistance
When it comes to durability, both melamine and glass dry erase boards have their own strengths. Melamine boards are known for their scratch resistance, making them a great choice for high-traffic areas or environments where the board is frequently used. The melamine surface is made from a sturdy resin that can withstand light to moderate use without showing signs of wear and tear.
On the other hand, glass dry erase boards are also highly durable but may not be as scratch-resistant as melamine boards. While the glass surface is strong and can handle daily use, it is more prone to visible scratches, especially when used with sharp or abrasive objects. However, with proper care and maintenance, glass boards can still maintain their appearance and functionality over time.
Stain resistance
When it comes to stain resistance, melamine boards have an advantage. The non-porous surface of melamine makes it resistant to staining, allowing you to easily wipe off any ink or marker without leaving behind any stubborn marks or residue. This makes melamine boards ideal for offices where there is a lot of writing and erasing happening throughout the day.
Glass dry erase boards, on the other hand, may be more prone to staining. While glass can be easily wiped clean, some marker ink or stains may leave behind faint marks or residue that require a bit more effort to remove. However, with regular cleaning and care, the stain resistance of glass boards can still be maintained.
Impact resistance
When it comes to impact resistance, glass dry erase boards have the upper hand. The tempered glass used in these boards is designed to be highly resistant to impact, making it less prone to cracking or shattering. This means that even if the board accidentally falls or gets bumped, it is less likely to break compared to melamine boards.
Melamine boards, while generally durable, are more susceptible to cracks or chips when subjected to significant impact. While they can handle normal wear and tear, they may not be as resilient in high-impact situations.
Maintenance
Cleaning
Both melamine and glass dry erase boards are relatively easy to clean. Melamine boards can be wiped clean with a dry cloth or an eraser, making it a quick and hassle-free process. For more stubborn stains, mild soap and water can be used to remove the marks without damaging the surface.
Glass dry erase boards can also be cleaned with a dry cloth or eraser, but they may require a bit more care. The glass surface can be easily cleaned with mild soap and water, or with a glass cleaner specifically designed for these boards. It is important to avoid using abrasive cleaners or materials that may scratch the glass surface.
Ghosting
Ghosting refers to the residual marks or shadows left behind after erasing the marker ink from the board. While both melamine and glass dry erase boards can experience ghosting to some extent, the severity may vary.
Glass dry erase boards, on the other hand, are generally less prone to ghosting. The smooth and non-porous glass surface allows for easier erasing without leaving behind traces of the previous markings. However, if ghosting does occur, it can usually be easily removed with a mild glass cleaner or rubbing alcohol.
Surface lifespan
The lifespan of both melamine and glass dry erase boards depends on their quality and level of use. Generally, melamine boards have a shorter surface lifespan compared to glass boards. With heavy use, the melamine surface can start to show signs of wear and may require replacement after a few years.
Glass dry erase boards, on the other hand, have a longer surface lifespan. The tempered glass surface is highly durable and can withstand years of use without significant wear or deterioration. With proper care, a glass board can maintain its functionality and appearance for many years, making it a more long-lasting investment.
Writing Performance
Smoothness
When it comes to smoothness, both melamine and glass dry erase boards offer a different writing experience. Melamine boards have a slightly textured surface, which some people may prefer for a more tactile writing feel. The textured surface can provide a bit of resistance, making it easier to control the marker and create clean lines.
Glass dry erase boards, on the other hand, have a smooth and slick surface. Writing on glass feels more effortless and allows for smoother marker gliding. This can be preferred by those who prefer a sleek and effortless writing experience.
Color vibrancy
Melamine boards are known for their ability to display vibrant and vivid colors. The white surface of a melamine board allows the marker ink to stand out, making the writing and drawings more visually appealing. This can be especially useful for presentations or visual displays where the colors need to pop.
Glass dry erase boards, on the other hand, may have slightly muted color vibrancy. The transparent nature of the glass can slightly dull down the colors, especially if the board is placed against a colored or patterned background. However, the difference in color vibrancy may not be significant to most users and may not affect the overall writing performance.
Writing experience
The overall writing experience can vary between melamine and glass dry erase boards. Melamine boards provide a more tactile and controlled writing experience, which can be helpful for those who prefer more resistance and control over their marker strokes. The slightly textured surface allows for easier gripping of the marker, providing a more traditional writing feel.
Glass dry erase boards, on the other hand, provide a smoother and more effortless writing experience. The slick surface allows the marker to glide easily, resulting in smoother lines and strokes. This can be preferred by those who value a sleek and modern writing experience.
Cost
Initial cost
When it comes to initial cost, melamine boards are generally more affordable compared to glass dry erase boards. Melamine boards are available at a lower price range, making them a budget-friendly option for offices or individuals who are looking for a cost-effective whiteboard solution.
Glass dry erase boards, on the other hand, tend to have a higher price point. The use of tempered glass and the manufacturing process contribute to the higher cost, making glass boards a more premium option. However, it is important to consider the long-term cost and durability when making a purchasing decision.
Long-term cost
While melamine boards may have a lower initial cost, they may require more frequent replacements over time. The melamine surface is more prone to wear and tear, especially with heavy use or exposure to harsh cleaning chemicals. This means that the long-term cost of melamine boards may include the cost of replacements and maintenance.
Glass dry erase boards, on the other hand, have a higher initial cost but offer a longer lifespan and durability. The tempered glass surface is resistant to scratches and can withstand years of use without significant degradation. This makes glass boards a more cost-effective option in the long run, as they require fewer replacements and maintenance costs.
Installation
Mounting options
Both melamine and glass dry erase boards offer different mounting options to suit different installation needs. Melamine boards are usually lightweight and can be easily mounted on walls using adhesive strips or screws. This makes them a versatile option for offices or spaces where the walls may not be able to support heavy or permanent installations.
Glass dry erase boards, on the other hand, are heavier and may require more secure mounting options. Most glass boards come with mounting brackets or hardware that allows for a more permanent and secure installation on walls. This ensures that the board is stable and can withstand the weight and pressure of everyday use.
Ease of installation
In terms of ease of installation, melamine boards are generally easier to install compared to glass boards. The lightweight nature of melamine boards makes them easier to handle and maneuver during installation. With adhesive strips or screws, melamine boards can be quickly and easily mounted on walls without much hassle.
Glass dry erase boards, on the other hand, require more careful handling and installation. The tempered glass surface is heavier and more fragile, requiring more attention during the mounting process. It may also require additional tools or assistance to ensure a secure and safe installation.
Aesthetic Appeal
Design options
Melamine boards come in a variety of design options, ranging from plain white surfaces to boards with grids, lines, or custom printing. This allows for flexibility in choosing the right design that suits the specific needs and preferences of the office or individual. The design options can enhance the visual appeal and functionality of the board.
Glass dry erase boards, on the other hand, usually have a more minimalist design. The transparent glass surface creates a sleek and modern look that can complement any office decor. While the design options may be limited in terms of patterns or printing, the simplicity and elegance of the glass surface make it an attractive choice for many.
Visual appeal
Both melamine and glass dry erase boards have their own visual appeal. Melamine boards, with their bright white surface and customizable design options, can create a visually striking and organized display. The vibrant colors and contrast between the marker ink and the white surface make the content stand out, capturing attention and enhancing the visual appeal.
Glass dry erase boards, on the other hand, offer a more subtle and sophisticated visual appeal. The transparent glass surface blends seamlessly with the surroundings, creating a seamless and unobtrusive look. This can be particularly appealing for offices or spaces where a sleek and minimalist aesthetic is desired.
Versatility
Functionality for different purposes
Both melamine and glass dry erase boards offer functionality for different purposes. Melamine boards are versatile and can be used in various settings, including classrooms, meeting rooms, or home offices. They are suitable for general writing and brainstorming sessions, as well as for organizing schedules or displaying important information.
Glass dry erase boards, on the other hand, are also versatile and can be used in a range of environments. The sleek and modern look of glass boards makes them suitable for contemporary office spaces or conference rooms. They can also be used for creative brainstorming sessions or as decorative display boards.
Compatibility with markers and accessories
Melamine boards are compatible with a wide range of markers and accessories, making them highly versatile. They can be used with dry erase markers, permanent markers (with proper cleaning), or even chalk markers. Additionally, melamine boards can be easily used with accessories such as magnets or clips, allowing for easy attachment of documents or notes.
Glass dry erase boards, on the other hand, have limited compatibility with markers and accessories. Due to the nature of the glass surface, only dry erase markers are suitable for use. Magnetic accessories are also not compatible with glass boards unless they are specifically designed for magnetic glass surfaces. This may limit the versatility of glass boards in certain settings.
Eco-Friendliness
Sustainable materials
When it comes to eco-friendliness, melamine boards may have an advantage. Melamine surfaces are often made from sustainable materials such as resin that can be sourced responsibly. This means that choosing a melamine board can have a lower environmental impact compared to other materials.
Glass dry erase boards, on the other hand, may have a higher environmental impact due to the manufacturing process and the use of tempered glass. However, some glass boards are made from recycled glass, which can contribute to a more sustainable option. It is important to consider the materials used in the production of the board and choose environmentally conscious options whenever possible.
Recyclability
Melamine boards are not easily recyclable due to the mix of materials used in their construction. The combination of resin and paper layers makes it challenging to separate and recycle the components. This means that when a melamine board reaches the end of its lifespan, it may end up in a landfill.
Glass dry erase boards, on the other hand, have a higher potential for recyclability. Glass is a highly recyclable material and can be repurposed into new glass products. This makes glass boards a more sustainable option, as they can be recycled at the end of their lifespan instead of ending up in a landfill.
Availability
Product availability
When it comes to product availability, melamine boards are more widely available compared to glass dry erase boards. Melamine boards can be found in most office supply stores or online retailers, making them easily accessible for purchase. They are available in various sizes and design options, allowing for more flexibility in finding the right board for your needs.
Glass dry erase boards, on the other hand, may be less readily available in physical stores. While they can still be found in some specialty office supply stores, they may have more limited options in terms of sizes and designs. Online retailers may offer a wider range of glass boards, making it easier to find the right fit for your office.
Customization options
Both melamine and glass dry erase boards offer customization options, but the extent may vary. Melamine boards can be customized with printed designs, grids, or lines, allowing for a more tailored experience. This can be particularly useful for offices or classrooms that require specific layouts or branding.
Glass dry erase boards, on the other hand, may have limited customization options due to the nature of the glass surface. While some glass boards can be custom printed with logos or designs, the options may be more limited compared to melamine boards. However, the minimalist and sleek look of glass boards can still complement any space with a touch of elegance.
Health and Safety
Chemical composition
Melamine boards are generally considered safe for use in office environments. The melamine surface is made from a resin that does not release harmful chemicals or toxins during use. This makes them suitable for busy environments such as classrooms or offices where multiple people may be using the board regularly.
Glass dry erase boards, on the other hand, are also considered safe to use. The tempered glass surface does not release any harmful chemicals and is non-porous, minimizing the risk of bacteria growth. This can be particularly important when it comes to maintaining a clean and hygienic environment.
Use in busy environments
Both melamine and glass dry erase boards can be used in busy environments, but they may have different considerations. Melamine boards are generally more resistant to scratches and wear, making them suitable for high-traffic areas or spaces where the board will be frequently used. They can withstand heavy use without showing visible signs of damage.
Glass dry erase boards, on the other hand, may require more care and attention in busy environments. While the glass surface is durable, it is more prone to visible scratches and stains if not handled properly. However, with regular cleaning and maintenance, glass boards can still maintain their functionality and appearance in busy environments.
Imagine a classroom where students are engaged, actively participating in discussions, and brainstorming ideas together. Now, envision a meeting room where colleagues are collaborating seamlessly, writing down their thoughts, and effortlessly erasing and updating information. custom melamine dry erase boards offer an innovative solution to enhance collaboration in both school and professional settings. These versatile boards provide a blank canvas for creativity and problem-solving, allowing individuals to express their ideas and thoughts clearly. Whether it’s in the classroom or the boardroom, custom melamine dry erase boards can revolutionize the way people work and learn, fostering an environment of collaboration and productivity.
Benefits of Custom Melamine Dry Erase Boards
Enhanced collaboration
custom melamine dry erase boards offer numerous benefits when it comes to collaboration. The large writing surface allows multiple individuals to contribute and share ideas, making it ideal for group work and brainstorming sessions. With a custom melamine dry erase board, you can easily foster collaboration and encourage everyone to participate.
Increased organization
One of the key advantages of using custom melamine dry erase boards is the ability to increase organization. You can use the board to create to-do lists, project timelines, or even a daily schedule. By visually organizing your tasks and goals, you can stay on track and ensure nothing gets overlooked.
Improved communication
Custom Melamine Dry Erase Boards also aid in improving communication. Whether you are a teacher explaining a complex concept, a manager presenting information to your team, or a healthcare professional discussing treatment plans, a visual aid can greatly enhance understanding. By using a custom melamine dry erase board, you can effectively convey your message and ensure everyone is on the same page.
Versatility and flexibility
Another great advantage of custom melamine dry erase boards is their versatility and flexibility. These boards can be used for a wide range of applications, from classrooms to boardrooms, hospitals to retail spaces. They are easily adaptable to different settings and can be customized to meet specific needs. Whether you need a large board for group discussions or a smaller one for personal use, custom melamine dry erase boards can be tailored to suit your requirements.
Factors to Consider When Choosing Custom Melamine Dry Erase Boards
Size and dimensions
The size and dimensions of a custom melamine dry erase board are important considerations. Think about the available wall space or the intended use of the board when determining the size you need. Consider whether you need a small board for personal use or a larger one for group collaboration.
Surface quality
Surface quality is crucial for a smooth writing experience and easy erasing. Look for a melamine surface that is durable, scratch-resistant, and easy to clean. The surface should also resist ghosting, which is the residual marking left after erasing.
Frame options
When choosing a custom melamine dry erase board, you have several frame options to consider. Common choices include aluminum frames, wood frames, or frameless options. Think about the aesthetic you want to achieve and the durability of the frame.
Mounting options
Consider the mounting options available for custom melamine dry erase boards. Depending on your needs and the available space, you can choose from options such as wall-mounted, mobile, or freestanding boards. Make sure the mounting system is secure and easy to install.
Customization options
Lastly, consider the customization options available. Custom melamine dry erase boards can be tailored to match your branding, include gridlines or templates, or even integrate a company logo. Discuss your requirements with the supplier to ensure you get the customization you need.
Different Applications of Custom Melamine Dry Erase Boards
Classrooms
Custom melamine dry erase boards are widely used in classrooms. They provide an interactive and engaging learning experience by allowing teachers to visually present information and involve students in active participation. These boards can be used for anything from teaching lessons and showcasing student work to organizing schedules and displaying reminders.
Boardrooms and meeting rooms
In boardrooms and meeting rooms, custom melamine dry erase boards enable effective communication and collaboration among team members. They are perfect for presenting ideas, discussing strategies, and brainstorming solutions. With a custom melamine dry erase board, you can keep the meeting focused and ensure all important points are captured.
Hospitals and healthcare facilities
Custom Melamine Dry Erase Boards are valuable tools in hospitals and healthcare facilities. They can be used for patient care, displaying medical charts, tracking treatment plans, and providing important information to staff and patients. These boards help improve communication and ensure everyone is informed and on the same page.
Retail and restaurant spaces
In retail and restaurant spaces, custom melamine dry erase boards can be used for various purposes. They can serve as menu boards, special offers display, or even as interactive customer feedback boards. The versatility of these boards allows businesses to adapt them to their specific needs and create a visually appealing and informative environment.
How to Use Custom Melamine Dry Erase Boards Effectively
Plan and outline your content
Before using a custom melamine dry erase board, take the time to plan and outline your content. Decide what information you want to convey and how you want to structure it. By having a clear plan, you can effectively organize your thoughts and make the most of the board’s space.
Use different colors and markers
To make your content more visually engaging and easier to understand, use different colors and markers on your custom melamine dry erase board. Colors can help highlight important points or categorize information, making it easier for viewers to follow along and comprehend the content.
Encourage participation
Custom melamine dry erase boards are meant to be interactive, so encourage participation from others. Invite individuals to come up and write or draw their ideas, and create an inclusive and collaborative atmosphere. This not only fosters engagement but also generates a sense of ownership and involvement.
Regularly update and maintain
To ensure your custom melamine dry erase board remains effective, make it a habit to regularly update and maintain it. Erase old content that is no longer relevant, clean the surface periodically to prevent ghosting or staining, and fix any damages promptly to keep the board in optimal condition.
Utilize additional features and accessories
Take advantage of additional features and accessories to enhance your custom melamine dry erase board experience. Attach magnetic strips or hooks to hold markers and erasers, use push pins to display documents or notes, or incorporate a custom-made overlay to create a grid or template system. These extras can greatly improve the usability and versatility of your board.
Tips for Cleaning and Maintaining Custom Melamine Dry Erase Boards
Use proper cleaning supplies
To keep your custom melamine dry erase board clean, use proper cleaning supplies. Avoid using abrasive materials or harsh chemicals that can damage the surface. Instead, use a non-abrasive cloth or sponge and a mild surface cleaner specifically designed for dry erase boards.
Remove stubborn stains
If stubborn stains appear on your custom melamine dry erase board, there are a few tricks to try. You can use a melamine foam eraser, also known as a magic eraser, to gently scrub away the stain. Alternatively, you can create a paste using baking soda and water and apply it to the stain, then wipe it away with a cloth.
Prevent ghosting and staining
To prevent ghosting and staining on your custom melamine dry erase board, make sure to erase the content promptly after use. Leaving markings on the board for an extended period can result in residue that is difficult to remove. Regularly clean the surface with a dry cloth to maintain its cleanliness and prevent ghosting.
Inspect and repair any damages
Regularly inspect your custom melamine dry erase board for any damages. If you notice scratches, dents, or other issues, address them promptly to prevent further damage. Depending on the severity of the damage, you may be able to repair it yourself or contact a professional for assistance.
Customization Options for Melamine Dry Erase Boards
Custom sizes and shapes
Custom melamine dry erase boards can be made in various sizes and shapes to suit your specific needs. Whether you require a small compact board or a large expansive one, the options are virtually limitless. Discuss your requirements with the supplier to determine the best size and shape for your custom board.
Logo and branding integration
If you want to incorporate your company logo or branding, custom melamine dry erase boards offer the perfect opportunity. You can have your logo prominently displayed on the board or choose a color scheme that aligns with your brand identity. This customization option allows you to reinforce your brand and create a cohesive visual experience.
Magnetic options
Some custom melamine dry erase boards can be made with magnetic surfaces. This feature enables you to use magnets to hold additional documents, notes, or other objects on the board. It adds an extra layer of functionality and convenience to your custom board.
Gridlines and templates
If you require a structured layout on your custom melamine dry erase board, gridlines and templates can be incorporated. Whether you need a calendar, a project timeline, or a specific grid system, these customization options make it easier to organize and present your content.
Choosing the Right Supplier for Custom Melamine Dry Erase Boards
Experience and reputation
When choosing a supplier for custom melamine dry erase boards, consider their experience and reputation. Look for a supplier who has been in the industry for a significant amount of time and has a solid track record of delivering quality products and services. Reading customer reviews and testimonials can provide valuable insights into the supplier’s reputation.
Quality of products
The quality of the custom melamine dry erase boards is of utmost importance. Ensure that the supplier uses high-quality materials and manufacturing processes that result in durable and long-lasting boards. Request samples or visit their showroom to examine the quality firsthand before making a decision.
Customization capabilities
Verify the supplier’s customization capabilities to ensure they can meet your specific requirements. Discuss your customization needs with them and inquire about their range of options and the level of customization they can provide. A good supplier will be able to work closely with you to bring your vision to life.
Customer service
Excellent customer service is crucial when choosing a supplier for custom melamine dry erase boards. Consider the supplier’s responsiveness, willingness to address your concerns, and ability to provide support when needed. A reliable supplier should be readily available to answer your questions and provide assistance throughout the ordering and customization process.
Comparing Custom Melamine Dry Erase Boards with Other Options
Whiteboards
Custom melamine dry erase boards are often compared with traditional whiteboards. While both serve similar purposes, there are some key differences. Melamine boards are generally more affordable, but they may not offer the same level of durability as higher-end whiteboards. Melamine boards also have a smoother surface, which some people prefer for writing and erasing.
Chalkboards
Chalkboards, on the other hand, use a completely different medium for writing. While they have a nostalgic appeal, they can be messy and require regular cleaning. Chalkboards may also produce more dust and may not offer the same level of clarity and visibility as melamine dry erase boards.
Glass marker boards
Glass marker boards offer a sleek and modern alternative to melamine dry erase boards. They have a smooth surface that is easy to write on and erase, and they are highly durable. However, glass marker boards tend to be more expensive and may require professional installation. They also require careful handling to avoid any damage.
Frequently Asked Questions about Custom Melamine Dry Erase Boards
Can custom melamine dry erase boards be used outdoors?
Custom melamine dry erase boards are primarily designed for indoor use. The melamine surface may not be able to withstand outdoor elements such as rain or direct sunlight, which can cause fading or warping. If you require a dry erase board for outdoor use, consider alternative materials such as porcelain or coated steel.
How do custom melamine dry erase boards differ from standard ones?
Custom melamine dry erase boards are specifically tailored to meet your unique requirements. They offer customization options in terms of size, shape, logo integration, and more. Standard dry erase boards, in contrast, are mass-produced and may not provide the same level of personalization.
What markers and erasers should be used on melamine boards?
To ensure the best performance and longevity of your melamine dry erase board, it is recommended to use low-odor, non-toxic dry erase markers and soft erasers specifically designed for dry erase boards. Avoid using permanent markers or abrasive erasers, as these can damage the surface and affect the erasability.
Conclusion
Custom melamine dry erase boards offer enhanced collaboration, increased organization, improved communication, and versatility in various applications. When choosing a custom melamine dry erase board, consider factors such as size, surface quality, frame and mounting options, and customization capabilities. Use these boards effectively by planning your content, incorporating colors and markers, encouraging participation, and regularly maintaining them. Cleaning and maintaining melamine boards require proper supplies and care. Customization options allow for tailored boards, including logo integration, magnetic surfaces, and gridlines. Choosing the right supplier involves considering their experience, product quality, customization capabilities, and customer service. Comparisons with other options like whiteboards, chalkboards, and glass marker boards highlight the unique features of melamine boards. FAQs provide additional information about melamine, outdoor use, differences from standard boards, and marker and eraser recommendations. With custom melamine dry erase boards, you can enjoy the benefits of collaborative and organized communication in various settings.
If you’re on the hunt for a whiteboard that won’t break the bank, look no further than affordable melamine dry erase boards. With their budget-friendly prices, these boards offer a practical solution for teachers, students, and professionals alike. Whether you need a handy tool for organizing your thoughts, presenting ideas, or keeping track of important information, these melamine dry erase boards are a reliable and cost-effective choice. Say goodbye to expensive alternatives and say hello to the perfect whiteboard for your needs.
Benefits of Melamine Dry Erase Boards
Affordable Option
Melamine dry erase boards are an excellent choice for those looking for an affordable option for their whiteboard needs. These boards are made from a melamine resin laminate, which is a cost-effective alternative to other materials such as porcelain or glass. The affordability of melamine boards makes them a popular choice for classrooms, small businesses, and even for personal use at home. Whether you need a whiteboard for brainstorming sessions, visual planning, or teaching, melamine boards offer a budget-friendly solution without sacrificing quality.
Versatility
One of the great benefits of melamine dry erase boards is their versatility. These boards are available in a variety of sizes, frame types, and surface qualities to suit different preferences and needs. Whether you need a small board for your home office or a large one for a conference room, you can find a melamine board that fits your requirements. Furthermore, melamine boards come in different colors, such as white or black, allowing you to choose a board that complements your space. The versatility of melamine dry erase boards makes them suitable for a wide range of settings, from offices and classrooms to homes and community centers.
Easy Maintenance
Another advantage of melamine dry erase boards is their easy maintenance. Cleaning these boards is a breeze, and you don’t need any specialized cleaning solutions. Simply use a soft dry eraser or a cloth to wipe away the markings. For stubborn stains, you can use a mild detergent mixed with water. The low-maintenance nature of melamine boards saves you time and effort, allowing you to focus on your work or presentation rather than worrying about keeping the board clean. Additionally, melamine boards are resistant to scratches and dents, ensuring that they retain their quality even with regular use.
Factors to Consider When Choosing Melamine Dry Erase Boards
Size
When choosing a melamine dry erase board, size is an important factor to consider. Think about how much space you have in your office, classroom, or other setting where the board will be used. If you have limited space, a smaller-sized board may be more suitable. On the other hand, if you have a large room or need to accommodate a larger audience, investing in a larger-sized board would be a better option. Consider your specific needs and the available space to determine the ideal size for your melamine board.
Frame Type
Melamine dry erase boards come in various frame types, each offering its own aesthetic and functionality. Common frame types include aluminum, wood, and plastic. Aluminum frames are lightweight, sturdy, and typically come in a silver or black finish, providing a sleek and modern look. Wood frames, on the other hand, add warmth and elegance to any space with their natural appearance. Plastic frames are often the most cost-effective option and are available in a wide range of colors. Consider the style and durability you desire in a frame when choosing your melamine board.
Surface Quality
The surface quality of a melamine dry erase board can greatly impact its functionality and durability. Look for a board with a smooth surface that allows for easy writing and erasing. Some melamine boards feature a low gloss surface, which reduces glare and improves visibility, making them ideal for well-lit spaces. Additionally, consider whether the board has a magnetic surface, as this feature allows you to conveniently attach documents, notes, or other magnetic accessories. By considering the surface quality of a melamine board, you can ensure that you choose a board that meets your specific requirements.
Different Types of Melamine Dry Erase Boards
Standard Melamine Boards
Standard melamine boards are the most common type of melamine dry erase boards available. These boards are made from a melamine resin laminate that is applied to a backing, typically a particleboard or a medium-density fiberboard (MDF). Standard melamine boards offer a smooth writing surface and are highly affordable, making them a popular choice for classrooms, offices, and other settings. However, it’s important to note that standard melamine boards are not magnetic.
Magnetic Melamine Boards
Unlike standard melamine boards, magnetic melamine boards have a magnetic receptive surface. This means that in addition to being used as a regular dry erase board, they can also hold magnetic accessories such as markers, erasers, and documents with magnetic backs. This feature comes in handy when you need to keep important information close at hand or want to enhance your presentations by attaching visual aids. Magnetic melamine boards are a versatile option that combines the functionality of a whiteboard with the convenience of holding magnetic objects.
Mobile Melamine Boards
Mobile melamine boards are designed for those who need the flexibility to move their whiteboard from one location to another. These boards typically come with wheels and a lock mechanism, allowing you to easily transport and secure the board in place. Mobile melamine boards are especially useful in educational and collaborative settings where the whiteboard needs to be moved around the room or between different rooms. Whether you’re a teacher conducting a lesson or a team leader facilitating a meeting, a mobile melamine board provides convenience and adaptability.
Comparing Melamine Boards with Other Whiteboard Options
Melamine vs Porcelain Boards
When comparing melamine boards with porcelain boards, the first notable difference is the price. Porcelain boards are generally more expensive than melamine boards, making melamine a more budget-friendly option. However, porcelain boards are known for their durability and resistance to stains and ghosting, making them a long-lasting investment. Melamine boards, while less expensive, may be more prone to staining and require more frequent cleaning to maintain their white appearance. When deciding between melamine and porcelain, consider your budget, durability needs, and preferred level of maintenance.
Melamine vs Glass Boards
Melamine boards and glass boards offer different aesthetics and functionalities. Glass boards have a sleek and modern appearance, adding a touch of elegance to any space. They are also highly durable, resistant to stains, and easy to clean. However, glass boards are typically more expensive than melamine boards. On the other hand, melamine boards are more affordable and offer a smooth writing surface. While melamine boards may not have the same level of durability as glass boards, they are still a great option for those on a tighter budget or in less demanding environments.
Melamine vs Painted Drywall
Painted drywall is a common alternative to melamine boards, especially in homes or DIY projects. While painted drywall can function as a temporary writing surface, it lacks the durability and convenience of a melamine board. Drywall can be easily damaged by improper use or erasing, and its porous surface may stain and become harder to clean over time. Melamine boards, on the other hand, are specifically designed for writing and erasing, ensuring a smooth and long-lasting surface. Additionally, melamine boards are more resistant to stains and scratches compared to painted drywall, making them a superior choice for whiteboard use.
Tips for Proper Installation and Mounting
Choosing the Right Mounting Method
When installing a melamine dry erase board, it’s crucial to choose the right mounting method for your specific needs and the type of wall you have. Most melamine boards can be mounted using screws or adhesive mounts. If you’re mounting the board on a drywall, using wall anchors along with screws is recommended to ensure proper stability. However, if you prefer a non-permanent mounting solution, adhesive mounting strips or hooks can be used. Be sure to follow the manufacturer’s instructions and weight limits when choosing a mounting method to prevent damage to your wall or board.
Ensuring Proper Stability
To ensure that your melamine board remains stable and secure on the wall, it’s important to consider the weight and size of the board in relation to the type of mounting you choose. Larger boards may require additional support to avoid sagging or falling off the wall. If you’re mounting the board using screws, make sure they are securely fastened into the wall studs or use wall anchors to provide stability. If you’re opting for adhesive mounting, ensure that the adhesive strips or hooks are properly applied and aligned to hold the weight of the board. Taking the time to ensure proper stability during installation will prevent accidents and prolong the lifespan of your melamine board.
Positioning the Board at an Optimal Height
The height at which you position your melamine dry erase board is an important consideration for optimal usability. For standard use, the ideal height is generally around eye level or slightly higher. This allows for comfortable writing and viewing without straining your neck or eyes. When positioning the board, consider the average height of the individuals who will be using it, whether it’s children in a classroom or adults in an office. Additionally, ensure that there is enough clearance below the board for any support trays or accessory holders you plan to attach. By positioning the board at an optimal height, you create a more user-friendly environment and enhance the overall experience of using the whiteboard.
Popular Brands and Models
Brand A – Model X
Brand A is well-known for producing high-quality melamine dry erase boards that are both affordable and durable. Model X, in particular, has received rave reviews for its smooth writing surface and easy erasability. It is available in different sizes to suit various needs, from small personal boards to large conference room boards. Brand A’s Model X is also known for its sleek aluminum frame, providing a modern and professional look. With the combination of affordability and quality, Brand A’s Model X is a popular choice among businesses, educational institutions, and individuals alike.
Brand B – Model Y
Brand B offers a range of melamine dry erase boards, and Model Y stands out for its exceptional magnetic capabilities. This model features a magnetic receptive surface, allowing users to attach and display documents, magnets, and other magnetic accessories. The high-quality melamine surface ensures smooth writing and easy erasing, while the magnetic feature adds a layer of functionality. Whether you need a magnetic board for presentations, collaborative work, or simply to keep important documents within reach, Brand B’s Model Y provides a reliable and versatile solution.
Brand C – Model Z
Brand C’s Model Z is highly regarded for its mobile functionality. This melamine dry erase board comes with sturdy caster wheels, allowing you to easily move the board to different locations or lock it in place for stability. Model Z is available in various sizes, ensuring that you can find the perfect board for your needs. With its durable construction, smooth writing surface, and convenient mobility, Brand C’s Model Z is a popular choice for educators, presenters, and anyone who requires a portable whiteboard solution.
Where to Purchase Affordable Melamine Dry Erase Boards
Online Retailers
There are numerous online retailers that offer a wide selection of melamine dry erase boards at competitive prices. Popular online marketplaces and office supply stores often have a dedicated section for whiteboards and offer a range of brands, models, sizes, and price options to suit different needs and budgets. When purchasing online, be sure to read customer reviews, check the specifications, and confirm the return policy to ensure a satisfactory buying experience.
Local Office Supply Stores
If you prefer a more hands-on approach before making a purchase, visiting a local office supply store is a great option. Many office supply stores have a variety of melamine dry erase boards on display, allowing you to see the different sizes, frame types, and surface qualities in person. This can help you make a more informed decision and ensure that the board meets your expectations. Additionally, some stores may offer in-store promotions or discounts, reducing the overall cost of the board.
Wholesale Suppliers
For those looking to purchase melamine dry erase boards in bulk or at a discounted price, wholesale suppliers are a valuable resource. Wholesale suppliers often provide cost-effective solutions for businesses, educational institutions, or organizations that require multiple boards. By purchasing from wholesale suppliers, you can enjoy significant savings while still obtaining high-quality melamine boards. Contact local suppliers or search online directories to find wholesale options in your area.
Care and Maintenance of Melamine Dry Erase Boards
Cleaning Techniques
Cleaning a melamine dry erase board is a straightforward process. To remove dry erase marker residue, use a soft dry eraser or a cloth to wipe off the markings. For tougher stains, a mild detergent diluted in water can be used. Apply the solution to the stained area and gently scrub with a soft cloth or sponge. It’s important to rinse the board thoroughly with clean water and dry it afterward. Avoid using abrasive cleaners or scrub brushes, as they can damage the melamine surface. By regularly cleaning your melamine board, you can maintain its pristine appearance and ensure optimal functionality.
Avoiding Stains and Ghosting
While melamine dry erase boards are relatively stain-resistant, it’s important to take precautions to prevent stubborn stains and ghosting. Use only dry erase markers specifically designed for whiteboards, as other types of markers may leave permanent marks or be more challenging to erase. Avoid using markers with a high alcohol content, as they can penetrate the melamine surface and cause staining. Additionally, try to clean the board promptly after use to prevent marker residue from being absorbed into the surface. By using appropriate markers and practicing proper maintenance, you can minimize the risk of stains and ghosting on your melamine board.
Replacing or Refurbishing Damaged Surfaces
Over time, melamine dry erase boards may become damaged or worn out. If the surface becomes scratched, discolored, or difficult to erase, it may be time to consider replacing or refurbishing the board. Some melamine boards have a replaceable surface, allowing you to simply remove the damaged surface and attach a new one. Check with the manufacturer or supplier to inquire about replacement surfaces for your specific board. Alternatively, if the board is still in good condition but requires some refurbishing, you can try using a melamine cleaner or a melamine paint refresh kit to restore its original appearance. By promptly addressing any damage or wear, you can extend the lifespan of your melamine board.
Creative Uses for Melamine Dry Erase Boards
Brainstorming Sessions
Melamine dry erase boards are excellent tools for brainstorming sessions. Whether you’re working individually or as a group, having a large whiteboard to jot down and organize ideas is highly effective. The smooth writing surface of melamine boards allows for quick and easy note-taking, drawing diagrams, or creating mind maps. You can also use different colored markers to visually categorize and prioritize ideas. Melamine boards offer the space and flexibility needed for productive brainstorming, helping you generate and develop creative solutions.
Visual Planning
Planning and organizing information visually is made easy with melamine dry erase boards. Whether you’re mapping out project timelines, creating schedules, or tracking progress, a whiteboard provides a tangible and dynamic platform for visual planning. The large surface area of melamine boards allows you to see the bigger picture and make adjustments as needed. You can use different color codes, labels, and shapes to represent different elements, making the planning process more intuitive and engaging. By utilizing a melamine board for visual planning, you can enhance teamwork, clarity, and efficiency.
Teaching and Education
Melamine dry erase boards are indispensable tools in both traditional and modern educational settings. Teachers can utilize these boards to illustrate concepts, demonstrate problem-solving methods, or engage students in interactive learning activities. The large writing area of melamine boards ensures that all students can easily see the content being presented, fostering an inclusive learning environment. Additionally, the boards can be used for collaborative learning, where students can work together on projects, solve puzzles, or take turns presenting. With their affordability, versatility, and ease of use, melamine dry erase boards are an essential resource for educators.
Conclusion
Melamine dry erase boards offer an affordable and versatile solution for various whiteboard needs. With their budget-friendly price tag, these boards are accessible to individuals and organizations with tight budgets. The versatility of melamine boards is evident in the wide range of sizes, frame types, and surface qualities available. Whether you need a small board for personal use or a large board for professional presentations, there is a melamine board to suit your needs. Maintenance is a breeze with melamine boards, as they are easy to clean and resistant to scratches and dents. By considering factors such as size, frame type, and surface quality, you can make an informed choice when purchasing a melamine dry erase board.
While melamine boards excel in their affordability and versatility, it’s important to compare them with other whiteboard options to find the best fit for your specific requirements. Consider factors such as durability, aesthetics, and cost when comparing melamine boards with porcelain or glass boards. Likewise, weigh the pros and cons of melamine boards compared to painted drywall if you’re considering a DIY approach.
Proper installation and mounting are essential to ensure your melamine board remains stable and secure. Choose the right mounting method based on your wall type and always prioritize stability when selecting your mounting accessories. Position the board at an optimal height to ensure comfortable writing and viewing without straining.
When it comes to purchasing melamine dry erase boards, there are various options available. Online retailers offer convenience and a wide selection, while local office supply stores allow you to see the boards in person before making a decision. For bulk purchases or discounted prices, consider reaching out to wholesale suppliers.
Taking care of your melamine board is crucial to maintain its appearance and functionality. Clean the board regularly using appropriate cleaning techniques and be mindful of using only dry erase markers designed for whiteboards. Avoid stains and ghosting by following best practices and promptly cleaning the board after use.
In addition to their traditional uses, melamine dry erase boards can be used creatively for brainstorming sessions, visual planning, and educational purposes. The large writing area and flexibility of a melamine board make it an excellent tool for generating and organizing ideas, planning projects, and engaging students in interactive learning.
In conclusion, melamine dry erase boards offer an affordable and versatile solution for various whiteboard needs. By considering your specific requirements and budget, you can find the perfect melamine board to meet your needs. Whether it’s for brainstorming, planning, or teaching, melamine dry erase boards provide an accessible and effective platform for communication and collaboration.
So, you’re in the market for a melamine dry erase board and wondering how much it’s going to set you back? Well, you’ve come to the right place. In this article, we’ll uncover the price range you can expect to find for melamine dry erase boards. From budget-friendly options to more high-end choices, we’ll give you the lowdown on what you can expect to pay and what factors might influence the cost. So sit back, relax, and let’s find out how much a melamine dry erase board is going to cost you.
Factors Affecting the Cost
When it comes to purchasing a melamine dry erase board, there are several factors that can affect the cost. Understanding these factors will help you make an informed decision and find the right board that fits your needs and budget.
Quality of Melamine
The quality of the melamine used in the dry erase board can greatly influence its cost. Higher quality melamine tends to be more durable and resistant to ghosting, which is when marker ink leaves behind faint marks even after erasing. While boards with high-quality melamine may be more expensive, they often offer better performance and longevity.
Size of the Board
The size of the board is another significant factor that affects the cost. Smaller boards, such as those designed for personal use or small spaces, are typically more affordable compared to larger boards meant for classrooms or conference rooms. The larger the board, the more material is required, resulting in a higher price.
Frame Material
The material used for the board’s frame can also impact the cost. Common frame materials include aluminum, wood, and plastic. Aluminum frames are usually the most durable and long-lasting, but they can be more expensive. Wood frames add a touch of elegance but may come at a higher price point. Plastic frames are generally the most affordable option.
Board Brand
The brand of the melamine dry erase board can also affect its cost. Certain brands are well-known for their quality and reputation, and their boards may be priced higher as a result. However, there are also lesser-known brands that offer good quality at a more affordable price. It’s essential to research different brands and compare their prices and customer reviews to find the best value for your money.
Additional Features
Some melamine dry erase boards may come with additional features that can impact the cost. For example, some boards have built-in gridlines or calendars, while others may have a magnetic surface for added functionality. These extra features can increase the price, so it’s important to consider whether they are necessary for your specific needs.
Average Cost of Melamine Dry Erase Boards
Now that we’ve discussed the factors that influence the cost of melamine dry erase boards, let’s take a look at the average prices you can expect to find for different sizes of boards.
Small-Sized Boards
Small-sized melamine dry erase boards, typically measuring around 18×24 inches, are ideal for personal use or small spaces like home offices or cubicles. These boards are usually the most affordable option and can range in price from $10 to $30.
Medium-Sized Boards
Medium-sized boards, ranging from 24×36 inches to 36×48 inches, are commonly used in classrooms or small meeting rooms. The cost of these boards can vary based on factors such as the brand and frame material, but you can generally expect to pay between $30 and $100.
Large-Sized Boards
Large-sized melamine dry erase boards, measuring around 48×72 inches, are typically found in conference rooms or large classrooms. Due to their size and material requirements, these boards tend to be more expensive. The average price for a large-sized melamine dry erase board ranges from $100 to $300.
Extra-Large Boards
For those in need of even larger boards, extra-large options measuring 72×96 inches or larger are available. These boards are commonly used in lecture halls, boardrooms, or other sizable spaces. The cost of extra-large melamine dry erase boards can range from $300 to $800 or more, depending on the brand and additional features.
Price Comparison of different Brands
To provide a comprehensive overview of the cost of melamine dry erase boards, let’s compare prices of various brands that are popular in the market.
Brand A
Brand A is known for its high-quality melamine dry erase boards. Their small-sized boards can range from $20 to $40, medium-sized boards from $40 to $80, large-sized boards from $90 to $200, and extra-large boards from $200 to $500.
Brand B
Brand B offers a range of melamine dry erase boards at competitive prices. Their small-sized boards can be found between $15 and $30, medium-sized boards between $30 and $60, large-sized boards between $80 and $150, and extra-large boards between $150 and $400.
Brand C
Brand C focuses on affordability without compromising quality. Their small-sized boards range from $10 to $25, medium-sized boards from $25 to $50, large-sized boards from $70 to $120, and extra-large boards from $120 to $350.
Brand D
Brand D is known for its premium quality and innovative features. Their small-sized boards can be priced between $30 and $50, medium-sized boards between $50 and $100, large-sized boards between $100 and $250, and extra-large boards between $250 and $800.
It’s important to note that these prices are just an estimate and may vary depending on the specific retailer you choose to purchase from.
Economical Options
Not everyone needs or wants to spend a significant amount of money on a melamine dry erase board. Fortunately, there are several economical options available that can suit both tight budgets and specific requirements.
Budget-Friendly Brands
There are several budget-friendly brands that offer decent quality melamine dry erase boards at affordable prices. These boards may not have all the bells and whistles of high-end options but serve the purpose of a standard dry erase board. Prices for small-sized budget-friendly boards usually range from $10 to $20, while medium-sized boards can be found between $20 and $40.
Secondhand Boards
Purchasing a secondhand melamine dry erase board is another cost-effective option. Many online platforms and local classifieds often have used boards listed at significantly reduced prices. While buying secondhand, it’s essential to thoroughly inspect the board for any damages or excessive wear. Prices for secondhand boards can vary, but you can usually find small-sized boards between $5 and $15, medium-sized boards between $15 and $30, and large-sized boards between $30 and $100.
Discounts and Sales
Keep an eye out for discounts and sales offered by retailers. Especially during back-to-school promotions or holiday seasons, you may find melamine dry erase boards at discounted prices. These deals can help you save money without compromising on quality. It’s beneficial to subscribe to newsletters or follow retailers on social media to stay informed about any upcoming sales or special offers.
Premium Options
If you’re looking for the best quality and are willing to invest more money, there are several premium options available in the market.
High-End Brands
High-end brands offer melamine dry erase boards that are built to last and provide excellent performance. These boards often come with additional features such as magnetic surfaces or built-in grids. Prices for high-end small-sized boards can range from $30 to $60, medium-sized boards from $60 to $120, large-sized boards from $120 to $250, and extra-large boards from $250 to $800.
Ultra-Durable Boards
Ultra-durable melamine dry erase boards are specially designed to withstand heavy use and resist scratches and stains. These boards are ideal for busy classrooms or workplaces where durability is a top priority. Prices for ultra-durable small-sized boards can vary between $20 and $40, medium-sized boards from $40 to $80, large-sized boards from $80 to $200, and extra-large boards from $200 to $600.
Luxury Designs
For those who prioritize aesthetics and want a melamine dry erase board that is as visually appealing as it is functional, luxury designs are available. These boards often feature premium frame materials and sophisticated designs, adding a touch of elegance to any space. Prices for luxury small-sized boards range from $40 to $80, medium-sized boards from $80 to $150, large-sized boards from $150 to $300, and extra-large boards from $300 to $800.
Additional Costs
Before finalizing your purchase decision, it’s important to consider any additional costs that may be associated with your melamine dry erase board.
Installation
If you require professional installation for your dry erase board, it’s important to factor in the cost of installation services. Some retailers offer installation services at an additional cost, while others provide detailed instructions for self-installation. The installation cost can vary depending on the size and complexity of the installation required.
Accessories
In addition to the board itself, you may need to purchase accessories such as markers, erasers, and cleaning solutions. While these are relatively affordable, these costs can add up over time. It’s important to consider the ongoing expenses of maintaining your melamine dry erase board and budget accordingly.
Where to Buy
Now that you have a better understanding of the cost factors and options available for melamine dry erase boards, let’s explore different places where you can purchase them.
Office Supply Stores
Office supply stores are a popular choice for purchasing melamine dry erase boards. These stores often offer a wide variety of sizes, brands, and price ranges to choose from. Additionally, you can also find accessories and installation services at some office supply stores.
Online Retailers
Online retailers provide convenience and a vast selection of melamine dry erase boards. E-commerce platforms offer the advantage of easily comparing prices, reading customer reviews, and browsing various brands and styles. However, it’s important to factor in shipping costs and delivery times when purchasing online.
Wholesalers
Wholesalers are another option to consider if you’re looking to purchase melamine dry erase boards in bulk or require a large number of boards for a commercial or educational setting. Wholesalers often offer discounted prices for bulk purchases and may even provide additional services such as customization options.
Tips for Finding the Best Price
To help you find the best price for a melamine dry erase board, here are a few tips to keep in mind during your search:
Compare Prices
Take the time to compare prices across different brands, sizes, and retailers to ensure you’re getting the best value for your money. Don’t forget to consider any additional features or special promotions that may add value to your purchase.
Consider Quality
While price is an essential factor, it’s equally important to consider the quality of the melamine dry erase board. Investing in a higher quality board might save you money in the long run by providing better performance and durability.
Look for Sales and Discounts
Keep an eye out for sales, discounts, and promotions offered by retailers. Timing your purchase during seasonal or holiday sales can help you secure a better deal. Subscribing to newsletters or following retailers on social media can ensure you’re always informed of any upcoming promotions.
Read Customer Reviews
Customer reviews can provide valuable insights into the quality and performance of melamine dry erase boards. By reading reviews, you can learn from others’ experiences and make a more informed decision.
Affordability: Melamine dry erase boards are generally more affordable compared to other types of whiteboards such as glass or porcelain.
Lightweight: These boards are lightweight, making them easy to hang or move around as needed.
Easy to Clean: Melamine surfaces are easy to erase and maintain with proper cleaning solutions.
Versatile: Melamine dry erase boards can be used in various settings, including classrooms, offices, homes, and more.
Cons
Durability: While durable, melamine boards are more susceptible to scratches, stains, and ghosting compared to porcelain or glass boards.
Lifespan: The lifespan of melamine boards may be shorter compared to other types of whiteboards.
Limited Features: Melamine boards often lack additional features such as magnetic surfaces or built-in grids.
Conclusion
When considering the cost of a melamine dry erase board, it’s important to take into account factors such as the quality of melamine, size of the board, brand, additional features, and frame material. Depending on your budget and requirements, there is a wide range of options available, from economical boards to high-end, premium choices. By comparing prices, considering quality, and looking for sales and discounts, you can find the best melamine dry erase board that fits your needs and budget. Remember to consider any additional costs such as installation and accessories, and explore different purchasing options such as office supply stores, online retailers, and wholesalers. Lastly, weigh the pros and cons of melamine dry erase boards to ensure you make an informed decision and choose the right board for your specific needs.
So you’re considering using melamine boards for your next project? Well, before you start, it’s important to weigh the advantages and disadvantages of these boards. On the bright side, melamine boards are known for their durability, affordability, and resistance to moisture and staining. They also come in a wide range of colors and designs, making them a versatile choice for both practical and decorative purposes. However, it’s worth noting that melamine boards can be prone to chipping and cracking, and they may not offer the same level of strength and longevity as solid wood. With that in mind, let’s take a closer look at the pros and cons of using melamine boards.
Advantages of Melamine Boards
Durable and Long-lasting
When it comes to durability, melamine boards are hard to beat. Made from a composite wood material that is fortified with melamine resin, these boards are incredibly strong and can withstand heavy use and abuse without showing signs of wear and tear. Whether you’re using them for shelving units, cabinets, or furniture, melamine boards are built to last.
Versatile Design Options
One of the major advantages of melamine boards is the wide range of design options available. Melamine boards are available in numerous colors, patterns, and finishes, allowing you to choose the perfect style to complement your interior design. Whether you prefer a classic wood grain finish or a bold solid color, melamine boards offer endless possibilities for creating a customized look.
Easy to Clean and Maintain
melamine boards are incredibly easy to clean and maintain, making them a popular choice for high-traffic areas and busy households. The smooth and non-porous surface of melamine boards makes them resistant to stains and spills, and they can be easily wiped clean with a damp cloth or mild cleaning solution. Unlike natural wood, melamine boards do not require regular polishing or sealing, saving you time and effort in the long run.
Affordable Alternative
One of the biggest advantages of melamine boards is their affordability. Compared to solid wood or other composite materials, melamine boards offer a cost-effective solution for a wide range of applications. Whether you’re working on a large-scale project or a small DIY endeavor, melamine boards allow you to achieve a high-quality and professional look without breaking the bank.
Resistant to Heat and Moisture
melamine boards are highly resistant to heat and moisture, making them suitable for use in kitchens, bathrooms, and other areas prone to humidity and temperature fluctuations. Unlike natural wood, melamine boards will not warp, swell, or rot when exposed to moisture. This moisture resistance also makes melamine boards a good choice for outdoor applications such as decks and fences.
Disadvantages of Melamine Boards
Lack of Natural Aesthetics
While melamine boards offer a wide range of design options, some people may find that they lack the natural aesthetics of real wood. The simulated wood grain patterns and solid colors of melamine boards may not have the same visual appeal and warmth as natural wood. However, advancements in manufacturing techniques have helped to improve the overall look and texture of melamine boards, making them more closely resemble real wood.
Prone to Chipping and Scratching
One drawback of melamine boards is that they can be prone to chipping and scratching, especially along the edges and corners. The thin layer of melamine resin that covers the composite wood material is not as strong as solid wood, making it more susceptible to damage from impact or abrasive materials. However, regular maintenance and proper usage can help minimize the risk of chipping and scratching.
Limited Repair Options
Unlike solid wood, melamine boards offer limited repair options. Once a melamine board is chipped or damaged, it is difficult to repair or refinish. In most cases, the damaged section will need to be replaced, which can be time-consuming and costly. It’s important to take extra precautions to prevent damage to melamine boards, such as using protective edge banding and avoiding sharp objects.
Toxicity Concerns
One concern with melamine boards is the potential release of formaldehyde, a toxic compound commonly used in the manufacturing process of melamine resin. However, reputable manufacturers adhere to strict regulations and industry standards to ensure that melamine boards meet safety requirements. It’s essential to choose melamine boards from trusted suppliers and inquire about the formaldehyde emission levels to ensure the health and safety of your living or working environment.
Less Structural Strength
Compared to solid wood or other structural materials, melamine boards have less structural strength. They are not recommended for applications that require heavy loads or support. While melamine boards are sturdy enough for most everyday uses, it is important to consider the weight-bearing capacity and structural requirements of your project before choosing melamine boards as the primary material.
In conclusion, melamine boards offer several advantages such as durability, versatile design options, easy maintenance, affordability, and resistance to heat and moisture. However, there are some disadvantages to consider, including the lack of natural aesthetics, susceptibility to chipping and scratching, limited repair options, potential toxicity concerns, and less structural strength. By weighing these pros and cons, you can make an informed decision on whether melamine boards are the right choice for your specific needs and preferences.
So you’ve decided to install melamine boards in your home but don’t quite know where to start? Look no further, because this step-by-step guide is here to help you out. From prepping the surface to finishing touches, we’ll walk you through each stage of the installation process, providing expert tips and tricks along the way. Whether you’re a seasoned DIYer or a novice looking to tackle a new project, this comprehensive guide will ensure that your melamine board installation is a success. Let’s get started!
Types of Melamine Boards
Before diving into the installation process, it’s important to understand the different types of melamine boards available:
Standard Melamine Board: The most common type, suitable for general use.
Moisture-Resistant Melamine: Ideal for bathrooms and kitchens.
Fire-Resistant Melamine: Designed for areas requiring additional safety measures.
Decorative Melamine: Comes in various patterns and colors for aesthetic appeal.
Whiteboard Melamine: Specifically designed for use as dry-erase surfaces.
Each type has its unique properties and applications, so choose the one that best suits your needs.
Comparison with Other Materials
When considering melamine boards for your project, it’s helpful to understand how they compare to other materials:
Cost: Generally more affordable than solid wood or high-end laminates.
Durability: More resistant to scratches and wear than painted surfaces.
Maintenance: Easier to clean and maintain compared to untreated wood.
Installation: Typically simpler to install than tile or solid wood paneling.
Versatility: Available in a wide range of colors and finishes.
Consider these factors when deciding if melamine boards are the right choice for your project.
Preparation
Before you begin installing melamine boards, it’s important to gather all the necessary tools and materials. You will need a circular saw, a straight edge or ruler, a measuring tape, a putty knife, finishing nails, adhesive, clamps, safety goggles, gloves, a dust mask, a damp cloth, and a mild detergent. Once you have all these tools and materials, you can move on to measuring and marking the installation area.
Measure and mark the installation area accurately using a measuring tape and a pencil. This will ensure that you have the correct dimensions for your melamine boards. Make sure to take into account any obstacles or fixtures that may affect the installation, such as electrical outlets or switches. Marking the installation area will also help you visualize the layout and determine where each board will go.
After marking the installation area, it’s important to prepare the surface before installing the melamine boards. Clean the walls thoroughly to remove any dirt, dust, or debris that may affect the adhesive’s bonding strength. If the walls are painted, consider sanding them lightly to create a rougher surface for better adhesion. Additionally, check for any level or straightness issues in the wall. If the wall is uneven or not straight, it’s a good idea to address these issues before proceeding with the installation.
DIY vs. Professional Installation
While this guide focuses on DIY installation, it’s worth considering the pros and cons of professional installation:
DIY Pros:
Cost-effective
Allows for customization
Provides a sense of accomplishment
DIY Cons:
Time-consuming
Requires specific tools and skills
Potential for mistakes
Professional Installation Pros:
Expertise and experience
Time-saving
Often includes warranty
Professional Installation Cons:
Higher cost
Less personal involvement
Potential scheduling conflicts
Assess your skills, budget, and time constraints to decide which option is best for you.
Cutting Melamine Boards
Once the installation area is prepared, you can start cutting the melamine boards to fit the measurements. Measure and mark the boards according to the dimensions you determined during the preparation stage. Use a measuring tape and a pencil to ensure accurate measurements.
To make the cuts, you’ll need a circular saw. Align the saw blade with the marked line on the board and carefully cut along the line. Make sure to go slow and steady to ensure straight and clean cuts. Using a straight edge as a guide can also help you achieve straight cuts.
Alternative Cutting Methods
While a circular saw is ideal, you can also cut melamine boards using:
Hand Saw: For straight cuts without power tools. Use a fine-toothed saw and cut slowly to avoid chipping.
Jigsaw: Useful for curved cuts or working in tight spaces.
Table Saw: Excellent for long, straight cuts if you have access to one.
Scoring Knife: For thinner melamine sheets, score deeply and snap along the line.
Always wear safety gear and work in a well-ventilated area, regardless of the cutting method.
Installing Melamine Boards
Now that you have your melamine boards cut to size, you can start installing them. Begin with the first board and apply adhesive on the back of the board. The adhesive should be spread evenly across the entire back surface to ensure a strong bond with the wall.
Press the board firmly against the wall, making sure it is aligned with the marked installation area. Apply pressure evenly to ensure proper adhesion. Once the board is in place, secure it further by using finishing nails. Place the nails along the edges of the board, making sure to drive them into the wall for added stability.
Continuing Installation
After installing the first board, you can move on to the next one. Measure and cut the next board according to the dimensions needed for the remaining space. Fit the cut board into place, ensuring that it aligns properly with the previously installed board.
To achieve uniform spacing between boards, use a spacer. This can be a small piece of wood or plastic that you place between the boards before securing them to the wall. The spacer will help maintain consistent spacing and prevent the boards from shifting.
Once the board is in position, secure it to the wall by following the same steps as before. Apply adhesive on the back of the board, press it firmly against the wall, and secure it with finishing nails.
Installing Corner Boards
When you reach the corners of the installation area, you will need to install corner boards. Measure and mark the corner boards according to the dimensions of the corners. Cut the boards to size using a circular saw, ensuring they fit snugly into the corner space.
Apply adhesive on the back of the corner boards and secure them against the walls. Use clamps to provide additional support and hold the corner boards in place while the adhesive sets. This will ensure that the corner boards are securely installed and won’t shift over time.
Working Around Obstacles
When installing melamine boards, you may encounter obstacles like electrical outlets or plumbing. Here’s how to handle them:
Measure and mark the location of the obstacle on your board.
Use a jigsaw or hole saw to cut out the marked area.
Test fit the board to ensure the cut-out aligns properly.
Sand the edges of the cut-out for a smooth finish.
Install the board as usual, making sure not to cover or damage the obstacle.
Always turn off electricity and water before working near outlets or plumbing fixtures.
Filling Joints and Seams
To achieve a seamless look, it’s important to fill in the joints and seams between the melamine boards. Prepare a melamine filler paste according to the manufacturer’s instructions. The filler paste should have a consistency that is easy to work with and spreads smoothly.
Fill all the joints and seams with the melamine filler paste, using a putty knife. Make sure to apply an even layer of filler, smoothing it out as you go. This will help achieve a level surface and conceal any gaps between the boards. Allow the filler to dry completely before moving on to the next step.
Once the filler has dried, sand it lightly to achieve a smooth and level surface. Use sandpaper or a sanding block to remove any excess filler and create a seamless finish. Sanding will also ensure that the surface is ready for the next step of the installation process.
Applying Edge Banding
To give your melamine board installation a finished look, you can apply edge banding to the exposed edges of the boards. Measure and cut the edge banding to fit the length of each exposed edge. Make sure to cut the banding slightly longer than needed to accommodate trimming.
Apply adhesive to both the edge banding and the corresponding edge of the board. Press the edge banding firmly onto the board, ensuring it is aligned and sticks securely. Trim any excess banding using a utility knife, ensuring a clean and neat finish.
Sanding and Finishing
Once the melamine boards and edge banding are in place, it’s important to sand the surface to achieve a smooth and professional finish. Use sandpaper or a sanding block to sand the surface of the boards, removing any imperfections or rough edges. Sanding will also help promote better adhesion of any sealers or finishes you choose to apply.
After sanding, remove all the dust using a damp cloth. Wipe down the entire surface of the boards, making sure to remove any debris or particles. This will ensure a clean surface for the next step.
To protect the surface and enhance its appearance, you can apply a melamine sealer or primer. Follow the manufacturer’s instructions for the specific product you choose. Apply the sealer or primer evenly, using a brush or roller. Allow it to dry completely before proceeding to the final step.
For an even more enhanced and durable finish, you can consider painting the melamine boards or applying a melamine topcoat. Choose a paint or topcoat specifically designed for melamine surfaces for best results. Follow the manufacturer’s instructions for application and drying times.
Troubleshooting Common Issues
Even with careful planning, you might encounter some issues. Here are solutions to common problems:
Gaps between boards: Fill with color-matched caulk or additional filler.
Uneven walls: Use shims behind the boards to create a level surface.
Chipped edges: Repair with melamine edge banding or filler.
Bubbling or peeling: Remove and reapply adhesive, ensuring full coverage.
Visible fasteners: Cover with color-matched caps or filler.
Remember, patience is key when troubleshooting. Take your time to achieve the best results.
Cleaning and Maintenance
To keep your melamine board installation looking its best, it’s important to regularly clean it with a mild detergent. Use a soft cloth or sponge to gently wipe down the surface, removing any stains or dirt. Avoid using abrasive cleaners or scrubbing too vigorously, as this can damage the surface of the boards.
Periodically, inspect the melamine boards for any signs of damage or wear. Check for any chips, cracks, or peeling edges. If you notice any damage, it’s important to repair or replace the affected sections promptly to prevent further deterioration.
Safety Precautions
During the melamine board installation process, it’s essential to prioritize safety. Always wear safety goggles and gloves to protect your eyes and hands from any potential hazards. When cutting or sanding the boards, use a dust mask to prevent inhalation of particles.
Ensure proper ventilation in your workspace, especially when using adhesives or finishes. Open windows or doors, or use fans to circulate fresh air and reduce the concentration of fumes.
Lastly, always follow the manufacturer’s instructions for adhesives and finishes. Different products may have specific application, drying, and safety guidelines that you should adhere to for optimal results and safety.
By following these step-by-step instructions and safety precautions, you can successfully install melamine boards and achieve a professional and durable finish in your space. Happy installing!
Environmental Considerations
When using melamine boards, consider their environmental impact:
Recyclability: While melamine itself is not recyclable, some manufacturers offer recycling programs for offcuts.
VOC Emissions: Choose low-VOC adhesives and finishes to minimize indoor air pollution.
Longevity: Proper installation and maintenance can extend the life of your melamine boards, reducing waste.
Sustainable Sourcing: Look for melamine boards made from sustainably sourced materials.
By considering these factors, you can make more environmentally conscious choices in your home improvement projects.
So you’re in need of a dry erase board that perfectly suits your needs? Look no further! With our simple guide, you’ll learn how to create your own customizable dry erase board. Whether you need a small-sized board for personal use or a large one for presentations, we’ve got you covered. Say goodbye to standard, generic boards and say hello to a custom solution that will make your life easier and more productive. Get ready to unleash your creativity and design a dry erase board that is uniquely yours!
Choosing the Right Size
Consider the Space Available
When choosing a dry erase board, it’s important to consider the amount of space you have available. You need to make sure that the board will fit comfortably in the location you have in mind. Measure the wall or surface where you plan to mount the board and consider how much wall space you can dedicate to it. You don’t want to end up with a board that is too large for the space or, on the other hand, one that is too small and doesn’t serve its purpose effectively.
Determine the Purpose
Another factor to consider when choosing the right size for your dry erase board is its purpose. Are you planning to use it for personal use in your home office or as a teaching tool in a classroom setting? The intended purpose of the board will often dictate the size you should choose. For personal use, a smaller board may be suitable, while a larger board may be necessary for group presentations or classrooms where visibility from all angles is important.
Evaluate the Audience
The audience that will be using the dry erase board is also an important consideration. If you are purchasing the board for a classroom or conference room, you will need to ensure that it is large enough to be visible to everyone in the room. On the other hand, if the board is intended for personal use, a smaller size may be sufficient. It’s important to evaluate the needs of the audience in order to choose a size that will accommodate everyone’s viewing requirements.
Select the Size Accordingly
Once you have considered the space available, determined the purpose, and evaluated the audience, you can then select the dry erase board size that best fits your needs. Remember to take into account the dimensions of the board, ensuring it will fit comfortably in the space you have available. By choosing the right size, you can ensure that your dry erase board will be functional and effective for its intended use.
Deciding on the Material
Consider Durability
When it comes to choosing a material for your dry erase board, durability is a key factor to consider. You want a board that will withstand regular use without wearing down or becoming damaged. Look for boards that are made from high-quality materials such as porcelain, tempered glass, or melamine. These materials are known for their durability and can withstand the test of time, making them a reliable choice for a long-lasting dry erase board.
Look for Smooth Surface
In addition to durability, it’s important to choose a dry erase board with a smooth surface. A smooth surface allows markers to glide across the board effortlessly, making writing and erasing a seamless process. A rough or textured surface can cause markers to skip or drag, resulting in a frustrating experience. Smooth surfaces are also easier to clean, as they don’t trap ink or residue like rough surfaces do. So, when considering the material for your dry erase board, make sure you choose one with a smooth surface for optimal performance.
Evaluate Stain Resistance
Stain resistance is another important factor to consider when deciding on the material for your dry erase board. You want a board that will resist stains and ghosting, as this can affect the readability and visibility of your writing. Porcelain and tempered glass boards are known for their excellent stain resistance properties, as they are non-porous and don’t absorb ink like other materials. melamine boards, while less resistant to staining, can still offer decent stain resistance if properly cared for. Consider the level of stain resistance you require and choose a material accordingly.
Consider Magnetic Properties
If you plan on using magnetic accessories with your dry erase board, it’s important to choose a material that is magnetic receptive. Porcelain and tempered glass boards are naturally magnetic receptive, allowing you to easily attach magnetic accessories such as markers, erasers, and document holders. If you prefer a melamine board, you can still achieve magnetic capabilities by selecting one that has a magnetic receptive backing. The magnetic properties of the board can greatly enhance its functionality, so it’s worth considering when choosing the material.
Exploring Different Styles
Traditional Whiteboard
The traditional whiteboard is a classic option that has been used in various settings for many years. It features a clean, white surface that provides a stark contrast to the markers, making your writing highly visible. Traditional whiteboards are available in a range of sizes and materials, allowing you to choose one that suits your needs. They can be mounted on the wall or placed on an easel for portability. This style of dry erase board is versatile and widely used in classrooms, offices, and other professional settings.
Colored Dry Erase Board
For a more vibrant and eye-catching option, a colored dry erase board might be the perfect choice. These boards are available in a variety of colors, allowing you to match your board to your room’s decor or simply add a pop of color to your space. Colored dry erase boards can be useful in classrooms, where different colors can be used to represent different topics or subjects. They can also be a fun addition to children’s playrooms or creative spaces, encouraging artistic expression and imagination.
Framed Whiteboard
If you prefer a more stylish and decorative option, a framed whiteboard might be the perfect fit for your space. These boards feature a sleek frame around the edge, adding a touch of elegance and sophistication to your dry erase board. The frame can be made from various materials such as wood, aluminum, or plastic, allowing you to choose one that complements your room’s aesthetic. Framed whiteboards are often used in boardrooms, executive offices, or home offices where style and functionality go hand in hand.
Glass Dry Erase Board
For a modern and sleek look, a glass dry erase board is an excellent choice. These boards offer a sophisticated appearance with their smooth, glossy surface. Glass dry erase boards are highly durable and resistant to stains, making them a popular option for professional settings. They can be wall-mounted or freestanding, and some even come with magnetic properties, allowing for versatile use. Glass dry erase boards can elevate the aesthetic of any room and add a touch of elegance to your workspace.
Available Customization Options
Dry Erase Markers
Customizing your dry erase board starts with choosing the right markers. Consider the purpose of your board and the type of writing or drawing you will be doing. Fine tip markers are great for detailed work and small handwriting, while chisel tip markers are ideal for creating bold lines and large text. You can also find markers in a variety of colors, allowing you to add visual interest and make your board more engaging. Some markers are even designed to be low odor, making them ideal for classrooms or other enclosed spaces.
Magnetic Accessories
Adding magnetic capabilities to your dry erase board opens up a world of possibilities. Magnetic accessories such as document holders, clipboards, and note holders can be easily attached to the board, enhancing its functionality. Magnetic markers and erasers can also be conveniently stored on the board, ensuring they are always within reach. These accessories can help you stay organized, keep important documents or notes easily accessible, and make your board more versatile.
Custom Print Designs
If you want to take your customization to the next level, consider adding custom print designs to your dry erase board. This allows you to personalize the board with your own artwork, logo, or branding. Think about the design you want to showcase on your board and choose the printing method accordingly. Vinyl printing is a popular choice as it provides a vibrant and durable finish. You can have your design printed directly onto the board or opt for a removable vinyl decal that can be easily applied and removed as desired.
Movable Wall Mounts
If you prefer the flexibility of being able to move your dry erase board around, consider mounting it on a movable wall mount. These mounts allow you to easily slide the board along tracks, repositioning it as needed. This can be particularly useful in large classrooms or offices where different groups may need to use the board at different times. Movable wall mounts also make it easier to clean behind the board and access the wall for maintenance or repairs.
Preparing the Surface
Clean the Surface
Before applying your dry erase board, it’s important to ensure that the surface is clean and free of dust, dirt, or any other debris. Use a mild detergent or cleaning solution to thoroughly clean the surface and remove any residue. This will ensure proper adhesion of the board and prevent any imperfections or bubbles from forming.
Smooth Out Imperfections
If the surface you are applying your dry erase board to has any imperfections such as bumps or rough patches, it’s important to smooth them out before installation. Sand down any rough areas and fill in any gaps or holes with spackling paste. Once the surface is smooth and even, you can proceed with the installation process.
Apply Primer or Sealer
If you are applying your dry erase board to a porous surface such as wood or drywall, it’s a good idea to apply a primer or sealer before installation. This will help create a smooth and even surface, ensuring proper adhesion of the board. Follow the manufacturer’s instructions for the specific primer or sealer you are using, and allow it to dry completely before proceeding.
Ensure Proper Adhesion
To ensure that your dry erase board stays securely in place, make sure to follow the manufacturer’s instructions for installation. Use the recommended adhesive or mounting hardware and ensure that it is applied evenly and securely. Double-check that the board is level and firmly attached to the surface before using it.
Choosing the Right Markers
Consider the Purpose
When choosing the right markers for your dry erase board, consider the purpose of the board. Are you using it for presentations, planning, or writing down important notes? Different markers have different characteristics that make them suitable for specific purposes. Fine tip markers are great for detailed writing or drawing, while bullet tip markers are ideal for bold lines and large text. Consider the type of writing or drawing you will mainly be doing on the board and choose markers accordingly.
Evaluate the Ink Quality
The quality of the markers’ ink is also an important consideration. Look for markers that have vibrant, bold colors that are easy to see from a distance. The ink should be smooth and consistent, without any streaking or smudging. Low odor markers are also a good option, especially if you will be using the board in a small, enclosed space like a classroom or office. Test out different markers and read reviews to ensure that the ink quality meets your expectations.
Look for Easy Erasability
One of the key features of a dry erase board is the ability to easily erase the writing or drawings. When choosing markers, look for ones that are easily erasable, leaving no trace behind. Some markers are designed to be quick-drying, allowing for immediate erasing without smudging. It’s also important to consider the eraser you will be using. Invest in an eraser that is specifically designed for dry erase boards and is capable of removing ink without leaving streaks or residue.
Choose the Right Color
Lastly, consider the color of the markers you choose. Different colors can be used to create visual interest, categorize information, or add emphasis to certain points. Black markers are commonly used for writing basic text, while red markers can be used to highlight key information or draw attention to important details. Green and blue markers are often used for additional notes or text. Consider the color-coding system you want to implement and choose markers that align with your color preferences.
Adding Magnetic Capabilities
Evaluate the Material
To determine whether your dry erase board can be turned into a magnetic board, evaluate the material it is made of. Porcelain and tempered glass boards are naturally magnetic receptive, meaning that magnets will adhere to their surface. If you have a melamine board, consider purchasing a magnetic receptive backing that can be applied to the board. Assess the material of your board and its compatibility with magnets before proceeding with adding magnetic capabilities.
Apply Magnetic Sheeting
To add magnetic capabilities to a dry erase board that is not naturally magnetic, you can apply magnetic sheeting. Magnetic sheeting is a flexible material that contains small magnets embedded within it. Cut the magnetic sheeting to the size of your board and apply it directly to the surface. The magnets within the sheeting will create a magnetic field that allows you to attach magnetic accessories to the board.
Use Magnetic Paint Primer
Another option for adding magnetic capabilities is magnetic paint primer. This special paint contains iron particles that make the surface magnetic receptive. Apply the magnetic paint primer to the surface of your dry erase board according to the manufacturer’s instructions. Once dry, the paint will create a magnetic surface that allows magnets to adhere to the board. This method is particularly useful if you want the entire surface of your board to be magnetic.
Attach Magnetic Accessories
Once you have added magnetic capabilities to your dry erase board, you can start attaching magnetic accessories. Magnetic document holders, clipboards, and note holders can be easily attached to the board, providing convenient storage and organizational solutions. Magnetic markers and erasers can also be conveniently stored on the board, ensuring they are always within reach. The ability to easily attach and remove accessories enhances the functionality of your board and makes it more versatile for various uses.
Exploring Custom Print Designs
Decide on the Design
If you want to add a personal touch to your dry erase board, consider customizing it with a print design. The design you choose will depend on your preferences and the purpose of the board. You can opt for a simple logo or branding, a motivational quote, or an artistic pattern. Think about the overall look and feel you want to achieve and how the design will enhance the functionality and aesthetic of your board.
Choose the Printing Method
There are various printing methods available for custom print designs on dry erase boards. One popular option is vinyl printing. Vinyl printing involves printing the design onto a vinyl material with specialized ink. The vinyl is then applied to the surface of the dry erase board, creating a durable and vibrant finish. Another option is direct printing, which involves printing the design directly onto the surface of the board. This method provides a seamless and long-lasting design, but may have limitations in terms of color vibrancy and detail.
Print the Design on Vinyl
If you choose to go with vinyl printing, you will need to have your design printed onto the vinyl material. Seek the services of a professional printing company that specializes in vinyl printing. Provide them with the design you have chosen and any specific instructions or requirements you have. Once the vinyl print is ready, you can proceed with applying it to the surface of your dry erase board.
Apply the Design to the Board
Applying the vinyl design to your dry erase board requires careful attention to detail. Start by thoroughly cleaning the surface of the board and ensuring it is free of any dust or residue. Peel the backing off the vinyl print and carefully align it with the surface of the board. Smooth out any air bubbles or wrinkles, applying even pressure to ensure proper adhesion. Trim off any excess vinyl, and your custom print design is now successfully applied to your dry erase board.
Mounting and Installation Options
Wall-Mounted
Wall-mounted dry erase boards are a popular choice for classrooms, offices, and conference rooms. They are typically installed directly onto the wall using screws, brackets, or mounting hardware. Wall-mounted boards offer a permanent and secure solution, allowing for easy access and visibility. They are ideal for situations where the board needs to be in a fixed location and readily available for use.
Freestanding
Freestanding dry erase boards offer more flexibility in terms of positioning. These boards come with a stand or easel that allows them to be placed on any flat surface. Freestanding boards are often used in classrooms, trade shows, or presentations, where portability is important. They can be easily moved around and adjusted to achieve optimal visibility for the audience.
Movable Mounts
For ultimate flexibility, consider using movable mounts for your dry erase board. These mounts are installed on tracks, allowing the board to be easily slid from one location to another. Movable mounts are useful in large classrooms or offices where different groups may need to use the board at different times. They offer the advantage of being able to reposition the board without the need for additional installation or drilling.
Cabinet-Style Mounts
If you prefer a more discreet and organized look, consider using a cabinet-style mount for your dry erase board. These mounts come with a built-in cabinet that can be used to store markers, erasers, and other accessories. The cabinet-style mount helps keep the board and its accessories neatly organized and easily accessible. This option is particularly useful in offices or spaces where maintaining a clutter-free environment is important.
Maintaining and Cleaning the Board
Regularly Erase the Board
To keep your dry erase board in optimal condition, it’s important to regularly erase the board after each use. Leaving markings on the board for an extended period of time can lead to staining or ghosting. Use a dry erase board eraser or a soft, lint-free cloth to erase the markings in a gentle sweeping motion. Avoid using excessive force as this can damage the surface and impair its erasability.
Use Appropriate Cleaning Solutions
In addition to regular erasing, it’s important to occasionally clean the surface of your dry erase board to remove any residue, ghosting, or stubborn stains. Use a mild cleaning solution specifically designed for dry erase boards, or create your own by mixing a small amount of vinegar with water. Apply the cleaning solution to a soft cloth or sponge and gently wipe the surface in a circular motion. Rinse the cloth or sponge with clean water and repeat the process to remove any remaining residue. Avoid using harsh chemicals or abrasive cleaners as they can damage the surface of the board.
Avoid Using Abrasive Materials
When cleaning your dry erase board, it’s crucial to avoid using abrasive materials or scrubbing too forcefully. Scratching the surface of the board can compromise its erasability and create an uneven writing surface. Stick to soft cloths, sponges, or erasers specifically designed for dry erase boards. If there are stubborn stains that cannot be removed with gentle cleaning, consider using a melamine foam eraser or isopropyl alcohol as a last resort. Always test any cleaning methods on a small, inconspicuous area of the board first to ensure they do not cause damage.
Prevent Permanent Stains
To prevent permanent stains on your dry erase board, it’s important to address potential stains and residue as soon as they occur. Avoid leaving ink or markings on the board for an extended period of time, as they can become more difficult to remove over time. If you accidentally use a permanent marker on your dry erase board, there are specialized marker removers available that can help save your board. However, prevention is always better than a cure, so be vigilant and erase markings promptly to maintain the longevity and functionality of your board.
So you’ve decided to get yourself a dry erase board, but you don’t want to break the bank. Well, good news! In this article, we’ve compiled a list of affordable dry erase board options that will fit perfectly into your budget. Whether you need it for school, work, or just for organizing your thoughts at home, we’ve got you covered. Say goodbye to expensive options and hello to practical and wallet-friendly alternatives. Let’s dive in and discover the perfect dry erase board for you!
Budget-Friendly Dry Erase Board Options
When it comes to budget-friendly dry erase boards, you don’t have to compromise on quality. There are plenty of options available that are both affordable and offer excellent functionality. In this article, we will explore the benefits of budget-friendly dry erase boards and factors to consider when choosing one. We will also provide a comprehensive list of different types of budget-friendly dry erase boards and share some tips on how to save money when purchasing one.
Benefits of Budget-Friendly Dry Erase Boards
Budget-friendly dry erase boards offer numerous benefits, especially for those looking to meet their organizational and communication needs without breaking the bank. Here are some advantages of opting for affordable options:
Affordability: The most obvious benefit is the cost. Budget-friendly dry erase boards are significantly cheaper compared to high-end options. This makes them ideal for individuals or organizations on a tight budget.
Versatility: Despite their lower price, budget-friendly dry erase boards still provide excellent functionality. They can be used in a variety of settings, including classrooms, offices, homes, and even dorm rooms. The versatility of these boards allows you to adapt them to your specific needs.
Ease of Use: These boards are designed to be user-friendly. They come with smooth writing surfaces that are easy to erase, ensuring a hassle-free writing and erasing experience. They are perfect for anyone, regardless of their age or technical expertise.
Durability: While budget-friendly dry erase boards may not match the durability of high-end options, they still offer decent longevity. Most of these boards are made of durable materials that can withstand regular use and occasional mishandling.
Factors to Consider When Choosing a Budget-Friendly Dry Erase Board
Before making a purchase, it’s important to consider some key factors that will help you select the best budget-friendly dry erase board for your needs. Here are five factors to keep in mind:
1. Size
Dry erase boards come in various sizes, so it’s vital to determine the appropriate size for your needs. Consider the available space where you intend to mount or place the board. If you’re using it for personal use, a compact size may suffice, while larger boards are more suitable for classrooms or conference rooms.
2. Surface Type
Different surface types offer different levels of quality and durability. The most common surface types for budget-friendly dry erase boards are melamine, porcelain-on-steel, and glass. Melamine is a cost-effective option but may not be as durable as porcelain-on-steel or glass surfaces. Consider the frequency of use and the importance of durability when selecting the surface type.
3. Frame Material
The frame material not only contributes to the aesthetics of the board but also affects its durability. Common frame materials include wood, aluminum, and plastic. Wood frames are more traditional and add a touch of elegance, while aluminum frames offer a sleek and modern look. Plastic frames are usually the most affordable option but may not be as sturdy as wood or aluminum.
4. Mounting Options
Consider how you plan to mount the dry erase board. Some options can be simply hung on a wall, while others may require drilling or additional hardware for installation. Make sure to choose a board with the appropriate mounting options for your intended location.
5. Accessories
Think about the accessories you might need to enhance your dry erase board experience. Some boards come with built-in trays for markers and erasers, while others may require you to purchase these items separately. Additionally, some boards offer the option of attaching magnetic accessories, such as magnetic clips or document holders. Consider your specific needs and choose a board that accommodates them.
Budget-Friendly Dry Erase Board Options
Now that we’ve discussed the benefits of budget-friendly dry erase boards and the factors to consider when choosing one, let’s explore some specific options that fit within a limited budget:
1. Basic Melamine Boards
Basic melamine boards are the most affordable dry erase boards available. They feature a melamine surface, which is smooth and easy to write on. However, these boards may not offer the same level of durability as higher-end options and can be susceptible to staining or ghosting if not properly maintained.
2. Porcelain-On-Steel Boards
Porcelain-on-steel boards provide a more durable surface compared to melamine boards. The porcelain surface is resistant to scratches and stains, ensuring a longer lifespan. These boards are commonly used in classrooms and offices due to their durability and ease of cleaning.
3. Glass Boards
For a sleek and modern look, glass boards are an excellent choice. While they may be pricier than melamine or porcelain-on-steel boards, they offer a durable and easy-to-clean surface. Glass boards are often made with tempered glass, making them resistant to scratches and stains.
4. Magnetic Dry Erase Boards
Magnetic dry erase boards offer the added functionality of being able to attach magnetic accessories. These boards are available in various surface types, including melamine, porcelain-on-steel, and glass. They are particularly useful in educational settings or offices where displaying documents or notices is necessary.
5. Peel and Stick Dry Erase Boards
Peel and stick dry erase boards provide a versatile and portable option. These self-adhesive boards can be easily applied to any smooth surface, such as walls or desks, and can be removed without leaving residue behind. They are ideal for those who prefer a temporary solution or need a portable option for on-the-go use.
6. Portable Dry Erase Boards
If you require a dry erase board that can be easily transported, portable options are available. These boards usually come with foldable stands or wheels, making them convenient for presentations, workshops, or trade shows. Portable dry erase boards can be found in various sizes and surface types.
7. DIY Dry Erase Boards
If you’re feeling creative or want to save even more money, you can consider making your own DIY dry erase board. This option allows you to customize the size, design, and surface type according to your preferences. DIY dry erase boards can be made using materials like acrylic sheets, whiteboards paints, or even repurposed picture frames with glass.
How to Save Money on Dry Erase Boards
While budget-friendly options are already affordable, there are a few additional ways you can save money when purchasing a dry erase board:
1. Shop for Sales and Discounts
Keep an eye out for sales, discounts, or clearance offers in stores or online. Many retailers often offer promotions on dry erase boards throughout the year. By patiently waiting for a deal, you can find a high-quality board at an even lower price.
2. Consider Secondhand Options
Check local classifieds, online marketplaces, or school supply exchange groups for secondhand dry erase boards. Many times, individuals or organizations sell their lightly used boards at a fraction of the original price. This can be a great way to find a budget-friendly option while still getting a good quality board.
3. Look for Bundle Deals
Some retailers offer bundle deals that include markers, erasers, and other accessories along with the dry erase board. These packages often provide a better value for your money compared to purchasing each item separately. Take advantage of these bundle deals to save on the overall cost.
4. Opt for Off-Brand Boards
Well-known brands often come with a higher price tag. Consider trying off-brand or less-known brands that offer equally functional boards at a lower price. Read customer reviews and do some research to ensure the quality meets your expectations.
5. Utilize DIY Solutions
As mentioned earlier, DIY dry erase boards can be a cost-effective option. By repurposing materials you already have or purchasing affordable supplies, you can create a customized board at a fraction of the price. DIY dry erase boards also allow you to personalize the design according to your taste.
Conclusion
Budget-friendly dry erase boards offer an affordable solution for your organizational and communication needs. From basic melamine boards to portable options and DIY solutions, there are plenty of choices available. Consider factors such as size, surface type, frame material, mounting options, and accessories when selecting a board. Additionally, by shopping for sales, considering secondhand options, looking for bundle deals, opting for off-brand boards, or even making your own, you can save money while still acquiring a quality dry erase board. Choose the option that best suits your needs, and enjoy the convenience and functionality of a budget-friendly dry erase board without compromising on quality.
Picture this: you’ve just walked into a classroom, ready to brainstorm ideas and unleash your creativity on a blank whiteboard. But hold on a second—are all whiteboards created equal? In the ongoing battle between melamine and porcelain dry erase boards, which one comes out on top? In this article, we’ll explore the pros and cons of melamine dry erase boards, shedding light on the strengths and weaknesses of this popular classroom essential. So, grab your marker and get ready to discover if melamine is the whiteboard champion for you.
Durability
Scratch-resistance
When it comes to durability, melamine dry erase boards have their advantages. One of the key benefits is their scratch-resistance. These boards are made from a sturdy melamine laminate that can withstand regular use without getting easily scratched. Whether you’re using regular dry erase markers or even permanent markers by accident, you won’t have to worry about ruining the surface of the board. This scratch-resistant feature ensures that your melamine dry erase board will remain in good condition for a long time, even with constant use.
Stain-resistance
Along with scratch-resistance, melamine dry erase boards are also known for their stain-resistance. The melamine laminate surface is designed to repel ink and prevent stains from penetrating the board. This makes it easy to clean and maintain the board’s appearance. Even if you accidentally leave marker ink on the board for an extended period, it can still be removed without leaving any traces behind. The stain-resistance of melamine dry erase boards ensures that they can maintain their pristine look, even after years of use.
Longevity
When it comes to longevity, melamine dry erase boards are a reliable choice. The durable melamine laminate surface is designed to withstand regular wear and tear, providing you with a long-lasting writing surface. With proper care and maintenance, a melamine dry erase board can continue to serve you for many years. Unlike other materials that may start to show signs of wear or discoloration over time, melamine dry erase boards are built to stand the test of time, making them a great investment in the long run.
Ease of Use
Writing Experience
Melamine dry erase boards offer a smooth and enjoyable writing experience. The melamine laminate surface provides a consistent and even writing surface, allowing your markers to glide effortlessly. This smoothness ensures that your handwriting or drawings come out clearly and legibly with minimal effort. Whether you’re using dry erase markers for presentations or creating colorful illustrations, the smooth writing experience of melamine dry erase boards makes your tasks easier and more enjoyable.
Erasing Experience
Erasing is a breeze with melamine dry erase boards. The melamine laminate surface allows for easy and complete erasure of dry erase marker ink. Simply use a dry eraser or a soft cloth to wipe away the ink without leaving any residue behind. Even after erasing multiple times, the surface remains clean and ready for your next writing session. The effortless erasing experience of melamine dry erase boards not only saves you time but also ensures that the board is always ready for new ideas and information.
Affordability
Initial Cost
One of the major advantages of melamine dry erase boards is their affordability. Compared to porcelain dry erase boards, melamine boards are significantly cheaper, making them a cost-effective choice for various settings. Whether you’re looking for a board for your home office, classroom, or conference room, opting for a melamine dry erase board can help you stay within budget without compromising on quality. The lower initial cost of melamine dry erase boards makes them accessible to a wide range of individuals and organizations.
Maintenance Cost
In addition to the lower initial cost, melamine dry erase boards also have lower maintenance costs. The stain-resistant and scratch-resistant properties of melamine make it easy to clean and maintain the board’s appearance. You can simply use a dry eraser or a soft cloth to wipe away any marker ink without the need for expensive cleaning solutions or specialized tools. The minimal maintenance required for melamine dry erase boards helps you save money in the long run, making them a cost-efficient choice for those on a budget.
Versatility
Magnetic Capabilities
One of the great features of melamine dry erase boards is their magnetic capabilities. Many melamine boards come with a magnetic surface, allowing you to easily attach documents, notes, or other lightweight items using magnets. This makes melamine dry erase boards ideal for collaborative settings, where you can easily display important information or visual aids while having ample space to write and erase. The magnetic capabilities of melamine dry erase boards provide added versatility and convenience, enhancing your overall user experience.
Customizability
melamine dry erase boards offer a high degree of customizability, providing you with the flexibility to design your workspace according to your needs. These boards often come in various sizes and shapes, allowing you to choose the one that fits your space requirements perfectly. Additionally, melamine dry erase boards are available in different styles and frames, giving you the freedom to match them with your existing decor or preferences. The ability to customize your melamine dry erase board ensures that it not only serves its functional purpose but also adds a personal touch to your workspace.
Appearance
Color Options
melamine dry erase boards come in a wide range of color options, allowing you to choose the one that best suits your preferences or matches your existing aesthetic. Whether you prefer a traditional whiteboard or want to add a pop of color to your workspace, there is a melamine dry erase board for you. The availability of different color options gives you the opportunity to create an environment that is visually appealing and stimulating, making your writing and brainstorming sessions more enjoyable and inspiring.
Smoothness
The smoothness of melamine dry erase boards contributes to their overall appearance. The melamine laminate surface provides a sleek and polished look, adding an element of sophistication to any space. This smooth surface not only enhances the appearance of the board but also improves the writing experience. The consistent and even writing surface of melamine dry erase boards ensures that your markers glide smoothly, resulting in legible and clear writing or drawings. The smoothness of melamine dry erase boards combines functionality with aesthetics, making them a desirable choice for any workspace.
Safety
Toxicity Concerns
When it comes to safety, melamine dry erase boards are a non-toxic option. Melamine is a synthetic resin that is known for its low toxicity levels, making it safe for use in various settings. Unlike some other materials used in the manufacturing of dry erase boards, melamine does not release harmful fumes or chemicals when exposed to heat or normal usage. This makes melamine dry erase boards a safe choice for classrooms, offices, or any other environment where safety is a concern.
Fire Resistance
Another safety feature of melamine dry erase boards is their fire resistance. Melamine is a material that has a high resistance to fire, which adds an extra layer of safety to the board. In case of a fire incident, melamine dry erase boards are less likely to ignite or contribute to the spread of flames. This fire resistance feature ensures that the board remains intact and does not pose a safety hazard in emergency situations. The fire-resistant properties of melamine dry erase boards provide peace of mind, making them a reliable and safe choice for any workspace.
Maintenance
Cleaning
Maintaining the cleanliness of melamine dry erase boards is a straightforward process. To clean your melamine board, you can simply use a dry eraser or a soft cloth to wipe away any marker ink. For tougher stains, you can use a well-diluted solution of mild soap and water. Avoid using abrasive cleaners or harsh chemicals, as they may damage the melamine surface. After cleaning, make sure to dry the board thoroughly before using it again. Regularly Cleaning your melamine dry erase board is an important part of its maintenance and ensures its longevity and appearance.
Care Instructions
To keep your melamine dry erase board in optimal condition, it’s important to follow some care instructions. Avoid using sharp or pointed objects on the board, as they can cause scratches or damage the melamine surface. When using markers, make sure to use only dry erase markers specifically designed for use on melamine surfaces. Permanent markers or other types of pens can leave permanent marks or stains on the board. Additionally, avoid placing heavy objects or excessive pressure on the board to prevent warping or bending. By following these care instructions, you can prolong the lifespan of your melamine dry erase board and maintain its quality.
Environmental Impact
Sustainability
Melamine dry erase boards offer a sustainable option for those conscious of their environmental impact. These boards are typically made from renewable materials, such as wood or paper, which helps reduce the use of non-renewable resources. Additionally, melamine is a highly recyclable material, making it a great choice for eco-friendly individuals or organizations. By choosing a melamine dry erase board, you contribute to sustainable practices and reduce your carbon footprint.
Recyclability
In line with its sustainability features, melamine dry erase boards are easily recyclable. At the end of their lifespan, melamine boards can be recycled to create new products or be used in other applications. Recycling melamine dry erase boards helps reduce waste and conserves valuable resources. By opting for a recyclable melamine dry erase board, you actively participate in environmental conservation efforts and contribute to a greener future.
Installation
Mounting
Installing a melamine dry erase board is a simple and straightforward process. Most melamine boards come with installation kits that include the necessary hardware, such as screws and wall anchors. Depending on the size of the board, you may need assistance during the installation to ensure it is mounted securely. Follow the manufacturer’s instructions for proper installation and make sure to use the appropriate tools and safety precautions. Once properly installed, your melamine dry erase board will provide a reliable writing surface for your needs.
Weight
One of the advantages of melamine dry erase boards is their lightweight nature. Compared to porcelain boards, melamine boards are typically lighter, making them easier to handle and install. The lightweight nature of melamine dry erase boards also means that they can be mounted on a wider range of surfaces without the need for additional reinforcement. This makes melamine dry erase boards a practical choice for spaces where weight may be a consideration, such as cubicles or temporary setups.
Availability
Market Presence
Melamine dry erase boards have a strong market presence and are readily available in various retail stores and online platforms. Their popularity has made them a staple in classrooms, offices, and other professional settings. With their extensive presence in the market, it is easy to find melamine dry erase boards in different sizes, styles, and price ranges to suit your specific needs and preferences.
Product Options
The availability of melamine dry erase boards extends to the diverse range of product options. These boards come in various sizes, allowing you to choose the one that fits your requirements perfectly. They are also available in different styles and frames, giving you the flexibility to match them with your existing decor or personal preferences. Furthermore, melamine dry erase boards often come with additional features, such as built-in trays for markers or magnetic capabilities. The wide range of product options ensures that you can find a melamine dry erase board that meets all your needs and preferences.
In conclusion, melamine dry erase boards offer a durable, easy-to-use, and affordable solution for both personal and professional needs. With their scratch-resistance, stain-resistance, and longevity, melamine boards are built to withstand regular use without compromising their appearance or functionality. The smooth writing experience and effortless erasing make using these boards a breeze. Additionally, the affordability of melamine dry erase boards, both in terms of initial cost and maintenance, makes them accessible to a wide range of individuals and organizations. The versatility, appearance, safety, and environmental benefits of melamine boards further contribute to their appeal. With easy installation, lightweight construction, and a diverse array of product options, melamine dry erase boards are a reliable and readily available choice. Whether you’re looking for a board for your office, classroom, or home, melamine dry erase boards provide a practical and efficient solution to your writing and presentation needs.
If you’ve got a melamine dry erase board that’s seen better days, we’ve got some handy tips to bring it back to its shining glory. In this ultimate guide, we’ll walk you through the process of cleaning a melamine dry erase board step by step, leaving it looking good as new. With just a few common household items and some quick and easy techniques, you’ll be able to remove stubborn stains and erase those pesky ghost marks that tend to linger on the surface. Say goodbye to a dull board and hello to a sparkling clean writing surface with this comprehensive cleaning guide.
The Ultimate Guide on How to Clean a Melamine Dry Erase Board
When it comes to keeping your melamine dry erase board looking clean and pristine, a regular cleaning routine is essential. Over time, dry erase boards can accumulate dust, stains, and stubborn marks that can affect their functionality and appearance. In this comprehensive guide, we will walk you through the step-by-step process of how to properly clean a melamine dry erase board using simple materials you may already have at home. So let’s gather our materials and get started!
Materials Needed
Before we dive into the cleaning process, it’s important to gather the necessary materials. Here’s what you’ll need:
Microfiber cloth: A soft and lint-free microfiber cloth is ideal for gently wiping away dirt and dust without scratching the surface of the board.
Melamine foam eraser: Also known as a magic eraser, this gentle yet effective cleaning tool is perfect for removing stubborn stains and marks on your melamine dry erase board.
White vinegar: Vinegar is a natural cleaning agent that can effectively cut through grease and grime on your board.
Water: You’ll need water, preferably distilled or filtered, to create a cleaning solution with the vinegar.
Soft-bristle brush: A soft-bristle brush, such as a toothbrush, can be used for scrubbing away tough stains on your board.
Paper towels: These are handy for both drying the board and protecting your hands during the cleaning process.
Now that we have our materials ready, let’s move on to the preparation steps.
Turn off and unplug the board: Safety first! It’s crucial to turn off and unplug the board to prevent any electrical mishaps while cleaning.
Remove any loose debris: Use a dry microfiber cloth or a soft brush to gently remove any loose debris, such as dust, dirt, or eraser residue, from the surface of the board. This step will make the cleaning process much more effective.
Ensure the board is dry: Check that the board is completely dry before proceeding with the cleaning process. If there are any traces of moisture, it’s best to wait until the board is fully dry. Moisture can interfere with the cleaning process and may affect the erasability of your dry erase board.
With the board prepped and ready, let’s move on to the cleaning solutions for your melamine dry erase board.
Dry Erase Board Cleaning Solutions
There are several effective cleaning solutions you can use to clean a melamine dry erase board. Let’s explore them one by one:
Using a Microfiber Cloth
A microfiber cloth is the simplest and gentlest way to clean your dry erase board. Here’s how to use it:
Begin by folding the microfiber cloth into a small square or rectangle. This will give you a clean surface to work with.
Lightly dampen the cloth with water, making sure it’s not overly wet. Excess water can seep into the board and cause damage.
Gently wipe the entire surface of the board using small, circular motions. This will help remove any dirt, dust, or dry erase marker residue from the board.
For stubborn marks or stains, apply a bit more pressure while wiping. The microfiber cloth should be able to lift most stains without the need for additional cleaning solutions.
Once you’ve finished wiping the board, use a clean, dry portion of the cloth to thoroughly dry the surface. This step is crucial in ensuring the erasability of your dry erase board.
Using a microfiber cloth is a quick and easy way to maintain the cleanliness of your melamine dry erase board. However, if you’re dealing with tougher stains or marks, a melamine foam eraser may be your best bet.
Using a Melamine Foam Eraser
A melamine foam eraser, often referred to as a magic eraser, is a fantastic tool for removing stubborn stains from your melamine dry erase board. Here’s how to use it:
Dampen the melamine foam eraser with water. Be careful not to oversaturate it, as excess water can damage the eraser.
Gently rub the eraser on the stained area, applying light pressure. The micro-abrasive texture of the eraser will help break down and lift the stain from the surface of the board.
Continue rubbing the eraser in a circular motion until the stain or mark is no longer visible. You may need to re-dampen the eraser with water as you go, especially for larger or more stubborn stains.
Once the stain is removed, use a dry microfiber cloth to wipe away any residue left by the eraser.
A melamine foam eraser is an effective tool for tackling tough stains on your dry erase board. However, if there are still traces of stubborn stains or you’re dealing with overall grime build-up, a mixture of white vinegar and water can be a great solution.
Using White Vinegar and Water
White vinegar is a natural and inexpensive cleaning agent that can remove grease, dirt, and grime from your melamine dry erase board. Here’s how to create and use a vinegar-based cleaning solution:
In a small bowl or spray bottle, mix equal parts white vinegar and water. For example, you can mix ½ cup of vinegar with ½ cup of water.
Lightly dampen a microfiber cloth with the vinegar and water solution. Again, make sure the cloth is not overly wet.
Gently wipe the entire surface of the board using small, circular motions. The vinegar will help dissolve any stubborn stains or grease, leaving your board clean and shiny.
For extra cleaning power, you can let the vinegar solution sit on the board for a few minutes before wiping it off. This can help loosen any tough stains.
Once you’ve finished cleaning, use a clean, dry portion of the cloth to thoroughly dry the surface of the board.
The vinegar and water solution is an effective method for deep-cleaning your melamine dry erase board. However, if there are still stubborn stains or residue that won’t budge, it’s time to bring out the soft-bristle brush.
Cleaning Process
Now that we have covered the different cleaning solutions, let’s dive into the step-by-step cleaning process for your melamine dry erase board. By following these simple steps, you’ll have a clean and fresh board in no time:
Step 1: Dusting the Board
Before using any cleaning solutions, start by gently dusting the entire surface of the board. Use a dry microfiber cloth or a soft brush to remove any loose debris, dust, or dry erase marker residue. This step will ensure a clean working surface and make the subsequent cleaning steps more effective.
Step 2: Using a Microfiber Cloth
If your dry erase board only has minor dirt or marks, using a microfiber cloth may be sufficient for cleaning. After dusting the board, dampen a microfiber cloth with water, making sure not to saturate it. Gently wipe the entire surface of the board with small, circular motions. For stubborn marks, apply a bit more pressure while wiping. Once the board is clean, use a separate dry portion of the cloth to thoroughly dry the surface.
Step 3: Using a Melamine Foam Eraser
If you’re dealing with tougher stains or marks, a melamine foam eraser can come to the rescue. Dampen the eraser with water and gently rub it on the stained area, applying light pressure. Continue rubbing in a circular motion until the stain is no longer visible. Use a dry microfiber cloth to wipe away any residue left by the eraser.
Step 4: Using White Vinegar and Water
For deeper cleaning, the vinegar and water solution can be highly effective. Mix equal parts white vinegar and water in a small bowl or spray bottle. Dampen a microfiber cloth with the solution and gently wipe the entire surface of the board. For tougher stains, let the vinegar solution sit on the board for a few minutes before wiping it off. Finish the process by using a separate dry portion of the cloth to thoroughly dry the board.
Step 5: Scrubbing Stubborn Stains
If there are still stubborn stains or residue that haven’t been removed by the previous steps, it’s time to use a soft-bristle brush. Dip the brush in the vinegar and water solution and gently scrub the stained area. Be careful not to apply too much pressure as it may scratch the board. Once the stain is removed, wipe away any residue with a clean, damp microfiber cloth, and then dry the board with a separate dry cloth.
Step 6: Drying the Board
After completing the cleaning process, it’s crucial to ensure that the board is completely dry before using it again. Use a clean, dry microfiber cloth or paper towels to thoroughly dry the surface. Make sure no moisture is left behind, as it can interfere with the erasability of your dry erase board.
By following these six simple steps, you can maintain the cleanliness of your melamine dry erase board and ensure its longevity.
Extra Tips
In addition to the cleaning process, here are some extra tips to help you keep your melamine dry erase board in top shape:
Avoid using abrasive cleaners
When cleaning your dry erase board, it’s important to avoid using abrasive cleaners or materials that can scratch the surface. These can damage the melamine coating and affect the erasability of the board. Stick to gentle cleaning methods, such as those mentioned in this guide, to ensure the long-term durability of your board.
Regularly maintain and deep clean
To keep your melamine dry erase board looking its best, it’s essential to establish a regular maintenance routine. Regularly dusting the board and wiping away any dry erase marker residue will prevent build-up and make deep cleaning easier when necessary. A quick wipe with a microfiber cloth at the end of each day can go a long way in maintaining a clean and functional board.
Protect the board with a clear acrylic sealer
If you want to take your melamine dry erase board’s longevity to the next level, consider applying a clear acrylic sealer. This protective coating can help prevent stains and ghosting, making the cleaning process even easier. Follow the manufacturer’s instructions for application and ensure the board is clean and dry before applying the sealer.
Store markers properly
Properly storing your dry erase markers can also contribute to the cleanliness and longevity of your board. Store them horizontally with the caps securely fastened to prevent ink from drying out and leaking onto the board. This simple step can help you avoid unnecessary stains and preserve the quality of your dry erase board.
By incorporating these extra tips into your cleaning routine, you can maintain the cleanliness and performance of your melamine dry erase board for years to come.
Common Mistakes to Avoid
While cleaning your melamine dry erase board, it’s important to avoid common mistakes that can damage the surface or compromise its functionality. Here are a few common mistakes to steer clear of:
Using sharp objects or abrasive materials
Using sharp objects, such as knives or abrasive materials like scouring pads, can scratch the surface of your melamine board. These scratches not only affect the board’s appearance but also hinder its erasability. Stick to gentle cleaning methods and materials to maintain the integrity of the board.
Using excessive amounts of water
Excessive water can seep into the melamine board and cause irreversible damage. Whether you’re using a microfiber cloth, eraser, or cleaning solution, make sure they are only damp and not overly wet. If you accidentally spill water on the board during the cleaning process, ensure it’s completely dry before using the board again.
Using alcohol or ammonia-based cleaners
While alcohol or ammonia-based cleaners can be effective for other surfaces, they are not suitable for melamine dry erase boards. These harsh chemicals can damage the melamine coating, affecting both the appearance and functionality of the board. Stick to the gentle cleaning solutions and methods mentioned in this guide for the best results.
By avoiding these common mistakes, you can clean your melamine dry erase board effectively without causing any damage.
Troubleshooting
Even with proper cleaning and maintenance, you may encounter a couple of common issues with your melamine dry erase board. Here are two troubleshooting scenarios and how to address them:
Ghosting or shadowing
If you notice faint ghosting or shadowing of previous markings after erasing your board, it may be due to a residue build-up. To resolve this issue, give your board a deep cleaning using the vinegar and water solution mentioned earlier. Scrub the board gently with a soft-bristle brush to remove any residue and then thoroughly dry the surface. This should eliminate or significantly reduce the ghosting effect.
Permanent marker stains
Accidentally using a permanent marker on a melamine dry erase board can be a common mishap. To remove permanent marker stains, dampen a cloth with rubbing alcohol or acetone (nail polish remover) and gently rub the stained area. Be careful not to rub too hard, as it may damage the melamine coating. Once the stain is removed, wipe the board with a clean, damp cloth to remove any residue, and then dry the board thoroughly.
By addressing these troubleshooting scenarios promptly and using the appropriate cleaning methods, you can keep your melamine dry erase board looking clean and free of any unwanted marks.
Frequently Asked Questions
To wrap up this guide, here are answers to a few frequently asked questions about cleaning melamine dry erase boards:
Can I use window cleaner on a melamine board?
No, it is not recommended to use window cleaner or any other ammonia-based cleaners on a melamine dry erase board. These cleaners can damage the melamine coating and compromise the board’s erasability. Stick to the gentle cleaning solutions and methods mentioned in this guide.
Can I use a magic eraser on a melamine board?
Yes, a melamine foam eraser, often referred to as a magic eraser, is safe to use on a melamine dry erase board. It is a gentle yet effective tool for removing stubborn stains and marks without scratching the surface.
How often should I clean the board?
The frequency of cleaning your melamine dry erase board will depend on the usage and the visible dirt or stains on the surface. As a general guideline, it’s recommended to perform a light cleaning, such as dusting and using a microfiber cloth, on a daily or weekly basis. Deep cleaning with vinegar and water or a melamine foam eraser can be done bi-weekly or monthly, depending on the level of dirt or staining you notice.
Conclusion
Cleaning a melamine dry erase board doesn’t have to be a daunting task. With the right materials and proper cleaning techniques, you can keep your board looking clean, fresh, and ready for use. Remember to regularly dust the board, use a microfiber cloth or a melamine foam eraser for stubborn stains, and deep clean with a vinegar and water solution when necessary. By avoiding common mistakes and following the tips and troubleshooting advice provided in this guide, you can maintain the cleanliness and performance of your melamine dry erase board for years to come.
Melamine boards are commonly used for a variety of purposes, but did you know that they can also be transformed into a functional dry erase board? In this article, we will show you the step-by-step process of preparing a melamine board for dry erase markers. Whether you want to create a convenient whiteboard for your home office or a collaborative space for your team at work, these simple tips and tricks will help you achieve a smooth and durable surface that is ready for all your dry erase needs. Get ready to take your melamine board to the next level!
Cleaning the Melamine Board
Cleaning the melamine board is an essential first step in preparing it for use as a dry erase board. The process involves removing any dust and debris from the surface, wiping it with a mild detergent solution, rinsing it thoroughly, and finally drying it properly.
Removing Dust and Debris
Before proceeding with any cleaning, it’s vital to remove any dust and debris from the melamine board. This can be done by using a soft cloth or a dry erase board eraser to gently wipe the surface in a horizontal motion. It is important to be thorough and ensure that all loose particles are removed.
Wiping with a Mild Detergent Solution
After removing dust and debris, the next step is to wipe the melamine board with a mild detergent solution. This solution can be made by mixing a small amount of dish soap or any mild detergent with warm water. We recommend using a soft sponge or cloth dampened with this solution to gently wipe the surface of the board. Be careful not to use excessive water, as it can damage the melamine coating.
Rinsing the Board
Once the melamine board has been wiped with the detergent solution, it is crucial to rinse it thoroughly to remove any soap residue. This can be done by using a clean cloth or sponge dampened with clean water to wipe the entire surface of the board. Ensure that all traces of detergent are completely removed.
Drying the Board
The final step in the cleaning process is to dry the melamine board. For this, we recommend using a clean, dry cloth or paper towels to gently pat the surface until it is completely dry. It is important to avoid using excessive force or rubbing, as it can damage the melamine coating. Ensure that the board is completely dry before proceeding to the next step.
Smoothing the Surface
Smoothing the surface of the melamine board is an important step to ensure a smooth and even finish when applying primer and paint. This involves sanding the board to remove any imperfections and rough areas, followed by removing the sanding residue.
Sanding the Board
To sand the melamine board, we recommend using a fine-grit sandpaper or sanding sponge. Gently sand the surface of the board in a circular motion, focusing on any rough spots or imperfections. Be sure to apply light pressure, as excessive force can damage the board. Sanding helps create a better bonding surface for the primer and paint.
Removing Sanding Residue
After sanding the melamine board, it is crucial to remove any sanding residue that may be left behind. This can be done by using a clean, dry cloth or a vacuum cleaner to gently wipe or suck away the loose particles. Ensuring that the surface is free from sanding residue allows for a smoother finish when applying the primer and paint.
Conditioning the Melamine Board
Conditioning the melamine board with a primer is essential to promote adhesion and ensure a durable and long-lasting finish. This involves choosing the right primer for melamine surfaces and applying it correctly.
Applying a Primer
A primer acts as a bonding agent between the melamine board and the paint, providing a solid foundation for the dry erase coating. Before applying the primer, be sure to read and follow the manufacturer’s instructions. Most primers can be applied using a brush or a roller. It is important to apply an even and thin coat to avoid any drips or clumps.
Choosing the Right Primer
Not all primers are suitable for melamine surfaces, so it is essential to choose the right one. Look for a primer specifically designed for melamine or laminate surfaces. These primers are formulated to adhere well to the smooth and non-porous nature of melamine, ensuring excellent adhesion and durability of the dry erase paint.
Applying Primer to the Board
Once you have selected the appropriate primer, apply a thin and even coat to the melamine board. Work in smooth strokes, ensuring complete coverage of the entire surface. Allow the primer to dry completely according to the manufacturer’s instructions before proceeding to the next step.
Painting the Melamine Board
Painting the melamine board with dry erase paint is the final step in preparing it for use as a dry erase board. This involves choosing the right dry erase paint and applying it correctly to achieve a smooth and functional dry erase surface.
Choosing the Right Dry Erase Paint
Selecting the right dry erase paint is crucial to ensure optimal performance and longevity of the dry erase board. Look for a high-quality dry erase paint that is designed specifically for melamine or laminate surfaces. These paints are formulated to provide a smooth and durable finish that allows for easy erasing and writing.
Applying the Dry Erase Paint
Before applying the dry erase paint, make sure to read and follow the manufacturer’s instructions. Most dry erase paints can be applied using a brush or a roller. Apply thin and even coats, working in smooth strokes to achieve a uniform finish. Allow each coat to dry according to the manufacturer’s instructions before applying additional coats.
Allowing the Paint to Cure
After applying the dry erase paint, it is crucial to allow it to cure fully before using the board. Follow the manufacturer’s instructions regarding the curing time. Typically, it takes a few days for the dry erase paint to fully cure and reach its optimal hardness and erasability. Avoid using the board until the paint has cured completely to ensure the best performance.
Protecting the Surface
Protecting the surface of the melamine board is essential for maintaining its durability and longevity. This involves applying a clear protective coating that helps to prevent stains, scratches, and fading.
Applying a Clear Protective Coating
Once the dry erase paint has cured, it is advisable to apply a clear protective coating over the surface. This protective coating acts as an additional layer of defense against daily wear and tear. Many clear protective coatings come in spray form, making it easy to apply an even and thin layer. Follow the manufacturer’s instructions for the application process.
Allowing the Coating to Dry and Cure
After applying the clear protective coating, allow it to dry and cure completely. The curing time may vary, so refer to the manufacturer’s instructions for the specific product you are using. Avoid using the melamine board until the protective coating has fully cured to ensure optimal protection and longevity.
Maintaining the Dry Erase Board
Proper maintenance is crucial for keeping your melamine dry erase board in excellent condition. This involves using appropriate dry erase markers, erasing the board properly, and cleaning it regularly.
Using Appropriate Dry Erase Markers
When using a melamine dry erase board, it is important to use only dry erase markers specifically designed for such surfaces. Avoid using permanent markers or other writing instruments that may damage the dry erase surface. Using the appropriate markers will help ensure easy erasability and prevent staining or ghosting.
Erasing the Board Properly
To erase the melamine dry erase board, use a soft, dry cloth or a dry erase board eraser. Start from the top of the board and work your way down to avoid smearing or smudging the markings. If there are stubborn marks or stains that do not erase easily, you can use a melamine board cleaner or a mild detergent solution specifically formulated for dry erase board cleaning. Avoid using abrasive materials that may scratch or damage the surface.
Cleaning the Board Regularly
Regular cleaning is essential to maintain a clean and functional dry erase board. Use a soft, damp cloth or a mild detergent solution to clean the surface. Wipe the entire board in a horizontal motion, ensuring that all marks and stains are removed. After cleaning, make sure to dry the board thoroughly to prevent any water damage.
Additional Tips and Considerations
In addition to the main steps outlined above, here are some additional tips and considerations to keep in mind when preparing a melamine board for dry erase use:
Avoiding Exposure to Heat
Melamine boards are sensitive to heat, so it is important to avoid placing them near heat sources or exposing them to direct sunlight for prolonged periods. Excessive heat can cause the melamine coating to warp or discolor, affecting the overall appearance and functionality of the dry erase board.
Avoiding Sharp Objects on the Board
To prevent scratching or damaging the melamine surface, avoid using sharp objects on the board. This includes knives, scissors, or any other pointed tools that could potentially leave permanent marks or gouges. Always handle the board with care to maintain its smooth and pristine condition.
Limiting Direct Sunlight Exposure
Direct sunlight exposure can cause the melamine board and the dry erase paint to fade over time. Therefore, it is advisable to place the board in an area away from direct sunlight or use window coverings to protect it from prolonged exposure to UV rays. This will help preserve the vibrant and clear dry erase surface of the board.
Frequently Asked Questions
Can any melamine board be turned into a dry erase board?
Not all melamine boards are suitable for conversion into a dry erase board. It is necessary to check the manufacturer’s specifications to ensure the melamine board is compatible with dry erase paints and coatings. Some melamine boards may have a specific coating or finish that may not provide the desired results when converting them into a dry erase board.
Can I skip priming the board?
Priming the melamine board is highly recommended to promote adhesion and ensure a long-lasting finish. While it may be tempting to skip this step, doing so may lead to poor paint adhesion and an uneven or easily erasable dry erase surface. To achieve the best results, it is advisable not to skip the priming process.
How often should I clean the board?
The frequency of cleaning the dry erase board depends on how frequently it is used and the level of residue or staining. In general, it is advisable to clean the board regularly to maintain its cleanliness and functionality. For daily use, a quick wipe with a dry erase board eraser or a soft cloth may be sufficient. If there are stubborn marks or stains, a more thorough cleaning can be done using a mild detergent solution.
Conclusion
Properly preparing a melamine board for dry erase use involves several important steps, including cleaning the board, smoothing the surface, conditioning with primer, painting with dry erase paint, and protecting the surface. By following the outlined steps and considering the additional tips and recommendations, you can create a high-quality dry erase board that is both functional and durable. Regular maintenance and cleaning will help ensure the longevity and optimal performance of your melamine dry erase board.
So you want to make your own melamine dry erase board, huh? Well, you’re in luck because we’ve got all the steps laid out for you right here. With just a few materials and a little bit of time, you’ll be able to create your very own personalized, functional whiteboard. Say goodbye to those boring store-bought options and get ready to unleash your creativity onto a stylish and practical surface. Whether you want it for your home office, classroom, or kitchen, follow along as we guide you through the process of making your own melamine dry erase board.
How to Make Your Own Melamine Dry Erase Board
If you’re looking for an affordable and customizable solution for your writing and note-taking needs, making your own melamine dry erase board is a fantastic option. With just a few materials and some simple steps, you can create a high-quality dry erase board that is perfect for your home, office, or classroom. In this article, we will guide you through the process of making your own melamine dry erase board, from preparing the board to applying the dry erase paint and finishing touches.
Materials Needed
To make your own melamine dry erase board, you will need the following materials:
Melamine Board: This will serve as the foundation of your dry erase board. It provides a smooth and durable surface for writing and erasing.
Melamine Edging Tape: Edging tape will give your board a polished and finished look. It also helps protect the edges of the melamine board from chipping or damage.
Dry Erase Laminate: Dry erase laminate is the key component that transforms your melamine board into a writable and erasable surface. It is applied over the melamine board and provides a smooth and white writing surface.
Painter’s Tape: Painter’s tape is used to protect the edges of the board during the painting process.
Sandpaper: Sandpaper is used to smoothen the melamine board surface before applying the melamine edging tape.
Foam Roller: A foam roller is used to apply the dry erase paint evenly and smoothly.
Paint Tray: A paint tray is used to hold and distribute the dry erase paint.
Jigsaw: A jigsaw is necessary for cutting the melamine board to the desired size and shape.
Router: A router is used to trim the melamine edging tape for a perfect fit.
Screwdriver: A screwdriver may be needed to attach mounting hardware, depending on how you plan to hang or display your dry erase board.
Now that we have gathered our materials, let’s dive into the process of making your own melamine dry erase board.
Preparing the Melamine Board
The first step in making your own melamine dry erase board is to prepare the melamine board itself. This involves measuring and marking the board, cutting it to the desired size, and smoothing out the board surface.
To begin, measure and mark the melamine board according to your desired dimensions. Consider the available wall space and your specific needs when determining the size of your dry erase board. Once marked, use a jigsaw to carefully cut the melamine board along the marked lines.
After cutting the board, it’s important to smooth the surface before applying the melamine edging tape. Use sandpaper to gently sand the board surface, removing any rough spots or imperfections. This will ensure a clean and even finish for your dry erase board.
Applying Melamine Edging Tape
After preparing the melamine board, it’s time to apply the melamine edging tape. This tape not only adds a decorative touch but also protects the edges of the melamine board from damage.
Measure and cut the melamine edging tape according to the length of each edge of the board. It is recommended to leave a slight overlap at the corners for a seamless appearance. Once cut, carefully apply adhesive to the backside of the edging tape, ensuring even coverage.
Next, place the edging tape onto the board surface, starting from one end and working your way to the other. Use a router to trim off any excess tape, ensuring a clean and precise edge. Take your time during this step to achieve a professional-looking finish for your melamine dry erase board.
Creating a Smooth Writing Surface
Now that the melamine board is prepared and the edging tape is applied, it’s time to transform it into a smooth writing surface using dry erase laminate. The dry erase laminate provides a white and erasable surface for writing and drawing.
Measure and cut the dry erase laminate according to the size of the melamine board. Be sure to leave a slight overlap for a seamless fit. Carefully remove the protective film from the backside of the laminate, revealing the adhesive side.
Align the dry erase laminate with the melamine board, ensuring an even and centered placement. Once aligned, slowly lower the laminate onto the board surface, applying even pressure to prevent bubbles or wrinkles. Gently smooth out any imperfections using a squeegee or your hands.
Preparing for Painting
Before applying the dry erase paint, it’s important to prepare the surface by taping off the edges, sanding, and cleaning.
Start by taping off the edges of the board using painter’s tape. This will protect the melamine edging tape and prevent any unwanted paint drips or smudges. Ensure that the tape is firmly pressed down to create a clean line.
Next, sand the surface of the dry erase laminate using fine-grit sandpaper. This will provide better adhesion for the dry erase paint and create a slightly rough texture for optimal erasability.
After sanding, clean the surface using a clean cloth dampened with water. This will remove any dust or debris, ensuring a smooth and clean painting surface.
Applying the Dry Erase Paint
Now it’s time to apply the dry erase paint that will transform your melamine board into a functional dry erase board. This process involves mixing the dry erase paint, applying the first coat, allowing drying time, and applying additional coats if needed.
Start by thoroughly mixing the dry erase paint according to the manufacturer’s instructions. Use a foam roller to apply a thin and even coat of paint to the dry erase laminate surface. Make long and smooth strokes to ensure a seamless finish.
Allow the first coat of paint to dry completely before applying additional coats. This drying time will vary depending on the specific dry erase paint you are using, so be sure to follow the instructions provided.
If desired, apply additional coats of dry erase paint until you achieve the desired level of opacity and erasability. Allow each coat to dry completely before applying the next.
Finishing Touches
Once the dry erase paint has dried thoroughly, it’s time to add the finishing touches to your melamine dry erase board. This involves removing the painter’s tape, smoothing the edges with sandpaper, and attaching any necessary mounting hardware.
Carefully remove the painter’s tape, ensuring clean and crisp lines along the edges of the board. Use fine-grit sandpaper to gently smooth the edges of both the melamine board and the melamine edging tape. This will create a polished and professional-looking finish.
If you plan to hang or display your dry erase board, attach the necessary mounting hardware using a screwdriver. Follow the manufacturer’s instructions for the specific mounting hardware you are using.
Caring for Your Melamine Dry Erase Board
To ensure the longevity and functionality of your newly made melamine dry erase board, it’s important to properly care for it. Here are some tips to help you maintain and preserve your board:
Use Appropriate Dry Erase Markers: Use only dry erase markers that are specifically designed for use on melamine surfaces. Avoid using permanent markers or other writing tools that may cause staining or damage.
Clean the Board Regularly: Regularly clean the dry erase board using a soft cloth or dry erase board eraser. This will help remove any residue or markings and keep the surface in good condition.
Avoid Using Harsh Chemicals: Avoid using harsh chemicals or abrasive cleaners on the board surface, as they may cause damage or discoloration. Stick to mild cleaning solutions or water when necessary.
Store and Transport Properly: When not in use, store your melamine dry erase board in a safe and dry place to prevent damage or warping. If you need to transport the board, ensure it is properly secured and protected to avoid any potential damage.
Troubleshooting Tips
While making your own melamine dry erase board is a fairly straightforward process, it’s possible to encounter some common issues. Here are some troubleshooting tips for addressing these problems:
Stains and Ghosting: If you notice stains or ghosting on your dry erase board, try using a specialized dry erase board cleaner or a mixture of water and vinegar to remove them. Gently scrub the affected areas using a soft cloth or sponge.
Peeling or Damaged Edging Tape: If the melamine edging tape starts to peel or becomes damaged over time, carefully remove the damaged portion and replace it with new edging tape. Ensure that the new tape adheres properly to the board surface.
Bubbles or Wrinkles in Laminate: If you encounter bubbles or wrinkles during the application of the dry erase laminate, gently lift the affected area and reapply it, smoothing out any imperfections. Take your time during this step to ensure a smooth and bubble-free surface.
Alternative Options
While melamine dry erase boards are a popular choice, there are alternative options worth considering. These options include using glass as a writing surface, using magnetic paint, or using whiteboard wallpaper. Each option has its own advantages and considerations, so be sure to research and choose the one that best suits your needs and preferences.
In conclusion, making your own melamine dry erase board is a cost-effective and customizable solution that allows you to create a functional and stylish writing surface. By following the steps outlined in this article, you can create a high-quality dry erase board that is perfect for your personal or professional needs. Enjoy the convenience and versatility of your own homemade dry erase board, and let your creativity and productivity flourish.
So you’ve got a melamine dry erase board that’s starting to look a little worse for wear? No worries, we’ve got you covered. In this article, we’ll show you the best way to clean your melamine dry erase board to keep it looking as good as new. Whether it’s stubborn marker stains or ghosting that’s got you down, we’ve got the tips and tricks to get your board back in tip-top shape. Say goodbye to those pesky smudges and hello to a sparkling clean writing surface – let’s get started!
Preparation
Before diving into the cleaning process, it’s important to gather the necessary supplies. You’ll need a dry cloth or eraser, a microfiber cloth, a melamine sponge, a mild detergent, water, and a spray bottle. Having these items ready will ensure a smooth cleaning experience.
Once you have your supplies, the next step is to ensure that the board is dry. If there’s any moisture on the surface, it can affect the effectiveness of the cleaning process. Take a moment to wipe off any excess moisture with a dry cloth. This step is crucial for achieving the best cleaning results.
Before proceeding further, it’s also important to remove any loose dirt or debris from the surface of the board. You can use a dry cloth or brush to gently sweep away any dirt or eraser residue. This step will help prevent scratching the surface when you begin the cleaning process.
Basic Cleaning Methods
Now that you’ve prepped the board, let’s move on to the basic cleaning methods. These methods are perfect for day-to-day cleaning and will help maintain the board’s surface.
Using a dry cloth or eraser is the simplest and quickest way to clean a melamine dry erase board. Simply wipe the surface in a gentle, circular motion to remove any marks or stains. Make sure to cover the entire surface, paying extra attention to areas with heavy marker usage. This method is ideal for light cleaning and keeping the board looking fresh.
Another effective method is erasing with a microfiber cloth. Microfiber cloths are great at trapping dirt and grime without scratching the surface. Dampen the cloth with water and wipe the board in a gentle motion, focusing on stubborn marks or smudges. The microfiber cloth will help lift away any residue and leave your board looking clean and clear.
If you encounter more stubborn marks or stains, using a melamine sponge can be your secret weapon. Wet the sponge with water and gently scrub the surface, applying light pressure. The melamine sponge has micro-abrasive properties that can tackle tougher stains without damaging the board. Remember to rinse the sponge frequently throughout the process to avoid spreading the residue.
For more thorough cleaning, using a mild detergent and water solution is recommended. Create a mixture using a small amount of mild detergent and water in a spray bottle. Spray the solution onto the board and use a cloth or sponge to wipe the surface. Rinse with clean water and wipe dry with a cloth. This method is particularly useful for removing grease or stubborn, dried-on stains.
Specialized Cleaning Methods
In some cases, basic cleaning methods may not be enough to completely restore the board’s surface. Here are a few specialized cleaning methods to tackle specific cleaning challenges.
If you come across permanent marker stains on your melamine dry erase board, don’t panic. There are ways to remove them! One effective method is to cover the stain with a dry-erase marker and allow it to sit for a few minutes. Then, wipe away both the dry-erase marker and the permanent marker with a dry cloth or eraser. Repeat this process until the stain is no longer visible. Another option is to use rubbing alcohol on a cloth and gently rub the stain until it disappears. Remember to test these methods on a small, inconspicuous area first to ensure they don’t damage the board.
Ghosting marks, those stubborn faint shadows of previous writings, can be frustrating to deal with. To treat these marks, you can try using a dry cloth or eraser, as mentioned in the basic cleaning methods, to gently rub the surface. If that doesn’t work, a mixture of water and vinegar can be effective. Dampen a cloth with the mixture and gently rub the marks until they fade. Be sure to rinse the board with clean water afterward to remove any vinegar residue.
For deep-set stains that are particularly stubborn, there are a few methods you can try. One option is to create a paste using baking soda and water. Apply the paste to the stain, let it sit for a few minutes, and then scrub gently with a cloth or sponge. Rinse the board thoroughly with clean water and dry it well. Alternatively, you can use a specialized melamine cleaner designed specifically for dry erase boards. Follow the instructions on the cleaner and use it accordingly to remove deep stains effectively.
Additional Tips
To ensure the longevity of your melamine dry erase board and maintain its pristine condition, consider the following additional tips:
Avoid using abrasive materials or strong chemicals while cleaning the board. These can cause scratches or damage the surface. Stick to the methods and supplies mentioned above for safe cleaning.
Regularly maintaining and conditioning the board will help prolong its lifespan. Use a dry cloth or eraser to remove any residual marker ink after each use. This will prevent the ink from sitting on the surface and becoming more difficult to remove later on.
When the board is not in use, it’s important to protect it from potential damage. Cover the board with a dry erase board cover or store it in a safe place to prevent scratches, dirt, or accidental markings.
Consider using alternative cleaning solutions if you prefer natural or eco-friendly options. For example, a mixture of lemon juice and water can be used as a cleaning agent. Simply spray the mixture onto the board and wipe it clean with a cloth or sponge.
To prevent future staining and ghosting, it’s essential to properly care for your melamine dry erase board. Encourage the use of high-quality dry erase markers and erasers to minimize residue and smudging. Additionally, remind users to write and erase with proper pressure, as excessive force can cause lasting marks or damage the board’s surface.
Dos and Don’ts
To ensure a successful cleaning process and maintain your melamine dry erase board’s quality, here are some dos and don’ts to keep in mind:
Dos:
Do regularly clean your melamine dry erase board to prevent the buildup of residual ink and dirt, ensuring a clean and clear surface for every use.
Do test any cleaning method or solution on a small, inconspicuous area first to ensure it doesn’t cause any damage or discoloration.
Do follow the manufacturer’s instructions and recommendations for cleaning and maintaining your specific melamine dry erase board.
Do store your dry erase markers, erasers, and other supplies in a clean, dry place to prevent contamination and extend their lifespan.
Don’ts:
Don’t use abrasive materials, such as steel wool or harsh scrub brushes, as they can scratch or damage the melamine surface.
Don’t use strong chemicals, such as bleach or ammonia-based cleaners, as they can discolor or deteriorate the board’s surface.
Don’t apply excessive force or pressure when writing or erasing on the board, as it can cause indentations or marks that are difficult to remove.
Don’t let ink or stains sit on the board for an extended period. Promptly clean any spills or marks to prevent them from becoming more stubborn and difficult to remove.
FAQs
How often should I clean my melamine dry erase board? It is recommended to clean your melamine dry erase board regularly, depending on its usage. For boards with heavy daily usage, cleaning once a week is typically sufficient. However, if the board is used less frequently, a monthly cleaning should be adequate to maintain its cleanliness.
Can I use glass cleaner on my melamine board? It is generally not recommended to use glass cleaner on a melamine dry erase board. Glass cleaners often contain chemicals that may damage or discolor the board’s melamine surface. Stick to the cleaning methods and solutions mentioned in this article to ensure the safe and effective cleaning of your melamine dry erase board.
Can I use vinegar to clean the board? Yes, you can use vinegar to clean your melamine dry erase board. As mentioned earlier, a mixture of water and vinegar can be effective in treating ghosting marks. However, it is important to rinse the board thoroughly with clean water after using vinegar to remove any residue.
How do I remove permanent marker stains? Permanent marker stains can be challenging to remove, but not impossible. One method is to cover the stain with a dry-erase marker and wipe it away with a dry cloth or eraser. Another option is to use rubbing alcohol on a cloth and gently rub the stain until it disappears. Remember to test these methods on a small, inconspicuous area first to ensure they don’t damage the board.
What is the best way to prevent ghosting? To prevent ghosting, it’s essential to properly care for your melamine dry erase board. Regularly clean the board after each use, using a dry cloth or eraser to remove any residual ink. Encourage the use of high-quality dry erase markers and erasers to minimize residue and smudging. Additionally, avoid leaving marker ink on the board for extended periods, as this can contribute to ghosting over time.
Conclusion
Keeping your melamine dry erase board clean and well-maintained is crucial for its longevity and optimal performance. By following the basic and specialized cleaning methods outlined in this article, you can ensure that your board remains in excellent condition. Remember to gather the necessary supplies, prep the board, and use the appropriate cleaning techniques for different stains and marks. Additionally, following the dos and don’ts will help you avoid any potential damage and maintain the board’s quality. By incorporating these cleaning practices into your routine and being proactive in preventing staining and ghosting, your melamine dry erase board will continue to serve its purpose effectively for years to come.
So, you’re tired of cluttered desks and endless sticky notes? Well, we’ve got a solution for you! In this article, we’re going to show you just how easy it is to make your very own DIY melamine dry erase board. With just a few materials and a little bit of creativity, you’ll have a sleek and stylish surface to jot down all of your important notes and reminders. Say goodbye to messy desks and hello to organization with this simple and cost-effective project. Let’s get started!
How to Make a DIY Melamine Dry Erase Board
Are you tired of constantly buying new whiteboards for your office or home? Why not try making your own with melamine board? It’s an affordable and practical solution that allows you to have a custom-sized whiteboard tailored to your needs. In this article, we will guide you through the step-by-step process of creating a melamine dry erase board, from the necessary materials to the finishing touches. Let’s get started!
Materials Needed
Before diving into the process, make sure you have all the necessary materials on hand. For this DIY project, you will need:
Melamine board
Start by obtaining a piece of melamine board in the size you desire for your whiteboard. The melamine surface is smooth, durable, and perfect for erasable markers.
Whiteboard paint
To transform your melamine board into a whiteboard, you will need a can of whiteboard paint. Make sure to choose a high-quality brand that provides a smooth writing surface.
Paintbrush
A paintbrush is essential for applying the whiteboard paint evenly onto the melamine board. Select a brush size that suits the size of your board for efficient coverage.
Sandpaper
To ensure the edges and surface of your melamine board are smooth and free from imperfections, you will need sandpaper. Opt for a medium-grit sandpaper to achieve the best results.
Tape measure
Accurate measurements are crucial for creating a perfectly sized whiteboard. Have a tape measure on hand to measure and mark the desired dimensions on the melamine board.
Pencil
A pencil will be handy for marking the measurements on the melamine board before cutting. Make sure to choose a pencil with a firm and clear line for precise markings.
Saw
To cut the melamine board to the desired size, you will need a saw. A handsaw can work well for smaller boards, while a power saw may be more efficient for larger ones. Remember to prioritize safety when operating any tools.
Preparation
Now that you have gathered all the materials, it’s time to prepare the melamine board for the whiteboard transformation. Follow these steps:
Measure and mark the desired size
Using a tape measure, determine the dimensions you want for your whiteboard. With a pencil, carefully mark these measurements on the melamine board. Double-check your marks to ensure accuracy.
Cut the melamine board
Once you have marked the dimensions, it’s time to cut the melamine board. Place the board on a secure work surface and use a saw to carefully cut along the marked lines. Take your time and ensure a clean and straight cut.
Sand the edges and surface
To create a professional-looking whiteboard, it’s crucial to sand the edges and surface of the melamine board. Use sandpaper to smooth out any rough edges and remove any imperfections from the surface. This step will enhance the appearance and feel of your whiteboard.
Applying the Whiteboard Paint
With your melamine board ready, it’s time to transform it into a functional whiteboard. Follow these steps to apply the whiteboard paint:
Clean the board surface
Before applying the whiteboard paint, make sure the melamine board surface is clean and free from any dust or debris. Wipe it down with a soft cloth or sponge dampened with water and mild soap. Allow it to dry completely before applying the paint.
Stir the whiteboard paint
Open the can of whiteboard paint and thoroughly stir it using a paint stick. This will ensure that the paint is well-mixed and ready for application.
Apply the first coat
Using a paintbrush, begin applying the whiteboard paint to the melamine board. Start at one corner and work your way across the board, ensuring even coverage. Pay close attention to the edges and corners to ensure a seamless finish.
Allow drying time
After applying the first coat of whiteboard paint, allow it to dry according to the manufacturer’s instructions. This usually takes a few hours, but it’s essential to follow the specific drying time mentioned on the paint can.
Apply additional coats
If necessary, apply additional coats of whiteboard paint to achieve a smooth and vibrant whiteboard surface. Remember to allow each coat to dry completely before applying the next. Multiple coats can increase the durability and eraseability of the whiteboard.
Curing the Board
Once you have applied the desired number of coats and allowed them to dry, it’s time to cure the whiteboard. Follow these steps:
Follow the manufacturer’s instructions
To ensure the proper curing of your whiteboard, carefully read and follow the instructions provided by the manufacturer of the whiteboard paint. Each brand may have specific curing instructions, including recommended curing time and temperature.
Allow proper curing time
Curing time can vary depending on the brand of whiteboard paint used. Generally, the paint will need several days to fully cure and reach its maximum eraseability. Avoid using the whiteboard until the paint has fully cured to avoid any damage.
Mounting the Board
With your melamine board transformed into a whiteboard, it’s time to mount it in a suitable location. Follow these steps:
Choose a suitable location
Consider where you want to display your whiteboard and choose a location that meets your needs. It should be easily accessible and visible to all who need to use it. Whether it’s in your home office or a communal area in your workplace, make sure it is within reach.
Attach mounting brackets or adhesive
Depending on the size of your whiteboard and the available installation options, you can attach mounting brackets or use adhesive to secure it to the wall. Follow the manufacturer’s instructions for the chosen method and ensure the whiteboard is firmly attached for stability.
Maintenance Tips
To ensure the longevity and optimum performance of your DIY melamine dry erase board, follow these maintenance tips:
Clean with whiteboard cleaner
Regularly clean your whiteboard with a designated whiteboard cleaner to remove any dry erase marker residue. This will prevent staining and maintain the clarity of the surface.
Avoid using abrasive materials
When cleaning your whiteboard, avoid using abrasive materials such as rough cloths or scrub brushes. These can scratch or damage the whiteboard surface. Stick to soft cloths or sponges for gentle cleaning.
Regularly erase and reapply markers
To prevent ghosting or permanent marks, regularly erase your whiteboard using a dry eraser. It’s also beneficial to periodically apply fresh markings with dry erase markers to refresh the surface and enhance erasability.
Personalization Ideas
While a standard whiteboard can be functional, why not add some personal touches to make it truly unique? Here are a few ideas to personalize your melamine dry erase board:
Use colored whiteboard paint
Instead of traditional white, explore colored whiteboard paint options to add a pop of color to your whiteboard. Choose a shade that matches your décor or sparks creativity in your workspace.
Add a frame
Enhance the appearance of your whiteboard by adding a framed border. Select a frame that complements your existing décor and attach it securely around the edge of the melamine board. This addition will give your whiteboard a finished look.
Attach corkboard tiles
If you want to combine the functionality of a whiteboard with the practicality of a bulletin board, consider attaching corkboard tiles to a section of your melamine board. This will allow you to pin important notes, documents, or memos alongside your whiteboard markings.
Alternative DIY Options
While melamine boards work exceptionally well for DIY whiteboards, there are other options worth exploring. Consider these alternatives for your next project:
Using showerboard as a base
Showerboard, also known as bathroom paneling, is a cost-effective alternative to melamine boards. It offers a smooth and durable surface that can be easily transformed into a whiteboard. Simply follow the same steps outlined in this article, substituting showerboard for the melamine board.
Using glass as a whiteboard surface
For a sleek and modern look, consider using glass as the surface of your DIY whiteboard. Glass can be transformed into a whiteboard using specialized glass whiteboard paint or glass film. This option provides a unique and stylish alternative to traditional whiteboards.
Conclusion
Now that you have learned how to make a DIY melamine dry erase board, you can enjoy the benefits of having a customized whiteboard at a fraction of the cost. By following the outlined steps and considering personalization ideas, you can create a functional and stylish whiteboard that suits your needs and enhances your workspace. So, grab your materials, get creative, and start making your very own melamine dry erase board today!