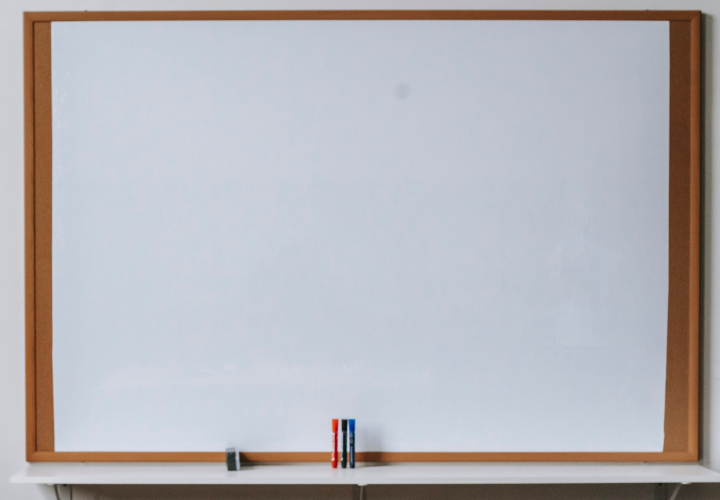
Yueshan Melamine Dry Erase Board with Lines
The Yueshan Melamine Dry Erase Board with Lines is a versatile and practical tool for any office, classroom, or home setting. Designed with functionality in mind, this whiteboard provides a smooth writing surface that allows you to jot down important notes, ideas, and reminders with ease. The addition of lines on the board ensures neat and organized writing, making it ideal for educational settings or brainstorming sessions. With a sleek design, durable construction, and easy installation, the Yueshan Melamine Dry Erase Board with Lines is the perfect solution for enhancing productivity and organization in any environment.
Yueshan Melamine Dry Erase Board with Lines
Overview
Whether you are a student, a professional, or a parent, having a reliable and versatile whiteboard is essential for effective communication and organization. The Yueshan Melamine Dry Erase Board with Lines offers all the features you need to enhance your writing experience and optimize productivity. With a durable melamine surface, clearly printed lines, and a sturdy aluminum frame, this whiteboard provides a neat and professional look while ensuring longevity and durability. In this comprehensive article, we will explore the key features, benefits, applications, installation process, maintenance tips, cleaning techniques, usage tips, and comparisons of the Yueshan Melamine Dry Erase Board with Lines. By the end, you will have a clear understanding of why this whiteboard is an excellent addition to any classroom, conference room, office space, home, restaurant, or hospital.
Whiteboard with linesBenefits and Features:
A product crafted to streamline thoughts and ideas, this whiteboard consists of evenly spaced horizontal lines, an easy-to-clean surface, and a robust frame ensuring durability.
| Benefits | Specific Features | Real-World Applications |
|---|---|---|
| 1. Structured Note-taking | Easy-to-clean surface | Ideal for classrooms & meetings |
| 2. Aesthetic design complements any setting | Robust frame for longevity | Perfect for home offices & study rooms |
| 3. Promotes organized thinking | Evenly spaced horizontal lines | Suitable for artists for sketching & planning |
| 4. Long-lasting utility | Suitable for all marker types | Used in corporate presentations & workshops |
| 5. Ensures clear readability | Sturdy wall mounts included | Great for planners and to-do lists |
| 6. Maximizes productivity | Anti-glare surface | Effective for tutoring and teaching sessions |
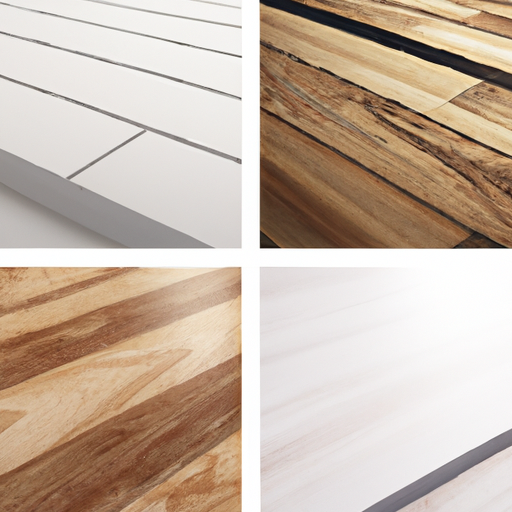
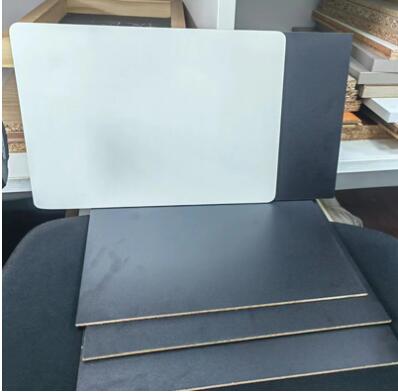
whiteboard with lines production details
| Category | Product Pictures | substrates | surface bright | ProductDescription |
|
High Glossy white |
MDFandPB |
108 ~ 116 |
The melamine finish high-gloss white writing whiteboard, available in various sizes and thicknesses like
3mm, 5mm, 8mm, 9mm, and 18mm, is commonly used for office meetings, training sessions, desk screens, memo writing, and practice writing. It can be written on using water-based black whiteboard pens and features grid lines. |
|
| Grid line white
board |
MDF |
108 ~ 116 |
available in various thicknesses like 3mm, 5mm, 9mm,
With dry erase function of melamine finish high-gloss field grid white background writing board, mainly used for making: teaching and practicing writing Chinese characters stationery board production. Writing stationery: water-based black whiteboard marker. |
|
|
Dot line grid white board |
MDF |
108 ~ 116 |
available in various thicknesses like 3mm, 5mm, 9mm,
The writing board with dry erase function has amelamine finishhigh-gloss red and blue lines on a white background and is mainly used for the production of: the teaching of pinyin and English and writing practice of stationery board production. Writing stationery: water-based black whiteboard pen |
|
| Matt black |
MDF |
7
~ 9 |
available in various thicknesses like 3mm, 5mm, 9mm, 18MM
Writing boards with dry-erase function, with a matte matte black base inmelaminefinish, mainly used for making: large blackboards for traditional teaching and small blackboards for practicing chalk writing. Writing stationery: white chalk |
|
| Green matt |
MDF |
7
~ 9 |
available in various thicknesses like 3mm, 5mm, 9mm, 18mm
Writing boards with dry-erase function, with a matte matte finishon a dark green background in amelamine finish, mainly used for the production of: writing boards for traditional teaching and small stationery boards for practicing chalk writing. Writing stationery: white chalk |
Key Features
Durable Melamine Surface
The Yueshan Melamine Dry Erase Board with Lines features a highly durable melamine surface that resists scratches, stains, and ghosting. This ensures a smooth writing experience without any smudging or interference, allowing you to focus on your message instead of worrying about unwanted marks on the board.
Clearly Printed Lines
One of the standout features of this whiteboard is its clearly printed lines. These lines are strategically placed to help improve writing alignment and maintain neatness. Whether you are a teacher writing in a straight line or a student practicing your handwriting, the printed lines provide a guide, resulting in well-organized and visually appealing content.
Sturdy Aluminum Frame
The whiteboard’s sturdy aluminum frame not only enhances its durability but also adds an aesthetically pleasing touch. The frame provides stability and ensures that the whiteboard remains firmly in place, even in high-traffic areas. Additionally, the aluminum frame is lightweight, making it easy to handle and transport if needed.
Versatile Size Options
Yueshan offers the Melamine Dry Erase Board with Lines in various size options to cater to different needs and spaces. Whether you need a compact whiteboard for your home office or a large one for a conference room, you can choose the size that suits your requirements. The variety of options ensures that you can find the perfect fit for any environment.
Mounting Options
To accommodate different installation preferences, the Yueshan Melamine Dry Erase Board with Lines offers multiple mounting options. You can choose to mount it horizontally or vertically, depending on your space and convenience. This flexibility allows you to customize the board’s placement according to your needs, providing optimal functionality and accessibility.
Accessory Tray
The inclusion of an accessory tray is another convenient feature of this whiteboard. The tray is designed to hold markers, erasers, and other essential writing tools, keeping them within easy reach. This not only ensures a clutter-free writing surface but also saves valuable time by eliminating the need to search for supplies.

Benefits
Improved Writing Alignment
With the clearly printed lines on the Yueshan Melamine Dry Erase Board, achieving proper writing alignment becomes effortless. Whether you are a teacher delivering a lecture or a student practicing handwriting, the lines act as a guide, allowing you to maintain consistent spacing and alignment. This ensures that your content looks professional and organized, making it easier for others to read and understand.
Enhanced Organization
The Yueshan Melamine Dry Erase Board with Lines offers enhanced organization capabilities, making it a valuable tool for classrooms, conference rooms, and offices. The printed lines provide a framework for creating neatly organized charts, diagrams, and lists. This allows presenters to convey information in a structured and logical manner, resulting in optimal audience comprehension and engagement.
Neat and Professional Look
Whiteboards with lines have become increasingly popular due to their sleek and professional appearance. The Yueshan Melamine Dry Erase Board with Lines not only offers functional benefits but also adds a touch of elegance to any environment. The clearly printed lines, along with the sturdy aluminum frame, create a visually appealing whiteboard that complements any decor.
Longevity and Durability
Investing in a durable whiteboard ensures its longevity and serves as a wise investment in the long run. The Yueshan Melamine Dry Erase Board with Lines is built to withstand the demands of daily use. Its melamine surface is resistant to scratches, stains, and ghosting, ensuring that the board remains in pristine condition for years. With proper care and maintenance, this whiteboard will continue to serve you effectively, eliminating the need for frequent replacements.
Easy Installation and Portability
Installing the Yueshan Melamine Dry Erase Board with Lines is a breeze, thanks to its versatile mounting options. Whether you prefer to mount it on a wall or use a stand, the straightforward installation process ensures that you can start using the whiteboard in no time. Additionally, the lightweight aluminum frame makes the whiteboard easily portable, allowing you to relocate it whenever necessary without any hassle.
Applications
The Yueshan Melamine Dry Erase Board with Lines is suitable for various applications and environments. Here are some of the areas where this whiteboard can be particularly beneficial:
Classrooms
In classrooms, the Yueshan Melamine Dry Erase Board with Lines becomes an essential teaching tool. Teachers can utilize the printed lines to maintain consistent and legible handwriting, helping students follow along with ease. This whiteboard is ideal for creating organized lesson plans, visual aids, and interactive exercises, enhancing student engagement and understanding.
Conference Rooms
In business settings, the Yueshan Melamine Dry Erase Board with Lines proves invaluable during meetings, brainstorming sessions, and presentations. The lines assist in creating visually appealing charts, graphs, and diagrams, enabling participants to easily follow and comprehend the information being conveyed. The professional look and durability of this whiteboard enhance the overall professionalism of the conference room.
Office Spaces
Within office spaces, the Yueshan Melamine Dry Erase Board with Lines is a versatile tool for collaboration, planning, and organization. Team members can utilize the lines to create project timelines, task lists, and strategic plans. This whiteboard promotes effective communication, ensuring that everyone is on the same page and working towards common goals.
Homes
For personal use, the Yueshan Melamine Dry Erase Board with Lines is a practical addition to any home. In home offices, it provides a dedicated space for jotting down important tasks, deadlines, and reminders. In kitchens, it can serve as a message board for leaving notes, sharing schedules, and organizing meals. The options are endless, allowing you to customize the whiteboard’s application according to your household’s specific needs.
Restaurants
In restaurants, the Yueshan Melamine Dry Erase Board with Lines can serve as a menu board or display board. The clearly printed lines help maintain a uniform layout and aid in organizing menu items, specials, and prices. By utilizing this whiteboard, restaurant owners can easily update their offerings and showcase new or seasonal items.
Hospitals
Within medical facilities, the Yueshan Melamine Dry Erase Board with Lines is a valuable tool for communication and organization. Doctors and nurses can utilize the lines to detail patient information, record vital signs, and track medications. This whiteboard supports efficient communication among healthcare professionals, enhancing patient care and ensuring accurate information exchange.

Installation
Choosing the Right Mounting Option
Before installing your Yueshan Melamine Dry Erase Board with Lines, consider the available mounting options and select the one that best suits your needs. You can choose between wall-mounting or using a stand depending on your preferences and available space.
Preparation and Tools
To ensure a smooth installation process, gather all the necessary tools beforehand. You will need a drill, level, measuring tape, screwdriver, and anchors or wall plugs if mounting on a wall. Having these tools prepared will save you time and ensure a secure installation.
Step-by-Step Installation Guide
- Determine where you want to install the whiteboard and ensure it is at an appropriate height and location for easy accessibility.
- If you are mounting the whiteboard on a wall, use a measuring tape to mark the desired position. It is recommended to position the board at eye level for optimal visibility.
- Use a level to make sure the marked position is straight and aligned.
- If necessary, use a drilling machine to create holes at the marked spots. Make sure to choose the right drill bit size according to the type of wall.
- If using wall plugs or anchors, insert them into the drilled holes.
- Position the whiteboard over the holes or wall plugs, making sure it aligns with the markings.
- Securely fasten the whiteboard to the wall using the provided screws or bolts. Use a screwdriver to tighten them, ensuring the whiteboard is firmly in place.
- Double-check the alignment and stability of the whiteboard.
- If using a stand, follow the manufacturer’s instructions for assembly and secure the whiteboard onto the stand.
Maintenance
Preventing Stains and Ghosting
To prevent staining and ghosting on your Yueshan Melamine Dry Erase Board with Lines, it is essential to take preventive measures. Avoid using permanent markers or markers that are not suitable for whiteboards. These markers can leave difficult-to-remove stains and damage the board’s surface. Always use dry erase markers specifically designed for whiteboards to ensure smooth writing and easy erasing without leaving any residue.
Removing Permanent Marker
If, by mistake, permanent marker ink ends up on the whiteboard’s surface, it is still possible to remove it. Use a dry erase marker to trace over the permanent ink, then quickly wipe it off with a dry cloth or eraser. The solvent in the dry erase marker lifts off the permanent ink, making it easier to erase. Repeat the process if necessary until all traces of the permanent marker are gone.
Repairing Surface Damage
In the event of surface damage, such as scratches or dents, there are a few methods to repair the Yueshan Melamine Dry Erase Board with Lines. For minor scratches, you can use a whiteboard cleaner, non-abrasive toothpaste, or baking soda mixed with water to gently rub over the scratched area. For deeper scratches or dents, you may need to consult a professional or contact the manufacturer for advice on repairing or replacing the board.
Preserving the Board’s Lifespan
To ensure the longevity of your Yueshan Melamine Dry Erase Board with Lines, it is important to handle it with care. Avoid applying excessive pressure when writing or erasing, as this can cause surface damage. Regularly clean the board using appropriate cleaning supplies to remove dust, residue, and marker ink. Keep the board away from direct sunlight or extreme temperatures, as they can affect the integrity of the melamine surface. By following these guidelines, you can preserve the board’s lifespan and continue to enjoy its benefits for years to come.

Cleaning
Choosing the Right Cleaning Supplies
To maintain a clean and glossy surface on your Yueshan Melamine Dry Erase Board with Lines, it is essential to choose the right cleaning supplies. Use a whiteboard-specific cleaner or a mild soap mixed with water to remove dust, stains, and marker residue. Avoid using harsh chemicals, abrasive cleaners, or rough cleaning pads, as they can damage the whiteboard’s surface.
Regular Cleaning Routine
To keep your whiteboard in optimal condition, it is recommended to establish a regular cleaning routine. Wipe the board with a soft, lint-free cloth or whiteboard eraser on a daily basis to remove dust and dry erase marker residue. This simple step will keep the surface clean and facilitate smooth writing and erasing experiences.
Dealing with Stubborn Stains
Occasionally, stubborn stains or marker residue may require a deeper cleaning. In such cases, dampen a soft cloth with a whiteboard cleaner or mild soap mixture and gently wipe the affected areas. Allow the cleaner to sit for a few seconds before wiping it off with a clean, damp cloth. If the stain persists, repeat the process or consult the manufacturer for further guidance.
Maintaining a Glossy Surface
To maintain the glossy surface of the Yueshan Melamine Dry Erase Board with Lines, it is important to avoid using excessive force when erasing or cleaning. Gentle yet thorough cleaning is sufficient to maintain the glossy finish. Regularly wiping the board with a whiteboard eraser or soft cloth will ensure that the melamine surface remains smooth and receptive to dry erase markers.
Usage Tips
Writing Techniques for Optimal Visibility
When using the Yueshan Melamine Dry Erase Board with Lines, employing proper writing techniques can enhance the visibility and legibility of your content. Use dark-colored dry erase markers that contrast well with the whiteboard’s surface to ensure optimal visibility from a distance. Write in bold, clear strokes and avoid writing too small, as it may be difficult for others to read. Remember to utilize the printed lines to maintain consistent alignment and spacing for a professional and organized appearance.
Utilizing the Lines for Perfect Formatting
The printed lines on the Yueshan Melamine Dry Erase Board serve as a useful tool for creating well-formatted content. Whether you are drawing graphs, dividing the board into sections, or writing in straight lines, the lines provide a visual guide for creating precise and visually pleasing content. Utilize the lines to maintain uniformity, balance, and legibility, resulting in professional-looking presentations and displays.
Utilizing the Accessory Tray Effectively
Make the most of the accessory tray included with the Yueshan Melamine Dry Erase Board with Lines. Keep your markers, erasers, and other essential writing tools organized and easily accessible in the tray. This will save valuable time during meetings or presentations, as you won’t need to search for supplies. Additionally, regularly check the tray for worn-out or dried-out markers and replenish them to maintain a smooth writing experience.
Avoiding Common Mistakes
To ensure optimal performance and a long lifespan for your Yueshan Melamine Dry Erase Board with Lines, it is important to avoid common mistakes. Never use sharp objects or abrasive materials to write on or erase the board, as they can damage the surface. Avoid leaving permanent marker ink on the board for extended periods, as this can make it more difficult to remove. Lastly, always use the board within its weight capacity limits to prevent damage or instability.
Maximizing Productivity
By incorporating the Yueshan Melamine Dry Erase Board with Lines into your workflow, you can maximize your productivity. Utilize the whiteboard for brainstorming, creating to-do lists, setting goals, and tracking progress. Visualize your ideas and strategies, share them with others during collaborative sessions, and easily update or modify content as needed. The versatility and convenience of this whiteboard will help you stay organized, focused, and efficient.

Comparisons
When considering the purchase of a whiteboard with lines, it is important to compare different options and features to make an informed decision. Assess factors such as durability, price, size options, frame materials, and line quality. Compare the Yueshan Melamine Dry Erase Board with Lines to other brands and models by reading customer reviews, evaluating warranties, and understanding the overall reputation of each product. By conducting a thorough and unbiased comparison, you can confidently choose the whiteboard that best suits your needs.
Conclusion
The Yueshan Melamine Dry Erase Board with Lines offers a range of features and benefits that make it an excellent choice for various applications. Whether you are a teacher, a professional, or a parent, this whiteboard enhances communication, organization, and productivity. With its durable melamine surface, clearly printed lines, sturdy aluminum frame, and versatile size options, the Yueshan Melamine Dry Erase Board with Lines provides a reliable and stylish solution. By following the installation and maintenance guidelines, you can ensure the longevity and effectiveness of your whiteboard, enabling you to achieve neat and professional results for years to come. Invest in the Yueshan Melamine Dry Erase Board with Lines and experience the difference it can make in your classroom, office, or home.

Yueshan Melamine Dry Erase Board with Lines Read More »