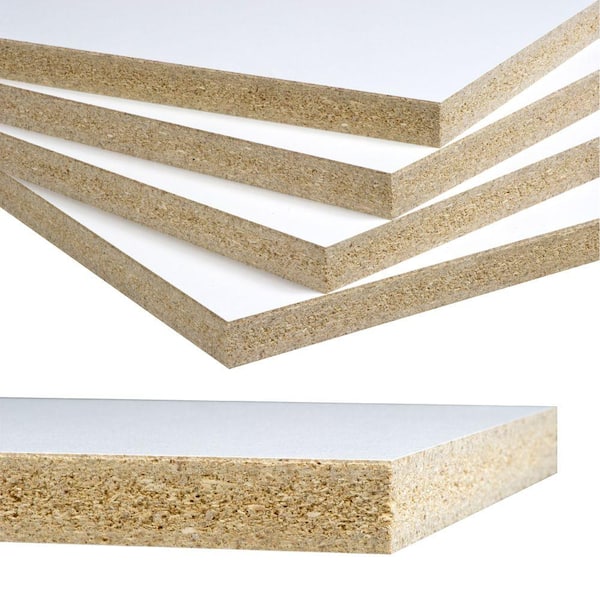
So you’re considering using melamine boards for your next project? Well, before you start, it’s important to weigh the advantages and disadvantages of these boards. On the bright side, melamine boards are known for their durability, affordability, and resistance to moisture and staining. They also come in a wide range of colors and designs, making them a versatile choice for both practical and decorative purposes. However, it’s worth noting that melamine boards can be prone to chipping and cracking, and they may not offer the same level of strength and longevity as solid wood. With that in mind, let’s take a closer look at the pros and cons of using melamine boards.
Advantages of Melamine Boards
Durable and Long-lasting
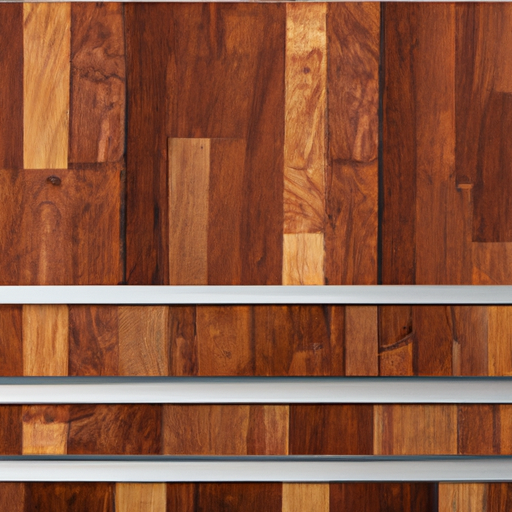
When it comes to durability, melamine boards are hard to beat. Made from a composite wood material that is fortified with melamine resin, these boards are incredibly strong and can withstand heavy use and abuse without showing signs of wear and tear. Whether you’re using them for shelving units, cabinets, or furniture, melamine boards are built to last.
Versatile Design Options
One of the major advantages of melamine boards is the wide range of design options available. Melamine boards are available in numerous colors, patterns, and finishes, allowing you to choose the perfect style to complement your interior design. Whether you prefer a classic wood grain finish or a bold solid color, melamine boards offer endless possibilities for creating a customized look.
Easy to Clean and Maintain
melamine boards are incredibly easy to clean and maintain, making them a popular choice for high-traffic areas and busy households. The smooth and non-porous surface of melamine boards makes them resistant to stains and spills, and they can be easily wiped clean with a damp cloth or mild cleaning solution. Unlike natural wood, melamine boards do not require regular polishing or sealing, saving you time and effort in the long run.
Affordable Alternative
One of the biggest advantages of melamine boards is their affordability. Compared to solid wood or other composite materials, melamine boards offer a cost-effective solution for a wide range of applications. Whether you’re working on a large-scale project or a small DIY endeavor, melamine boards allow you to achieve a high-quality and professional look without breaking the bank.
Resistant to Heat and Moisture
melamine boards are highly resistant to heat and moisture, making them suitable for use in kitchens, bathrooms, and other areas prone to humidity and temperature fluctuations. Unlike natural wood, melamine boards will not warp, swell, or rot when exposed to moisture. This moisture resistance also makes melamine boards a good choice for outdoor applications such as decks and fences.
Disadvantages of Melamine Boards
Lack of Natural Aesthetics
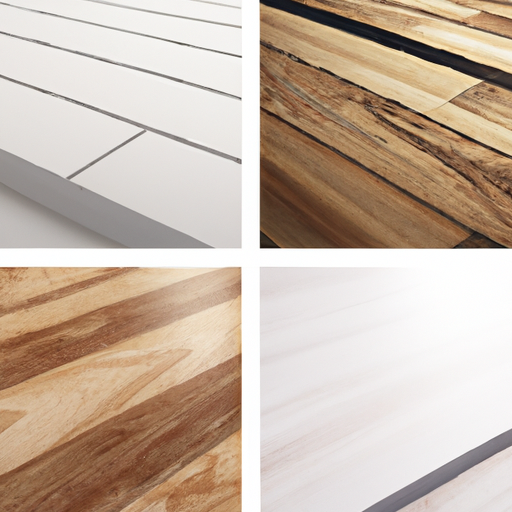
While melamine boards offer a wide range of design options, some people may find that they lack the natural aesthetics of real wood. The simulated wood grain patterns and solid colors of melamine boards may not have the same visual appeal and warmth as natural wood. However, advancements in manufacturing techniques have helped to improve the overall look and texture of melamine boards, making them more closely resemble real wood.
Prone to Chipping and Scratching
One drawback of melamine boards is that they can be prone to chipping and scratching, especially along the edges and corners. The thin layer of melamine resin that covers the composite wood material is not as strong as solid wood, making it more susceptible to damage from impact or abrasive materials. However, regular maintenance and proper usage can help minimize the risk of chipping and scratching.
Limited Repair Options
Unlike solid wood, melamine boards offer limited repair options. Once a melamine board is chipped or damaged, it is difficult to repair or refinish. In most cases, the damaged section will need to be replaced, which can be time-consuming and costly. It’s important to take extra precautions to prevent damage to melamine boards, such as using protective edge banding and avoiding sharp objects.
Toxicity Concerns
One concern with melamine boards is the potential release of formaldehyde, a toxic compound commonly used in the manufacturing process of melamine resin. However, reputable manufacturers adhere to strict regulations and industry standards to ensure that melamine boards meet safety requirements. It’s essential to choose melamine boards from trusted suppliers and inquire about the formaldehyde emission levels to ensure the health and safety of your living or working environment.
Less Structural Strength
Compared to solid wood or other structural materials, melamine boards have less structural strength. They are not recommended for applications that require heavy loads or support. While melamine boards are sturdy enough for most everyday uses, it is important to consider the weight-bearing capacity and structural requirements of your project before choosing melamine boards as the primary material.
In conclusion, melamine boards offer several advantages such as durability, versatile design options, easy maintenance, affordability, and resistance to heat and moisture. However, there are some disadvantages to consider, including the lack of natural aesthetics, susceptibility to chipping and scratching, limited repair options, potential toxicity concerns, and less structural strength. By weighing these pros and cons, you can make an informed decision on whether melamine boards are the right choice for your specific needs and preferences.
So you’ve decided to install melamine boards in your home but don’t quite know where to start? Look no further, because this step-by-step guide is here to help you out. From prepping the surface to finishing touches, we’ll walk you through each stage of the installation process, providing expert tips and tricks along the way. Whether you’re a seasoned DIYer or a novice looking to tackle a new project, this comprehensive guide will ensure that your melamine board installation is a success. Let’s get started!
Types of Melamine Boards
Before diving into the installation process, it’s important to understand the different types of melamine boards available:
Standard Melamine Board: The most common type, suitable for general use.
Moisture-Resistant Melamine: Ideal for bathrooms and kitchens.
Fire-Resistant Melamine: Designed for areas requiring additional safety measures.
Decorative Melamine: Comes in various patterns and colors for aesthetic appeal.
Whiteboard Melamine: Specifically designed for use as dry-erase surfaces.
Each type has its unique properties and applications, so choose the one that best suits your needs.
Comparison with Other Materials
When considering melamine boards for your project, it’s helpful to understand how they compare to other materials:
Cost: Generally more affordable than solid wood or high-end laminates.
Durability: More resistant to scratches and wear than painted surfaces.
Maintenance: Easier to clean and maintain compared to untreated wood.
Installation: Typically simpler to install than tile or solid wood paneling.
Versatility: Available in a wide range of colors and finishes.
Consider these factors when deciding if melamine boards are the right choice for your project.
Preparation
Before you begin installing melamine boards, it’s important to gather all the necessary tools and materials. You will need a circular saw, a straight edge or ruler, a measuring tape, a putty knife, finishing nails, adhesive, clamps, safety goggles, gloves, a dust mask, a damp cloth, and a mild detergent. Once you have all these tools and materials, you can move on to measuring and marking the installation area.
Measure and mark the installation area accurately using a measuring tape and a pencil. This will ensure that you have the correct dimensions for your melamine boards. Make sure to take into account any obstacles or fixtures that may affect the installation, such as electrical outlets or switches. Marking the installation area will also help you visualize the layout and determine where each board will go.
After marking the installation area, it’s important to prepare the surface before installing the melamine boards. Clean the walls thoroughly to remove any dirt, dust, or debris that may affect the adhesive’s bonding strength. If the walls are painted, consider sanding them lightly to create a rougher surface for better adhesion. Additionally, check for any level or straightness issues in the wall. If the wall is uneven or not straight, it’s a good idea to address these issues before proceeding with the installation.
DIY vs. Professional Installation
While this guide focuses on DIY installation, it’s worth considering the pros and cons of professional installation:
DIY Pros:
Cost-effective
Allows for customization
Provides a sense of accomplishment
DIY Cons:
Time-consuming
Requires specific tools and skills
Potential for mistakes
Professional Installation Pros:
Expertise and experience
Time-saving
Often includes warranty
Professional Installation Cons:
Higher cost
Less personal involvement
Potential scheduling conflicts
Assess your skills, budget, and time constraints to decide which option is best for you.
Cutting Melamine Boards
Once the installation area is prepared, you can start cutting the melamine boards to fit the measurements. Measure and mark the boards according to the dimensions you determined during the preparation stage. Use a measuring tape and a pencil to ensure accurate measurements.
To make the cuts, you’ll need a circular saw. Align the saw blade with the marked line on the board and carefully cut along the line. Make sure to go slow and steady to ensure straight and clean cuts. Using a straight edge as a guide can also help you achieve straight cuts.
Alternative Cutting Methods
While a circular saw is ideal, you can also cut melamine boards using:
Hand Saw: For straight cuts without power tools. Use a fine-toothed saw and cut slowly to avoid chipping.
Jigsaw: Useful for curved cuts or working in tight spaces.
Table Saw: Excellent for long, straight cuts if you have access to one.
Scoring Knife: For thinner melamine sheets, score deeply and snap along the line.
Always wear safety gear and work in a well-ventilated area, regardless of the cutting method.
Installing Melamine Boards
Now that you have your melamine boards cut to size, you can start installing them. Begin with the first board and apply adhesive on the back of the board. The adhesive should be spread evenly across the entire back surface to ensure a strong bond with the wall.
Press the board firmly against the wall, making sure it is aligned with the marked installation area. Apply pressure evenly to ensure proper adhesion. Once the board is in place, secure it further by using finishing nails. Place the nails along the edges of the board, making sure to drive them into the wall for added stability.
Continuing Installation
After installing the first board, you can move on to the next one. Measure and cut the next board according to the dimensions needed for the remaining space. Fit the cut board into place, ensuring that it aligns properly with the previously installed board.
To achieve uniform spacing between boards, use a spacer. This can be a small piece of wood or plastic that you place between the boards before securing them to the wall. The spacer will help maintain consistent spacing and prevent the boards from shifting.
Once the board is in position, secure it to the wall by following the same steps as before. Apply adhesive on the back of the board, press it firmly against the wall, and secure it with finishing nails.
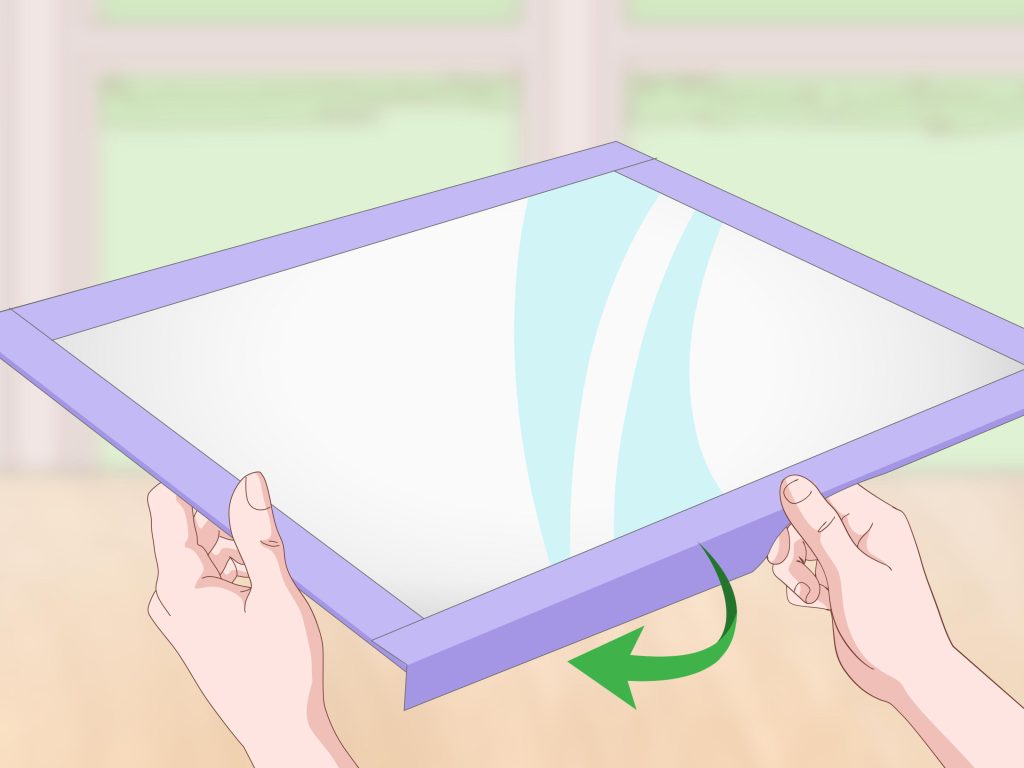
Installing Corner Boards
When you reach the corners of the installation area, you will need to install corner boards. Measure and mark the corner boards according to the dimensions of the corners. Cut the boards to size using a circular saw, ensuring they fit snugly into the corner space.
Apply adhesive on the back of the corner boards and secure them against the walls. Use clamps to provide additional support and hold the corner boards in place while the adhesive sets. This will ensure that the corner boards are securely installed and won’t shift over time.
Working Around Obstacles
When installing melamine boards, you may encounter obstacles like electrical outlets or plumbing. Here’s how to handle them:
Measure and mark the location of the obstacle on your board.
Use a jigsaw or hole saw to cut out the marked area.
Test fit the board to ensure the cut-out aligns properly.
Sand the edges of the cut-out for a smooth finish.
Install the board as usual, making sure not to cover or damage the obstacle.
Always turn off electricity and water before working near outlets or plumbing fixtures.
Filling Joints and Seams
To achieve a seamless look, it’s important to fill in the joints and seams between the melamine boards. Prepare a melamine filler paste according to the manufacturer’s instructions. The filler paste should have a consistency that is easy to work with and spreads smoothly.
Fill all the joints and seams with the melamine filler paste, using a putty knife. Make sure to apply an even layer of filler, smoothing it out as you go. This will help achieve a level surface and conceal any gaps between the boards. Allow the filler to dry completely before moving on to the next step.
Once the filler has dried, sand it lightly to achieve a smooth and level surface. Use sandpaper or a sanding block to remove any excess filler and create a seamless finish. Sanding will also ensure that the surface is ready for the next step of the installation process.
Applying Edge Banding
To give your melamine board installation a finished look, you can apply edge banding to the exposed edges of the boards. Measure and cut the edge banding to fit the length of each exposed edge. Make sure to cut the banding slightly longer than needed to accommodate trimming.
Apply adhesive to both the edge banding and the corresponding edge of the board. Press the edge banding firmly onto the board, ensuring it is aligned and sticks securely. Trim any excess banding using a utility knife, ensuring a clean and neat finish.
Sanding and Finishing
Once the melamine boards and edge banding are in place, it’s important to sand the surface to achieve a smooth and professional finish. Use sandpaper or a sanding block to sand the surface of the boards, removing any imperfections or rough edges. Sanding will also help promote better adhesion of any sealers or finishes you choose to apply.
After sanding, remove all the dust using a damp cloth. Wipe down the entire surface of the boards, making sure to remove any debris or particles. This will ensure a clean surface for the next step.
To protect the surface and enhance its appearance, you can apply a melamine sealer or primer. Follow the manufacturer’s instructions for the specific product you choose. Apply the sealer or primer evenly, using a brush or roller. Allow it to dry completely before proceeding to the final step.
For an even more enhanced and durable finish, you can consider painting the melamine boards or applying a melamine topcoat. Choose a paint or topcoat specifically designed for melamine surfaces for best results. Follow the manufacturer’s instructions for application and drying times.
Troubleshooting Common Issues
Even with careful planning, you might encounter some issues. Here are solutions to common problems:
Gaps between boards: Fill with color-matched caulk or additional filler.
Uneven walls: Use shims behind the boards to create a level surface.
Chipped edges: Repair with melamine edge banding or filler.
Bubbling or peeling: Remove and reapply adhesive, ensuring full coverage.
Visible fasteners: Cover with color-matched caps or filler.
Remember, patience is key when troubleshooting. Take your time to achieve the best results.
Cleaning and Maintenance
To keep your melamine board installation looking its best, it’s important to regularly clean it with a mild detergent. Use a soft cloth or sponge to gently wipe down the surface, removing any stains or dirt. Avoid using abrasive cleaners or scrubbing too vigorously, as this can damage the surface of the boards.
Periodically, inspect the melamine boards for any signs of damage or wear. Check for any chips, cracks, or peeling edges. If you notice any damage, it’s important to repair or replace the affected sections promptly to prevent further deterioration.
Safety Precautions
During the melamine board installation process, it’s essential to prioritize safety. Always wear safety goggles and gloves to protect your eyes and hands from any potential hazards. When cutting or sanding the boards, use a dust mask to prevent inhalation of particles.
Ensure proper ventilation in your workspace, especially when using adhesives or finishes. Open windows or doors, or use fans to circulate fresh air and reduce the concentration of fumes.
Lastly, always follow the manufacturer’s instructions for adhesives and finishes. Different products may have specific application, drying, and safety guidelines that you should adhere to for optimal results and safety.
By following these step-by-step instructions and safety precautions, you can successfully install melamine boards and achieve a professional and durable finish in your space. Happy installing!
Environmental Considerations
When using melamine boards, consider their environmental impact:
Recyclability: While melamine itself is not recyclable, some manufacturers offer recycling programs for offcuts.
VOC Emissions: Choose low-VOC adhesives and finishes to minimize indoor air pollution.
Longevity: Proper installation and maintenance can extend the life of your melamine boards, reducing waste.
Sustainable Sourcing: Look for melamine boards made from sustainably sourced materials.
By considering these factors, you can make more environmentally conscious choices in your home improvement projects.
If you’ve got a melamine dry erase board that’s seen better days, we’ve got some handy tips to bring it back to its shining glory. In this ultimate guide, we’ll walk you through the process of cleaning a melamine dry erase board step by step, leaving it looking good as new. With just a few common household items and some quick and easy techniques, you’ll be able to remove stubborn stains and erase those pesky ghost marks that tend to linger on the surface. Say goodbye to a dull board and hello to a sparkling clean writing surface with this comprehensive cleaning guide.
The Ultimate Guide on How to Clean a Melamine Dry Erase Board
When it comes to keeping your melamine dry erase board looking clean and pristine, a regular cleaning routine is essential. Over time, dry erase boards can accumulate dust, stains, and stubborn marks that can affect their functionality and appearance. In this comprehensive guide, we will walk you through the step-by-step process of how to properly clean a melamine dry erase board using simple materials you may already have at home. So let’s gather our materials and get started!
Materials Needed
Before we dive into the cleaning process, it’s important to gather the necessary materials. Here’s what you’ll need:
Microfiber cloth: A soft and lint-free microfiber cloth is ideal for gently wiping away dirt and dust without scratching the surface of the board.
Melamine foam eraser: Also known as a magic eraser, this gentle yet effective cleaning tool is perfect for removing stubborn stains and marks on your melamine dry erase board.
White vinegar: Vinegar is a natural cleaning agent that can effectively cut through grease and grime on your board.
Water: You’ll need water, preferably distilled or filtered, to create a cleaning solution with the vinegar.
Soft-bristle brush: A soft-bristle brush, such as a toothbrush, can be used for scrubbing away tough stains on your board.
Paper towels: These are handy for both drying the board and protecting your hands during the cleaning process.
Now that we have our materials ready, let’s move on to the preparation steps.
Turn off and unplug the board: Safety first! It’s crucial to turn off and unplug the board to prevent any electrical mishaps while cleaning.
Remove any loose debris: Use a dry microfiber cloth or a soft brush to gently remove any loose debris, such as dust, dirt, or eraser residue, from the surface of the board. This step will make the cleaning process much more effective.
Ensure the board is dry: Check that the board is completely dry before proceeding with the cleaning process. If there are any traces of moisture, it’s best to wait until the board is fully dry. Moisture can interfere with the cleaning process and may affect the erasability of your dry erase board.
With the board prepped and ready, let’s move on to the cleaning solutions for your melamine dry erase board.
Dry Erase Board Cleaning Solutions
There are several effective cleaning solutions you can use to clean a melamine dry erase board. Let’s explore them one by one:
Using a Microfiber Cloth
A microfiber cloth is the simplest and gentlest way to clean your dry erase board. Here’s how to use it:
Begin by folding the microfiber cloth into a small square or rectangle. This will give you a clean surface to work with.
Lightly dampen the cloth with water, making sure it’s not overly wet. Excess water can seep into the board and cause damage.
Gently wipe the entire surface of the board using small, circular motions. This will help remove any dirt, dust, or dry erase marker residue from the board.
For stubborn marks or stains, apply a bit more pressure while wiping. The microfiber cloth should be able to lift most stains without the need for additional cleaning solutions.
Once you’ve finished wiping the board, use a clean, dry portion of the cloth to thoroughly dry the surface. This step is crucial in ensuring the erasability of your dry erase board.
Using a microfiber cloth is a quick and easy way to maintain the cleanliness of your melamine dry erase board. However, if you’re dealing with tougher stains or marks, a melamine foam eraser may be your best bet.
Using a Melamine Foam Eraser
A melamine foam eraser, often referred to as a magic eraser, is a fantastic tool for removing stubborn stains from your melamine dry erase board. Here’s how to use it:
Dampen the melamine foam eraser with water. Be careful not to oversaturate it, as excess water can damage the eraser.
Gently rub the eraser on the stained area, applying light pressure. The micro-abrasive texture of the eraser will help break down and lift the stain from the surface of the board.
Continue rubbing the eraser in a circular motion until the stain or mark is no longer visible. You may need to re-dampen the eraser with water as you go, especially for larger or more stubborn stains.
Once the stain is removed, use a dry microfiber cloth to wipe away any residue left by the eraser.
A melamine foam eraser is an effective tool for tackling tough stains on your dry erase board. However, if there are still traces of stubborn stains or you’re dealing with overall grime build-up, a mixture of white vinegar and water can be a great solution.
Using White Vinegar and Water
White vinegar is a natural and inexpensive cleaning agent that can remove grease, dirt, and grime from your melamine dry erase board. Here’s how to create and use a vinegar-based cleaning solution:
In a small bowl or spray bottle, mix equal parts white vinegar and water. For example, you can mix ½ cup of vinegar with ½ cup of water.
Lightly dampen a microfiber cloth with the vinegar and water solution. Again, make sure the cloth is not overly wet.
Gently wipe the entire surface of the board using small, circular motions. The vinegar will help dissolve any stubborn stains or grease, leaving your board clean and shiny.
For extra cleaning power, you can let the vinegar solution sit on the board for a few minutes before wiping it off. This can help loosen any tough stains.
Once you’ve finished cleaning, use a clean, dry portion of the cloth to thoroughly dry the surface of the board.
The vinegar and water solution is an effective method for deep-cleaning your melamine dry erase board. However, if there are still stubborn stains or residue that won’t budge, it’s time to bring out the soft-bristle brush.
Cleaning Process
Now that we have covered the different cleaning solutions, let’s dive into the step-by-step cleaning process for your melamine dry erase board. By following these simple steps, you’ll have a clean and fresh board in no time:
Step 1: Dusting the Board
Before using any cleaning solutions, start by gently dusting the entire surface of the board. Use a dry microfiber cloth or a soft brush to remove any loose debris, dust, or dry erase marker residue. This step will ensure a clean working surface and make the subsequent cleaning steps more effective.
Step 2: Using a Microfiber Cloth
If your dry erase board only has minor dirt or marks, using a microfiber cloth may be sufficient for cleaning. After dusting the board, dampen a microfiber cloth with water, making sure not to saturate it. Gently wipe the entire surface of the board with small, circular motions. For stubborn marks, apply a bit more pressure while wiping. Once the board is clean, use a separate dry portion of the cloth to thoroughly dry the surface.
Step 3: Using a Melamine Foam Eraser
If you’re dealing with tougher stains or marks, a melamine foam eraser can come to the rescue. Dampen the eraser with water and gently rub it on the stained area, applying light pressure. Continue rubbing in a circular motion until the stain is no longer visible. Use a dry microfiber cloth to wipe away any residue left by the eraser.
Step 4: Using White Vinegar and Water
For deeper cleaning, the vinegar and water solution can be highly effective. Mix equal parts white vinegar and water in a small bowl or spray bottle. Dampen a microfiber cloth with the solution and gently wipe the entire surface of the board. For tougher stains, let the vinegar solution sit on the board for a few minutes before wiping it off. Finish the process by using a separate dry portion of the cloth to thoroughly dry the board.
Step 5: Scrubbing Stubborn Stains
If there are still stubborn stains or residue that haven’t been removed by the previous steps, it’s time to use a soft-bristle brush. Dip the brush in the vinegar and water solution and gently scrub the stained area. Be careful not to apply too much pressure as it may scratch the board. Once the stain is removed, wipe away any residue with a clean, damp microfiber cloth, and then dry the board with a separate dry cloth.
Step 6: Drying the Board
After completing the cleaning process, it’s crucial to ensure that the board is completely dry before using it again. Use a clean, dry microfiber cloth or paper towels to thoroughly dry the surface. Make sure no moisture is left behind, as it can interfere with the erasability of your dry erase board.
By following these six simple steps, you can maintain the cleanliness of your melamine dry erase board and ensure its longevity.
Extra Tips
In addition to the cleaning process, here are some extra tips to help you keep your melamine dry erase board in top shape:
Avoid using abrasive cleaners
When cleaning your dry erase board, it’s important to avoid using abrasive cleaners or materials that can scratch the surface. These can damage the melamine coating and affect the erasability of the board. Stick to gentle cleaning methods, such as those mentioned in this guide, to ensure the long-term durability of your board.
Regularly maintain and deep clean
To keep your melamine dry erase board looking its best, it’s essential to establish a regular maintenance routine. Regularly dusting the board and wiping away any dry erase marker residue will prevent build-up and make deep cleaning easier when necessary. A quick wipe with a microfiber cloth at the end of each day can go a long way in maintaining a clean and functional board.
Protect the board with a clear acrylic sealer
If you want to take your melamine dry erase board’s longevity to the next level, consider applying a clear acrylic sealer. This protective coating can help prevent stains and ghosting, making the cleaning process even easier. Follow the manufacturer’s instructions for application and ensure the board is clean and dry before applying the sealer.
Store markers properly
Properly storing your dry erase markers can also contribute to the cleanliness and longevity of your board. Store them horizontally with the caps securely fastened to prevent ink from drying out and leaking onto the board. This simple step can help you avoid unnecessary stains and preserve the quality of your dry erase board.
By incorporating these extra tips into your cleaning routine, you can maintain the cleanliness and performance of your melamine dry erase board for years to come.
Common Mistakes to Avoid
While cleaning your melamine dry erase board, it’s important to avoid common mistakes that can damage the surface or compromise its functionality. Here are a few common mistakes to steer clear of:
Using sharp objects or abrasive materials
Using sharp objects, such as knives or abrasive materials like scouring pads, can scratch the surface of your melamine board. These scratches not only affect the board’s appearance but also hinder its erasability. Stick to gentle cleaning methods and materials to maintain the integrity of the board.
Using excessive amounts of water
Excessive water can seep into the melamine board and cause irreversible damage. Whether you’re using a microfiber cloth, eraser, or cleaning solution, make sure they are only damp and not overly wet. If you accidentally spill water on the board during the cleaning process, ensure it’s completely dry before using the board again.
Using alcohol or ammonia-based cleaners
While alcohol or ammonia-based cleaners can be effective for other surfaces, they are not suitable for melamine dry erase boards. These harsh chemicals can damage the melamine coating, affecting both the appearance and functionality of the board. Stick to the gentle cleaning solutions and methods mentioned in this guide for the best results.
By avoiding these common mistakes, you can clean your melamine dry erase board effectively without causing any damage.
Troubleshooting
Even with proper cleaning and maintenance, you may encounter a couple of common issues with your melamine dry erase board. Here are two troubleshooting scenarios and how to address them:
Ghosting or shadowing
If you notice faint ghosting or shadowing of previous markings after erasing your board, it may be due to a residue build-up. To resolve this issue, give your board a deep cleaning using the vinegar and water solution mentioned earlier. Scrub the board gently with a soft-bristle brush to remove any residue and then thoroughly dry the surface. This should eliminate or significantly reduce the ghosting effect.
Permanent marker stains
Accidentally using a permanent marker on a melamine dry erase board can be a common mishap. To remove permanent marker stains, dampen a cloth with rubbing alcohol or acetone (nail polish remover) and gently rub the stained area. Be careful not to rub too hard, as it may damage the melamine coating. Once the stain is removed, wipe the board with a clean, damp cloth to remove any residue, and then dry the board thoroughly.
By addressing these troubleshooting scenarios promptly and using the appropriate cleaning methods, you can keep your melamine dry erase board looking clean and free of any unwanted marks.
Frequently Asked Questions
To wrap up this guide, here are answers to a few frequently asked questions about cleaning melamine dry erase boards:
Can I use window cleaner on a melamine board?
No, it is not recommended to use window cleaner or any other ammonia-based cleaners on a melamine dry erase board. These cleaners can damage the melamine coating and compromise the board’s erasability. Stick to the gentle cleaning solutions and methods mentioned in this guide.
Can I use a magic eraser on a melamine board?
Yes, a melamine foam eraser, often referred to as a magic eraser, is safe to use on a melamine dry erase board. It is a gentle yet effective tool for removing stubborn stains and marks without scratching the surface.
How often should I clean the board?
The frequency of cleaning your melamine dry erase board will depend on the usage and the visible dirt or stains on the surface. As a general guideline, it’s recommended to perform a light cleaning, such as dusting and using a microfiber cloth, on a daily or weekly basis. Deep cleaning with vinegar and water or a melamine foam eraser can be done bi-weekly or monthly, depending on the level of dirt or staining you notice.
Conclusion
Cleaning a melamine dry erase board doesn’t have to be a daunting task. With the right materials and proper cleaning techniques, you can keep your board looking clean, fresh, and ready for use. Remember to regularly dust the board, use a microfiber cloth or a melamine foam eraser for stubborn stains, and deep clean with a vinegar and water solution when necessary. By avoiding common mistakes and following the tips and troubleshooting advice provided in this guide, you can maintain the cleanliness and performance of your melamine dry erase board for years to come.
Are you tired of your melamine dry erase board looking dull and dirty? We’ve got you covered! In this article, we will show you the step-by-step process of cleaning and polishing your melamine dry erase board, making it look as good as new. With just a few simple tools and ingredients, you’ll be able to remove stubborn stains and restore the shine to your board in no time. Say goodbye to smudges and hello to a pristine writing surface with our easy cleaning tips.
Preparation
Before you begin cleaning and polishing your melamine dry erase board, it’s essential to gather all the necessary cleaning supplies. This will ensure that you have everything you need within arm’s reach, making the process more efficient.
Start by collecting a microfiber cloth, rubbing alcohol, a melamine foam eraser, melamine polish, whiteboard cleaner with alcohol, and a bucket of water. Having these items ready will save you time and prevent interruptions during the cleaning process.
Removing Stubborn Marks
When it comes to removing stubborn marks from your melamine dry erase board, it’s important to use gentle yet effective methods that won’t damage the surface. Here are a few techniques you can try:
Use a Microfiber Cloth
Start by using a microfiber cloth to clean the board. Microfiber is known for its ability to attract and lift dirt, dust, and grime without leaving any marks behind. Gently wipe the surface of the board in a circular motion to remove any loose debris.
Try Using Rubbing Alcohol
If ordinary wiping doesn’t do the trick, you can try using rubbing alcohol. Dampen a corner of your microfiber cloth with rubbing alcohol and gently rub the stubborn mark. The alcohol helps break down the residue, making it easier to remove. Be careful not to apply too much pressure to avoid damaging the surface.
Apply a Melamine Foam Eraser
For more persistent marks on your melamine dry erase board, a melamine foam eraser can work wonders. Moisten the eraser with water and gently scrub the stubborn marks. The abrasive nature of the foam eraser helps lift the stains without scratching the surface. Remember to rinse the eraser frequently to prevent transferring the stains back onto the board.
Cleaning the Board
Once you have successfully removed any stubborn marks, it’s time to proceed with cleaning the entire board’s surface. Follow these steps to ensure a thorough cleaning:
Dampen the Microfiber Cloth
Begin by dampening your microfiber cloth with water. Make sure it’s not soaking wet but moist enough to facilitate the cleaning process effectively. Excess water can seep into the board, causing damage or warping.
Wipe the Board in a Circular Motion
Using the damp microfiber cloth, wipe the entire surface of the melamine dry erase board in a circular motion. This motion helps lift any remaining dirt or residue, leaving the board looking clean and fresh. Be sure to cover all areas, including the edges and sides of the board.
Pay Attention to the Corners
When cleaning your melamine dry erase board, it’s easy to overlook the corners. However, dirt and residues tend to accumulate in these hard-to-reach areas. Take extra care and spend a little more time cleaning the corners to ensure a thorough and pristine result.
Dry the Board Thoroughly
To prevent any water damage or streaks, it’s important to dry the board thoroughly after cleaning. Use a dry microfiber cloth or a lint-free towel to wipe away any remaining moisture. Leaving the board damp can affect its performance and longevity.
Polishing the Board
Polishing your melamine dry erase board not only enhances its appearance but also helps protect the surface. Follow these steps to achieve a shiny and well-maintained board:
Apply a Melamine Polish
Start by applying a small amount of melamine polish onto a clean, dry microfiber cloth. Melamine polish is specifically designed for dry erase boards and provides a protective layer that repels dirt and stains. Gently spread the polish onto the entire board surface, ensuring an even application.
Rub the Polish in Circular Motions
Once the polish is applied, use the same cloth to gently rub it onto the surface of the melamine dry erase board. Use circular motions to distribute the polish evenly and allow it to penetrate the surface. This technique ensures maximum coverage and a polished, glossy finish.
Removing Ghosting Marks
Ghosting marks, which occur when dry erase ink leaves behind a faint residue, can be frustrating. However, they can be effectively removed from your melamine dry erase board with the following steps:
Use a Whiteboard Cleaner with Alcohol
To tackle ghosting marks, opt for a whiteboard cleaner specifically formulated with alcohol. The alcohol helps dissolve the dry erase ink residue and makes it easier to remove. Apply a small amount of the cleaner onto a clean, dry microfiber cloth.
Apply the Cleaner and Wipe in a Circular Motion
Dampen the cloth with the cleaner and gently scrub the ghosting marks in a circular motion. The cleaner will break down the residue, allowing you to wipe it away. Take care not to use excessive force, as it may damage the board’s surface.
Rinse the Board with Water
After removing the ghosting marks with the cleaner, rinse the board with water. This will help eliminate any remaining cleaner residue. Dampen a clean microfiber cloth with water and gently wipe the entire board, ensuring no traces of the cleaner are left behind.
Dry the Board Completely
Lastly, ensure that you dry the board completely to avoid any water streaks. Use a dry microfiber cloth or lint-free towel to remove any moisture. Properly drying the board will help maintain its cleanliness and prevent new ghosting marks from forming.
Maintaining the Board
Keeping your melamine dry erase board clean and in good condition is essential for its long-term usability. Here are some tips to help you maintain your board effectively:
Use Only Dry Erase Markers
To prevent staining or damaging the surface of your melamine dry erase board, make sure to use only dry erase markers. Using regular markers or other types of ink can be difficult to erase and may leave permanent marks. Dry erase markers are specially designed for these types of boards, making them the ideal choice.
Avoid Using Permanent Markers
It’s crucial to avoid using permanent markers on your melamine dry erase board, as they are extremely difficult to remove. Even if the marks appear to be erased with regular cleaning, there is a high chance of ghosting or permanent staining. Be cautious and ensure that only dry erase markers are used.
Clean Regularly
Regular cleaning is vital to maintain the cleanliness and functionality of your melamine dry erase board. Develop a cleaning routine that works for you and fits your usage pattern. Cleaning the board at least once a week, or more frequently if needed, will help prevent the buildup of dirt, ghosting marks, and stains.
Tips and Precautions
When cleaning and polishing your melamine dry erase board, it’s important to keep a few tips and precautions in mind to ensure the best results and avoid any damage:
Test Cleaning Solutions on a Small Area First
Before applying any cleaning solution or polish to the entire board, it’s wise to test it on a small, inconspicuous area. This will help you ensure that the solution is safe to use and won’t cause any adverse effects on the melamine surface.
Avoid Using Abrasive Materials
When cleaning your melamine dry erase board, never use abrasive materials such as scrub brushes or harsh sponges. These can scratch the melamine surface and compromise its integrity. Stick to soft microfiber cloths or melamine foam erasers for gentle yet effective cleaning.
Protect the Board’s Surface
To prolong the lifespan of your melamine dry erase board, consider using a protective covering or sleeve when it’s not in use. This will shield the surface from dust, dirt, and accidental damage. Additionally, avoid placing heavy objects on the board to prevent warping or bending.
Frequently Asked Questions
Can I Use Vinegar to Clean a Melamine Dry Erase Board?
It is generally not recommended to use vinegar to clean a melamine dry erase board. While vinegar can be effective for cleaning certain surfaces, it can be too harsh for melamine. Vinegar is acidic and may damage the melamine coating, causing it to deteriorate over time. Stick to mild cleaning solutions specifically designed for dry erase boards.
What Should I Do if the Dry Erase Marker Stains Won’t Come Off?
If dry erase marker stains are proving to be stubborn and won’t come off with regular cleaning methods, there are a few additional steps you can take. One option is to use a slightly stronger cleaning solution specifically formulated for removing stubborn stains on melamine surfaces. Alternatively, you can try using a melamine foam eraser to scrub away the marks gently. Remember to always test any new cleaning solution or method on a small, inconspicuous area first.
How Often Should I Clean and Polish the Board?
The frequency of cleaning and polishing your melamine dry erase board will depend on its usage and condition. As a general guideline, cleaning the board thoroughly at least once a week is recommended. However, if the board experiences heavy daily use or if stains and ghosting marks are more persistent, cleaning may be required more frequently. Polish should be applied every few months or as needed to maintain the board’s glossy finish and protective layer.
Conclusion
Cleaning and polishing your melamine dry erase board doesn’t have to be a daunting task. By following the proper techniques and using the right tools, you can keep your board looking pristine and functioning flawlessly for years to come. Remember to gather your cleaning supplies, remove stubborn marks gently, clean the board thoroughly, polish it for a shiny finish, and maintain it regularly. By incorporating these practices into your cleaning routine, you can enjoy a clean, polished, and well-maintained melamine dry erase board that will continue to serve you well.
Melamine boards are commonly used for a variety of purposes, but did you know that they can also be transformed into a functional dry erase board? In this article, we will show you the step-by-step process of preparing a melamine board for dry erase markers. Whether you want to create a convenient whiteboard for your home office or a collaborative space for your team at work, these simple tips and tricks will help you achieve a smooth and durable surface that is ready for all your dry erase needs. Get ready to take your melamine board to the next level!
Cleaning the Melamine Board
Cleaning the melamine board is an essential first step in preparing it for use as a dry erase board. The process involves removing any dust and debris from the surface, wiping it with a mild detergent solution, rinsing it thoroughly, and finally drying it properly.
Removing Dust and Debris
Before proceeding with any cleaning, it’s vital to remove any dust and debris from the melamine board. This can be done by using a soft cloth or a dry erase board eraser to gently wipe the surface in a horizontal motion. It is important to be thorough and ensure that all loose particles are removed.
Wiping with a Mild Detergent Solution
After removing dust and debris, the next step is to wipe the melamine board with a mild detergent solution. This solution can be made by mixing a small amount of dish soap or any mild detergent with warm water. We recommend using a soft sponge or cloth dampened with this solution to gently wipe the surface of the board. Be careful not to use excessive water, as it can damage the melamine coating.
Rinsing the Board
Once the melamine board has been wiped with the detergent solution, it is crucial to rinse it thoroughly to remove any soap residue. This can be done by using a clean cloth or sponge dampened with clean water to wipe the entire surface of the board. Ensure that all traces of detergent are completely removed.
Drying the Board
The final step in the cleaning process is to dry the melamine board. For this, we recommend using a clean, dry cloth or paper towels to gently pat the surface until it is completely dry. It is important to avoid using excessive force or rubbing, as it can damage the melamine coating. Ensure that the board is completely dry before proceeding to the next step.
Smoothing the Surface
Smoothing the surface of the melamine board is an important step to ensure a smooth and even finish when applying primer and paint. This involves sanding the board to remove any imperfections and rough areas, followed by removing the sanding residue.
Sanding the Board
To sand the melamine board, we recommend using a fine-grit sandpaper or sanding sponge. Gently sand the surface of the board in a circular motion, focusing on any rough spots or imperfections. Be sure to apply light pressure, as excessive force can damage the board. Sanding helps create a better bonding surface for the primer and paint.
Removing Sanding Residue
After sanding the melamine board, it is crucial to remove any sanding residue that may be left behind. This can be done by using a clean, dry cloth or a vacuum cleaner to gently wipe or suck away the loose particles. Ensuring that the surface is free from sanding residue allows for a smoother finish when applying the primer and paint.
Conditioning the Melamine Board
Conditioning the melamine board with a primer is essential to promote adhesion and ensure a durable and long-lasting finish. This involves choosing the right primer for melamine surfaces and applying it correctly.
Applying a Primer
A primer acts as a bonding agent between the melamine board and the paint, providing a solid foundation for the dry erase coating. Before applying the primer, be sure to read and follow the manufacturer’s instructions. Most primers can be applied using a brush or a roller. It is important to apply an even and thin coat to avoid any drips or clumps.
Choosing the Right Primer
Not all primers are suitable for melamine surfaces, so it is essential to choose the right one. Look for a primer specifically designed for melamine or laminate surfaces. These primers are formulated to adhere well to the smooth and non-porous nature of melamine, ensuring excellent adhesion and durability of the dry erase paint.
Applying Primer to the Board
Once you have selected the appropriate primer, apply a thin and even coat to the melamine board. Work in smooth strokes, ensuring complete coverage of the entire surface. Allow the primer to dry completely according to the manufacturer’s instructions before proceeding to the next step.
Painting the Melamine Board
Painting the melamine board with dry erase paint is the final step in preparing it for use as a dry erase board. This involves choosing the right dry erase paint and applying it correctly to achieve a smooth and functional dry erase surface.
Choosing the Right Dry Erase Paint
Selecting the right dry erase paint is crucial to ensure optimal performance and longevity of the dry erase board. Look for a high-quality dry erase paint that is designed specifically for melamine or laminate surfaces. These paints are formulated to provide a smooth and durable finish that allows for easy erasing and writing.
Applying the Dry Erase Paint
Before applying the dry erase paint, make sure to read and follow the manufacturer’s instructions. Most dry erase paints can be applied using a brush or a roller. Apply thin and even coats, working in smooth strokes to achieve a uniform finish. Allow each coat to dry according to the manufacturer’s instructions before applying additional coats.
Allowing the Paint to Cure
After applying the dry erase paint, it is crucial to allow it to cure fully before using the board. Follow the manufacturer’s instructions regarding the curing time. Typically, it takes a few days for the dry erase paint to fully cure and reach its optimal hardness and erasability. Avoid using the board until the paint has cured completely to ensure the best performance.
Protecting the Surface
Protecting the surface of the melamine board is essential for maintaining its durability and longevity. This involves applying a clear protective coating that helps to prevent stains, scratches, and fading.
Applying a Clear Protective Coating
Once the dry erase paint has cured, it is advisable to apply a clear protective coating over the surface. This protective coating acts as an additional layer of defense against daily wear and tear. Many clear protective coatings come in spray form, making it easy to apply an even and thin layer. Follow the manufacturer’s instructions for the application process.
Allowing the Coating to Dry and Cure
After applying the clear protective coating, allow it to dry and cure completely. The curing time may vary, so refer to the manufacturer’s instructions for the specific product you are using. Avoid using the melamine board until the protective coating has fully cured to ensure optimal protection and longevity.
Maintaining the Dry Erase Board
Proper maintenance is crucial for keeping your melamine dry erase board in excellent condition. This involves using appropriate dry erase markers, erasing the board properly, and cleaning it regularly.
Using Appropriate Dry Erase Markers
When using a melamine dry erase board, it is important to use only dry erase markers specifically designed for such surfaces. Avoid using permanent markers or other writing instruments that may damage the dry erase surface. Using the appropriate markers will help ensure easy erasability and prevent staining or ghosting.
Erasing the Board Properly
To erase the melamine dry erase board, use a soft, dry cloth or a dry erase board eraser. Start from the top of the board and work your way down to avoid smearing or smudging the markings. If there are stubborn marks or stains that do not erase easily, you can use a melamine board cleaner or a mild detergent solution specifically formulated for dry erase board cleaning. Avoid using abrasive materials that may scratch or damage the surface.
Cleaning the Board Regularly
Regular cleaning is essential to maintain a clean and functional dry erase board. Use a soft, damp cloth or a mild detergent solution to clean the surface. Wipe the entire board in a horizontal motion, ensuring that all marks and stains are removed. After cleaning, make sure to dry the board thoroughly to prevent any water damage.
Additional Tips and Considerations
In addition to the main steps outlined above, here are some additional tips and considerations to keep in mind when preparing a melamine board for dry erase use:
Avoiding Exposure to Heat
Melamine boards are sensitive to heat, so it is important to avoid placing them near heat sources or exposing them to direct sunlight for prolonged periods. Excessive heat can cause the melamine coating to warp or discolor, affecting the overall appearance and functionality of the dry erase board.
Avoiding Sharp Objects on the Board
To prevent scratching or damaging the melamine surface, avoid using sharp objects on the board. This includes knives, scissors, or any other pointed tools that could potentially leave permanent marks or gouges. Always handle the board with care to maintain its smooth and pristine condition.
Limiting Direct Sunlight Exposure
Direct sunlight exposure can cause the melamine board and the dry erase paint to fade over time. Therefore, it is advisable to place the board in an area away from direct sunlight or use window coverings to protect it from prolonged exposure to UV rays. This will help preserve the vibrant and clear dry erase surface of the board.
Frequently Asked Questions
Can any melamine board be turned into a dry erase board?
Not all melamine boards are suitable for conversion into a dry erase board. It is necessary to check the manufacturer’s specifications to ensure the melamine board is compatible with dry erase paints and coatings. Some melamine boards may have a specific coating or finish that may not provide the desired results when converting them into a dry erase board.
Can I skip priming the board?
Priming the melamine board is highly recommended to promote adhesion and ensure a long-lasting finish. While it may be tempting to skip this step, doing so may lead to poor paint adhesion and an uneven or easily erasable dry erase surface. To achieve the best results, it is advisable not to skip the priming process.
How often should I clean the board?
The frequency of cleaning the dry erase board depends on how frequently it is used and the level of residue or staining. In general, it is advisable to clean the board regularly to maintain its cleanliness and functionality. For daily use, a quick wipe with a dry erase board eraser or a soft cloth may be sufficient. If there are stubborn marks or stains, a more thorough cleaning can be done using a mild detergent solution.
Conclusion
Properly preparing a melamine board for dry erase use involves several important steps, including cleaning the board, smoothing the surface, conditioning with primer, painting with dry erase paint, and protecting the surface. By following the outlined steps and considering the additional tips and recommendations, you can create a high-quality dry erase board that is both functional and durable. Regular maintenance and cleaning will help ensure the longevity and optimal performance of your melamine dry erase board.
So you want to make your own melamine dry erase board, huh? Well, you’re in luck because we’ve got all the steps laid out for you right here. With just a few materials and a little bit of time, you’ll be able to create your very own personalized, functional whiteboard. Say goodbye to those boring store-bought options and get ready to unleash your creativity onto a stylish and practical surface. Whether you want it for your home office, classroom, or kitchen, follow along as we guide you through the process of making your own melamine dry erase board.
How to Make Your Own Melamine Dry Erase Board
If you’re looking for an affordable and customizable solution for your writing and note-taking needs, making your own melamine dry erase board is a fantastic option. With just a few materials and some simple steps, you can create a high-quality dry erase board that is perfect for your home, office, or classroom. In this article, we will guide you through the process of making your own melamine dry erase board, from preparing the board to applying the dry erase paint and finishing touches.
Materials Needed
To make your own melamine dry erase board, you will need the following materials:
Melamine Board: This will serve as the foundation of your dry erase board. It provides a smooth and durable surface for writing and erasing.
Melamine Edging Tape: Edging tape will give your board a polished and finished look. It also helps protect the edges of the melamine board from chipping or damage.
Dry Erase Laminate: Dry erase laminate is the key component that transforms your melamine board into a writable and erasable surface. It is applied over the melamine board and provides a smooth and white writing surface.
Painter’s Tape: Painter’s tape is used to protect the edges of the board during the painting process.
Sandpaper: Sandpaper is used to smoothen the melamine board surface before applying the melamine edging tape.
Foam Roller: A foam roller is used to apply the dry erase paint evenly and smoothly.
Paint Tray: A paint tray is used to hold and distribute the dry erase paint.
Jigsaw: A jigsaw is necessary for cutting the melamine board to the desired size and shape.
Router: A router is used to trim the melamine edging tape for a perfect fit.
Screwdriver: A screwdriver may be needed to attach mounting hardware, depending on how you plan to hang or display your dry erase board.
Now that we have gathered our materials, let’s dive into the process of making your own melamine dry erase board.
Preparing the Melamine Board
The first step in making your own melamine dry erase board is to prepare the melamine board itself. This involves measuring and marking the board, cutting it to the desired size, and smoothing out the board surface.
To begin, measure and mark the melamine board according to your desired dimensions. Consider the available wall space and your specific needs when determining the size of your dry erase board. Once marked, use a jigsaw to carefully cut the melamine board along the marked lines.
After cutting the board, it’s important to smooth the surface before applying the melamine edging tape. Use sandpaper to gently sand the board surface, removing any rough spots or imperfections. This will ensure a clean and even finish for your dry erase board.
Applying Melamine Edging Tape
After preparing the melamine board, it’s time to apply the melamine edging tape. This tape not only adds a decorative touch but also protects the edges of the melamine board from damage.
Measure and cut the melamine edging tape according to the length of each edge of the board. It is recommended to leave a slight overlap at the corners for a seamless appearance. Once cut, carefully apply adhesive to the backside of the edging tape, ensuring even coverage.
Next, place the edging tape onto the board surface, starting from one end and working your way to the other. Use a router to trim off any excess tape, ensuring a clean and precise edge. Take your time during this step to achieve a professional-looking finish for your melamine dry erase board.
Creating a Smooth Writing Surface
Now that the melamine board is prepared and the edging tape is applied, it’s time to transform it into a smooth writing surface using dry erase laminate. The dry erase laminate provides a white and erasable surface for writing and drawing.
Measure and cut the dry erase laminate according to the size of the melamine board. Be sure to leave a slight overlap for a seamless fit. Carefully remove the protective film from the backside of the laminate, revealing the adhesive side.
Align the dry erase laminate with the melamine board, ensuring an even and centered placement. Once aligned, slowly lower the laminate onto the board surface, applying even pressure to prevent bubbles or wrinkles. Gently smooth out any imperfections using a squeegee or your hands.
Preparing for Painting
Before applying the dry erase paint, it’s important to prepare the surface by taping off the edges, sanding, and cleaning.
Start by taping off the edges of the board using painter’s tape. This will protect the melamine edging tape and prevent any unwanted paint drips or smudges. Ensure that the tape is firmly pressed down to create a clean line.
Next, sand the surface of the dry erase laminate using fine-grit sandpaper. This will provide better adhesion for the dry erase paint and create a slightly rough texture for optimal erasability.
After sanding, clean the surface using a clean cloth dampened with water. This will remove any dust or debris, ensuring a smooth and clean painting surface.
Applying the Dry Erase Paint
Now it’s time to apply the dry erase paint that will transform your melamine board into a functional dry erase board. This process involves mixing the dry erase paint, applying the first coat, allowing drying time, and applying additional coats if needed.
Start by thoroughly mixing the dry erase paint according to the manufacturer’s instructions. Use a foam roller to apply a thin and even coat of paint to the dry erase laminate surface. Make long and smooth strokes to ensure a seamless finish.
Allow the first coat of paint to dry completely before applying additional coats. This drying time will vary depending on the specific dry erase paint you are using, so be sure to follow the instructions provided.
If desired, apply additional coats of dry erase paint until you achieve the desired level of opacity and erasability. Allow each coat to dry completely before applying the next.
Finishing Touches
Once the dry erase paint has dried thoroughly, it’s time to add the finishing touches to your melamine dry erase board. This involves removing the painter’s tape, smoothing the edges with sandpaper, and attaching any necessary mounting hardware.
Carefully remove the painter’s tape, ensuring clean and crisp lines along the edges of the board. Use fine-grit sandpaper to gently smooth the edges of both the melamine board and the melamine edging tape. This will create a polished and professional-looking finish.
If you plan to hang or display your dry erase board, attach the necessary mounting hardware using a screwdriver. Follow the manufacturer’s instructions for the specific mounting hardware you are using.
Caring for Your Melamine Dry Erase Board
To ensure the longevity and functionality of your newly made melamine dry erase board, it’s important to properly care for it. Here are some tips to help you maintain and preserve your board:
Use Appropriate Dry Erase Markers: Use only dry erase markers that are specifically designed for use on melamine surfaces. Avoid using permanent markers or other writing tools that may cause staining or damage.
Clean the Board Regularly: Regularly clean the dry erase board using a soft cloth or dry erase board eraser. This will help remove any residue or markings and keep the surface in good condition.
Avoid Using Harsh Chemicals: Avoid using harsh chemicals or abrasive cleaners on the board surface, as they may cause damage or discoloration. Stick to mild cleaning solutions or water when necessary.
Store and Transport Properly: When not in use, store your melamine dry erase board in a safe and dry place to prevent damage or warping. If you need to transport the board, ensure it is properly secured and protected to avoid any potential damage.
Troubleshooting Tips
While making your own melamine dry erase board is a fairly straightforward process, it’s possible to encounter some common issues. Here are some troubleshooting tips for addressing these problems:
Stains and Ghosting: If you notice stains or ghosting on your dry erase board, try using a specialized dry erase board cleaner or a mixture of water and vinegar to remove them. Gently scrub the affected areas using a soft cloth or sponge.
Peeling or Damaged Edging Tape: If the melamine edging tape starts to peel or becomes damaged over time, carefully remove the damaged portion and replace it with new edging tape. Ensure that the new tape adheres properly to the board surface.
Bubbles or Wrinkles in Laminate: If you encounter bubbles or wrinkles during the application of the dry erase laminate, gently lift the affected area and reapply it, smoothing out any imperfections. Take your time during this step to ensure a smooth and bubble-free surface.
Alternative Options
While melamine dry erase boards are a popular choice, there are alternative options worth considering. These options include using glass as a writing surface, using magnetic paint, or using whiteboard wallpaper. Each option has its own advantages and considerations, so be sure to research and choose the one that best suits your needs and preferences.
In conclusion, making your own melamine dry erase board is a cost-effective and customizable solution that allows you to create a functional and stylish writing surface. By following the steps outlined in this article, you can create a high-quality dry erase board that is perfect for your personal or professional needs. Enjoy the convenience and versatility of your own homemade dry erase board, and let your creativity and productivity flourish.
So you’ve got a melamine dry erase board that’s starting to look a little worse for wear? No worries, we’ve got you covered. In this article, we’ll show you the best way to clean your melamine dry erase board to keep it looking as good as new. Whether it’s stubborn marker stains or ghosting that’s got you down, we’ve got the tips and tricks to get your board back in tip-top shape. Say goodbye to those pesky smudges and hello to a sparkling clean writing surface – let’s get started!
Preparation
Before diving into the cleaning process, it’s important to gather the necessary supplies. You’ll need a dry cloth or eraser, a microfiber cloth, a melamine sponge, a mild detergent, water, and a spray bottle. Having these items ready will ensure a smooth cleaning experience.
Once you have your supplies, the next step is to ensure that the board is dry. If there’s any moisture on the surface, it can affect the effectiveness of the cleaning process. Take a moment to wipe off any excess moisture with a dry cloth. This step is crucial for achieving the best cleaning results.
Before proceeding further, it’s also important to remove any loose dirt or debris from the surface of the board. You can use a dry cloth or brush to gently sweep away any dirt or eraser residue. This step will help prevent scratching the surface when you begin the cleaning process.
Basic Cleaning Methods
Now that you’ve prepped the board, let’s move on to the basic cleaning methods. These methods are perfect for day-to-day cleaning and will help maintain the board’s surface.
Using a dry cloth or eraser is the simplest and quickest way to clean a melamine dry erase board. Simply wipe the surface in a gentle, circular motion to remove any marks or stains. Make sure to cover the entire surface, paying extra attention to areas with heavy marker usage. This method is ideal for light cleaning and keeping the board looking fresh.
Another effective method is erasing with a microfiber cloth. Microfiber cloths are great at trapping dirt and grime without scratching the surface. Dampen the cloth with water and wipe the board in a gentle motion, focusing on stubborn marks or smudges. The microfiber cloth will help lift away any residue and leave your board looking clean and clear.
If you encounter more stubborn marks or stains, using a melamine sponge can be your secret weapon. Wet the sponge with water and gently scrub the surface, applying light pressure. The melamine sponge has micro-abrasive properties that can tackle tougher stains without damaging the board. Remember to rinse the sponge frequently throughout the process to avoid spreading the residue.
For more thorough cleaning, using a mild detergent and water solution is recommended. Create a mixture using a small amount of mild detergent and water in a spray bottle. Spray the solution onto the board and use a cloth or sponge to wipe the surface. Rinse with clean water and wipe dry with a cloth. This method is particularly useful for removing grease or stubborn, dried-on stains.
Specialized Cleaning Methods
In some cases, basic cleaning methods may not be enough to completely restore the board’s surface. Here are a few specialized cleaning methods to tackle specific cleaning challenges.
If you come across permanent marker stains on your melamine dry erase board, don’t panic. There are ways to remove them! One effective method is to cover the stain with a dry-erase marker and allow it to sit for a few minutes. Then, wipe away both the dry-erase marker and the permanent marker with a dry cloth or eraser. Repeat this process until the stain is no longer visible. Another option is to use rubbing alcohol on a cloth and gently rub the stain until it disappears. Remember to test these methods on a small, inconspicuous area first to ensure they don’t damage the board.
Ghosting marks, those stubborn faint shadows of previous writings, can be frustrating to deal with. To treat these marks, you can try using a dry cloth or eraser, as mentioned in the basic cleaning methods, to gently rub the surface. If that doesn’t work, a mixture of water and vinegar can be effective. Dampen a cloth with the mixture and gently rub the marks until they fade. Be sure to rinse the board with clean water afterward to remove any vinegar residue.
For deep-set stains that are particularly stubborn, there are a few methods you can try. One option is to create a paste using baking soda and water. Apply the paste to the stain, let it sit for a few minutes, and then scrub gently with a cloth or sponge. Rinse the board thoroughly with clean water and dry it well. Alternatively, you can use a specialized melamine cleaner designed specifically for dry erase boards. Follow the instructions on the cleaner and use it accordingly to remove deep stains effectively.
Additional Tips
To ensure the longevity of your melamine dry erase board and maintain its pristine condition, consider the following additional tips:
Avoid using abrasive materials or strong chemicals while cleaning the board. These can cause scratches or damage the surface. Stick to the methods and supplies mentioned above for safe cleaning.
Regularly maintaining and conditioning the board will help prolong its lifespan. Use a dry cloth or eraser to remove any residual marker ink after each use. This will prevent the ink from sitting on the surface and becoming more difficult to remove later on.
When the board is not in use, it’s important to protect it from potential damage. Cover the board with a dry erase board cover or store it in a safe place to prevent scratches, dirt, or accidental markings.
Consider using alternative cleaning solutions if you prefer natural or eco-friendly options. For example, a mixture of lemon juice and water can be used as a cleaning agent. Simply spray the mixture onto the board and wipe it clean with a cloth or sponge.
To prevent future staining and ghosting, it’s essential to properly care for your melamine dry erase board. Encourage the use of high-quality dry erase markers and erasers to minimize residue and smudging. Additionally, remind users to write and erase with proper pressure, as excessive force can cause lasting marks or damage the board’s surface.
Dos and Don’ts
To ensure a successful cleaning process and maintain your melamine dry erase board’s quality, here are some dos and don’ts to keep in mind:
Dos:
Do regularly clean your melamine dry erase board to prevent the buildup of residual ink and dirt, ensuring a clean and clear surface for every use.
Do test any cleaning method or solution on a small, inconspicuous area first to ensure it doesn’t cause any damage or discoloration.
Do follow the manufacturer’s instructions and recommendations for cleaning and maintaining your specific melamine dry erase board.
Do store your dry erase markers, erasers, and other supplies in a clean, dry place to prevent contamination and extend their lifespan.
Don’ts:
Don’t use abrasive materials, such as steel wool or harsh scrub brushes, as they can scratch or damage the melamine surface.
Don’t use strong chemicals, such as bleach or ammonia-based cleaners, as they can discolor or deteriorate the board’s surface.
Don’t apply excessive force or pressure when writing or erasing on the board, as it can cause indentations or marks that are difficult to remove.
Don’t let ink or stains sit on the board for an extended period. Promptly clean any spills or marks to prevent them from becoming more stubborn and difficult to remove.
FAQs
How often should I clean my melamine dry erase board? It is recommended to clean your melamine dry erase board regularly, depending on its usage. For boards with heavy daily usage, cleaning once a week is typically sufficient. However, if the board is used less frequently, a monthly cleaning should be adequate to maintain its cleanliness.
Can I use glass cleaner on my melamine board? It is generally not recommended to use glass cleaner on a melamine dry erase board. Glass cleaners often contain chemicals that may damage or discolor the board’s melamine surface. Stick to the cleaning methods and solutions mentioned in this article to ensure the safe and effective cleaning of your melamine dry erase board.
Can I use vinegar to clean the board? Yes, you can use vinegar to clean your melamine dry erase board. As mentioned earlier, a mixture of water and vinegar can be effective in treating ghosting marks. However, it is important to rinse the board thoroughly with clean water after using vinegar to remove any residue.
How do I remove permanent marker stains? Permanent marker stains can be challenging to remove, but not impossible. One method is to cover the stain with a dry-erase marker and wipe it away with a dry cloth or eraser. Another option is to use rubbing alcohol on a cloth and gently rub the stain until it disappears. Remember to test these methods on a small, inconspicuous area first to ensure they don’t damage the board.
What is the best way to prevent ghosting? To prevent ghosting, it’s essential to properly care for your melamine dry erase board. Regularly clean the board after each use, using a dry cloth or eraser to remove any residual ink. Encourage the use of high-quality dry erase markers and erasers to minimize residue and smudging. Additionally, avoid leaving marker ink on the board for extended periods, as this can contribute to ghosting over time.
Conclusion
Keeping your melamine dry erase board clean and well-maintained is crucial for its longevity and optimal performance. By following the basic and specialized cleaning methods outlined in this article, you can ensure that your board remains in excellent condition. Remember to gather the necessary supplies, prep the board, and use the appropriate cleaning techniques for different stains and marks. Additionally, following the dos and don’ts will help you avoid any potential damage and maintain the board’s quality. By incorporating these cleaning practices into your routine and being proactive in preventing staining and ghosting, your melamine dry erase board will continue to serve its purpose effectively for years to come.
Looking for the perfect addition to your workspace that combines functionality and style? Look no further than melamine whiteboard sheets! These sheets are not only practical for jotting down notes and ideas, but they also add a sleek and modern touch to any office or creative space. In this article, we will guide you through the process of selecting the best melamine whiteboard sheets that suit your needs, whether it’s for brainstorming sessions, project management, or simply staying organized. So, let’s dive in and discover the top choices for enhancing your workspace with these amazing sheets!
Size
Standard sizes
Melamine whiteboard sheets are available in a variety of standard sizes to suit different workspace needs. The most common sizes include 24×36 inches, 36×48 inches, and 48×72 inches. These standard sizes are perfect for small to medium-sized spaces, such as offices, classrooms, and home work areas. They offer enough writing space for daily use and are easy to fit onto most walls or easel stands.
Custom sizes
For those who require a specific size or have unique space constraints, custom-sized melamine whiteboard sheets are also available. Whether you need a smaller board for a compact office or a larger one for a conference room, custom-sized sheets can be tailored to your exact specifications. This flexibility ensures that your workspace remains functional and aesthetically pleasing, as the whiteboard can be seamlessly integrated into any area.
Thickness
Thin sheets
Thin melamine whiteboard sheets are typically around 1/8 inch thick. These sheets provide a lightweight and slim option, making them easy to handle and mount on walls. They are ideal for environments where space is limited or where frequent repositioning is required. However, it is important to note that thin sheets may not be as durable as their thicker counterparts and may be more prone to warping over time.
Medium sheets
Melamine whiteboard sheets with a medium thickness, typically around 1/4 inch, strike a good balance between durability and ease of use. These sheets are sturdier than their thinner counterparts and are less likely to warp or bend. They are suitable for various work settings, including offices, schools, and conference rooms. Medium sheets offer a solid writing surface that can withstand regular use without compromising on portability.
Thick sheets
Thick melamine whiteboard sheets, ranging from 3/8 inch to 1/2 inch in thickness, are the most robust and heavy-duty option available. They are designed to withstand heavy use and resist warping, making them perfect for high-traffic areas or environments where durability is a top priority. Thick sheets provide a solid and reliable surface for writing, erasing, and displaying information.
Surface Finish
Glossy finish
Melamine whiteboard sheets with a glossy finish offer a sleek and polished appearance. The glossy surface enhances the brightness and clarity of any writing or drawings, resulting in an eye-catching display. This finish is particularly popular in settings where aesthetics play a significant role, such as modern offices or creative spaces. The smoothness of the glossy surface also allows for easy erasing and maintenance.
Matte finish
Melamine whiteboard sheets with a matte finish provide a more subdued look that is often preferred in professional environments. The matte surface reduces glare, making it easier to read and write on the board without distractions. Additionally, the matte finish is more forgiving when it comes to concealing minor scratches or imperfections, ensuring that your whiteboard maintains a clean and professional appearance over time.
Durability
Scratch-resistant
One of the key features to consider when choosing a melamine whiteboard sheet is its scratch resistance. High-quality melamine sheets are designed to resist scratches caused by regular use, ensuring that your whiteboard remains in excellent condition for years to come. Scratch-resistant sheets are particularly important in high-traffic areas where the board is continuously being used and erased.
Stain-resistant
In addition to scratch resistance, melamine whiteboard sheets can also offer stain resistance. This feature prevents permanent marks and stains from ruining the surface of the board. Whether it’s accidental ink smudges or coffee spills, a stain-resistant melamine whiteboard sheet can be easily cleaned and maintained, maintaining a professional appearance and extending the lifespan of the board.
Impact-resistant
Another aspect of durability to consider is the board’s ability to withstand impacts. Melamine whiteboard sheets with enhanced impact resistance are designed to endure accidental bumps or knocks without denting or chipping. This feature is particularly important in high-traffic areas or environments where the whiteboard may be exposed to frequent handling or potential accidents.
Installation
Wall-mounted
Installing a melamine whiteboard sheet on the wall is a popular choice for many workspaces. It provides a permanent and sturdy solution for displaying information and enhancing collaboration. Wall-mounted melamine sheets often come with mounting hardware, such as screws or brackets, to secure the board firmly in place. This installation method is ideal for offices, classrooms, and other spaces where the whiteboard needs to be easily accessible to multiple users.
Magnetic backing
Some melamine whiteboard sheets come with a magnetic backing, allowing them to be easily attached to magnetic surfaces. This feature is beneficial for spaces that lack wall space or have metal surfaces readily available, such as steel cabinets or magnetic boards. The magnetic backing provides a convenient and flexible option for displaying information and can be easily repositioned as needed.
Peel-and-stick adhesive
For those who prefer a non-permanent installation method, melamine whiteboard sheets with peel-and-stick adhesive backing are a popular choice. This option allows you to attach the board to various flat surfaces, such as walls, doors, or even desks, without the need for tools or additional hardware. Peel-and-stick adhesive installation offers the flexibility to move or reposition the whiteboard without damaging the surface it is applied to.
Ease of Cleaning
Dry erase marker erasability
One of the significant advantages of melamine whiteboard sheets is their excellent erasability. Dry erase markers can be easily wiped away with a dry cloth or eraser, leaving no residue or smudges behind. This feature makes it effortless to update information, make changes, or start with a clean slate. The smooth surface of melamine sheets ensures quick and efficient erasing, allowing for hassle-free use in any workspace.
Resistance to ghosting
Ghosting, the faint remnants of previous markings or erasures, can be a common issue with lower-quality whiteboards. However, high-quality melamine whiteboard sheets are designed to resist ghosting. This means that even after prolonged use or extensive erasing, the board will maintain a clean and clear surface without any visible ghosting. This feature ensures that your whiteboard always looks tidy and professional.
Cleaning solution compatibility
For stubborn stains or marks, melamine whiteboard sheets are generally compatible with cleaning solutions specifically designed for whiteboards. These solutions can effectively remove tougher stains or ink residue, restoring the board to its original condition. However, it is essential to follow the manufacturer’s instructions and recommendations for cleaning solutions to ensure that the melamine surface remains undamaged and retains its longevity.
Compatibility with Accessories
Magnetic attachments
Many melamine whiteboard sheets are compatible with magnetic attachments, allowing you to enhance the functionality of the board. Magnetic attachments, such as document holders, clipboards, or hooks, can be easily attached to the surface of the whiteboard, providing convenient storage and display options. This compatibility makes it easier to keep important documents or accessories within reach while utilizing the writing space effectively.
Accessory trays
To keep markers, erasers, and other writing tools organized and easily accessible, some melamine whiteboard sheets are equipped with built-in accessory trays. These trays are typically attached to the bottom or sides of the board, providing a dedicated storage space for writing utensils. This feature ensures that essential accessories are readily available whenever you need them and helps to maintain a clutter-free workspace.
Markers and erasers
Melamine whiteboard sheets are compatible with most dry erase markers and erasers available on the market. When purchasing markers and erasers for your whiteboard, it is essential to choose high-quality, low-odor options that are specifically designed for use on melamine surfaces. This ensures optimal performance, easy erasability, and a long lifespan for both the markers and the whiteboard surface.
Price Range
Budget-friendly options
For those with a limited budget, there are budget-friendly melamine whiteboard sheet options available. These sheets provide a cost-effective solution for basic writing and display needs. While they may not offer the same level of durability or advanced features as higher-priced options, they still provide a functional and reliable surface for everyday use. Budget-friendly melamine sheets are ideal for small offices, classrooms, or individuals looking for an affordable whiteboard option.
Mid-range options
Mid-range melamine whiteboard sheets offer a balance between affordability and quality. Priced slightly higher than budget-friendly options, these sheets often have enhanced features such as scratch resistance, stain resistance, and improved endurance. They are suitable for various work environments, including classrooms, conference rooms, and professional offices, where durability and functionality are important considerations.
High-end options
High-end or premium melamine whiteboard sheets are designed to meet the demands of professional settings or those seeking top-of-the-line features and durability. These sheets are often constructed with superior materials, providing exceptional scratch resistance, stain resistance, and impact resistance. While high-end options may come with a higher price tag, they offer the best quality and performance, making them ideal for frequent use or heavy-duty applications.
Brands
Leading brands
Several leading brands in the industry offer reliable and trusted melamine whiteboard sheets. These brands have built a reputation for producing high-quality products that meet the needs of various workspaces. Some of the leading brands include Quartet, Expo, U Brands, and MasterVision. These brands offer a wide range of sizes, finishes, and features, ensuring that there is a suitable option for every workspace requirement.
Specialty brands
In addition to the leading brands, there are also specialty brands that focus specifically on melamine whiteboard sheets. These brands may offer unique features or tailored solutions to meet specific workspace demands. For example, there are specialty brands that specialize in custom-sized melamine sheets or those that focus on environmentally friendly materials. Exploring specialty brands allows you to find a whiteboard that caters specifically to your unique needs or preferences.
Customer Reviews
Customer satisfaction
Customer reviews play a vital role in gauging the satisfaction of individuals who have already purchased and used melamine whiteboard sheets. Positive customer reviews indicate a high level of satisfaction with the product, its durability, erasability, and overall performance. Paying attention to customer satisfaction is crucial when selecting a melamine whiteboard sheet, as it provides insight into the real-world experiences and opinions of others.
Common complaints
Understanding common complaints can help identify potential drawbacks or concerns with melamine whiteboard sheets. Some common complaints among customers may include issues with erasability, durability, or the quality of the writing surface. By evaluating these complaints, you can make an informed decision and choose a melamine whiteboard sheet that addresses any potential concerns or meets your specific needs.
Expert opinions
Expert opinions and reviews can offer valuable insights into the quality, performance, and features of different melamine whiteboard sheets. Experts often conduct thorough evaluations and comparisons of various brands and models, taking into account factors such as erasability, durability, and overall value for money. Considering expert opinions alongside customer reviews can provide a well-rounded understanding of the strengths and weaknesses of different melamine whiteboard sheets.
Melamine, the versatile material known for its durability and affordability, has been a staple in the furniture industry for years. However, there remains a lingering question: can melamine be used as a dry erase board? Many have wondered if this accessible material can serve as an alternative to traditional dry erase boards, providing a cost-effective solution for schools, offices, and homes alike. In this article, we will address this very query and explore the potential of melamine as a whiteboard substitute. Whether you’re an educator searching for budget-friendly options or simply curious about melamine’s capabilities, join us as we delve into the possibilities of this fascinating material.
What is Melamine?
Melamine is a durable and versatile material that is commonly used in the production of various household and industrial products. It is a type of laminate that is made by combining melamine resin with paper, textile, or wood fibers. The resulting material is then thermally fused under high pressure to create a hard and smooth surface.
Properties of Melamine
Composition and Structure
Melamine is composed of melamine resin, which is a hard and heat-resistant plastic material. The resin is made by condensing melamine with formaldehyde, resulting in a strong and stable compound. When combined with other materials like paper or wood fibers, melamine resin forms a rigid structure that is resistant to cracking, warping, or peeling.
Durability
One of the key properties of melamine is its exceptional durability. Its hard surface can withstand heavy use, making it resistant to scratches, impacts, and general wear and tear. This makes melamine a great choice for products that require a high level of durability, such as countertops, cabinets, and furniture.
Resistance to Stains
Melamine is also known for its excellent resistance to stains. Its smooth and non-porous surface prevents liquids and stains from penetrating the material, making it easy to clean and maintain. This property makes melamine a popular choice for kitchen and bathroom surfaces, where spills and stains are common.
Thermal Stability
Melamine exhibits impressive thermal stability, meaning it can withstand high temperatures without melting or deforming. This makes it suitable for applications that involve heat, such as kitchen countertops or hot beverage coasters. However, it is important to note that excessive heat can still cause discoloration or damage to the material.
Chemical Resistance
Another notable property of melamine is its resistance to many chemicals. It is unaffected by most household cleaning agents and common solvents, making it highly resistant to chemical damage. This property makes melamine an ideal choice for surfaces that may come into contact with cleaning products or chemicals on a regular basis.
Can Melamine Be Used as a Dry Erase Board?
Yes, melamine can be used as a dry erase board. In fact, melamine is a popular material for dry erase boards due to its affordability and ease of installation. While it may not offer the same level of performance as higher-end options like porcelain or glass boards, melamine dry erase boards can still provide a reliable and functional writing surface.
Advantages of Using Melamine as a Dry Erase Board
Affordability
One of the major advantages of using melamine as a dry erase board is its affordability. Compared to other materials like porcelain or glass, melamine dry erase boards are significantly cheaper, making them a more budget-friendly option, especially for large-scale installations or educational settings.
Ease of Installation
Melamine dry erase boards are relatively easy to install. They often come with mounting hardware or adhesive backing, allowing for quick and hassle-free installation on various surfaces. This makes melamine dry erase boards a convenient choice for both professional and personal use.
Versatility
Melamine dry erase boards come in a wide range of sizes and designs, making them highly versatile. Whether you need a small board for your home office or a large one for a classroom or conference room, melamine dry erase boards can be easily customized to meet your specific needs. Additionally, they are available in various colors and finishes, allowing for aesthetic customization as well.
Using Proper Erasers
When using a melamine dry erase board, it is important to use the proper erasers to avoid damaging the surface. Regular dry erase board erasers or soft, lint-free cloths are recommended to remove dry erase marker ink. Avoid using abrasive materials or harsh chemicals, as they can scratch or degrade the melamine surface. By using the appropriate erasers and cleaning methods, you can ensure the longevity and performance of your melamine dry erase board.
In conclusion, melamine is a versatile and durable material that can be effectively used as a dry erase board. Its affordability, ease of installation, and versatility make it a popular choice for both personal and professional settings. However, it is important to follow proper care and maintenance practices, such as using suitable erasers and avoiding abrasive materials, to ensure the longevity and performance of the melamine dry erase board. So, if you’re looking for an affordable and functional dry erase board option, melamine could be the perfect choice for you.